
UNDERSTANDING THE LAYOUT – The Main Navigation Page
The Main Navigation Page is used to navigate to all the headings for your report.
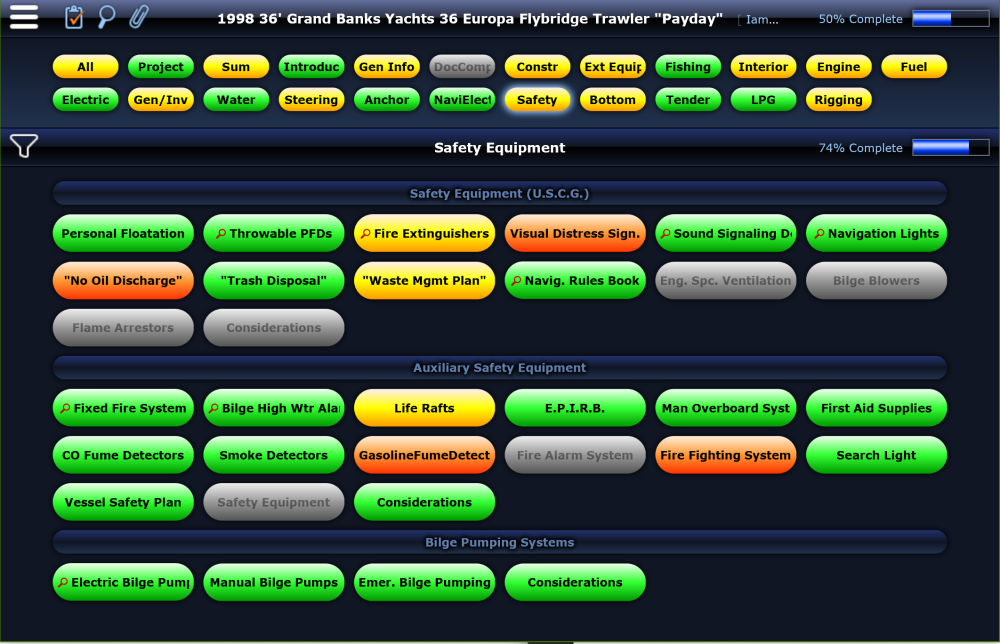
The rows of buttons at the top of the page are your primary Categories. Below and within each category are the sub-categories and individual headings. The Categories, Sub-Categories and Headings can be modified and re-ordered as you prefer.
You will notice the different colors marking the different levels of completion of each heading.
Gray buttons are not applicable.
Orange buttons have no information yet added.
Yellow buttons are in progress.
Green buttons are complete.
You can filter the level of completion in various ways using the filter icon to the left. 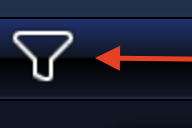 You will notice the filtered buttons disappear but the buttons retain their original position, this is to maintain consistency once you become familiar with each buttons location.
Once all the buttons within a category have been completed, you‘ll notice that category heading turns green accordingly. This color co-ordination helps to quickly distinguish which items have been completed, and which are still required to complete the Survey.
Before we click on a button and move into the entry page let‘s look over some of the other features on this page.
 At the top left of the page is the main menu icon. Each feature in this menu will be covered throughout this manual.
 The next icon over is the Checklist which is an extremely useful tool to store notes and reminders during the Survey day. Each line item functions as a check-box so that they can be marked checked once complete. Create a new checklist item by pressing the button and typing the entry, or selecting from one of the customizable Quick Insert Checklist Items below. You can always create new Checklist items as reminders for things you perform frequently. (check coolant levels etc.). Refer back to this list throughout your Survey to complete items and use the filters above for quick reference. Press the red
 X at the top right to leave the Checklist.
 The next icon in the top bar of the main navigation page is the Findings & Recommendations List. All of the Findings & Recommendations created throughout your report will appear here in one location for convenient reference. If you have not yet created any findings or recommendations your list will be empty. If you have items here, you can filter by Priority and click on any entry to edit.
 Next icon over we have the project attachments icon. Images placed here will be added to the back of the Report. In a later video we’ll cover attaching images at a specific heading. Use the
 + button to select the images you wish to add. Long press or right click on any image for its selection menu. To reorder images, turn on the re-order mode button in the upper right. De-select this mode once you have finished ordering your images. Use the red X to leave this section.
Lastly we have the the client‘s name and contact information which can be viewed with a right click or long press, as well as a more detailed breakdown of your progress through this report in the far upper upper right.