User Manual & Guide
1.6.0.0
  • 2.0
  • 1.6.0.0
Table of Contents
User Manual & Guide
  • 1.6.0.0
    • User Manual & Guide — 2.0
    • User Manual & Guide — 1.6.0.0
GrabGrab
GrabGrab
  • Welcome to the InspectX User Guide
    • System Requirements
    • InspectX on a Mac
  • Installation Instructions
    • Initial Configuration
    • Initial Settings
  • Getting Started
    • Desktop Icons
    • Resize InspectX
    • Before your first Survey
      • The Project Selection Page
      • The Main Navigation Page
      • The Button Entry Page
      • The Findings Page
        • Deleting a Finding
      • The Publish Preview Page
    • Table of Contents
    • Mark entire category as ‘Complete’ or ‘Not Applicable’
    • Images
      • Adding images
      • Rotating images
      • Re-order images
    • Adding a signature
    • Adding a company logo
  • Publishing the report
    • Formatting the Report
      • Creating new buttons
      • Changing the report title
    • Networking
      • Access from a local computer
    • Backups
      • Migrating the database
      • Importing a project or file
    • Common Questions
      • Server Application Error message
      • Publishing Error
      • Cover Page Glyphs
      • Unable to click any headings?
    • Change Credit Card

    Adding a company logo

    Adding a signature
    Publishing the report

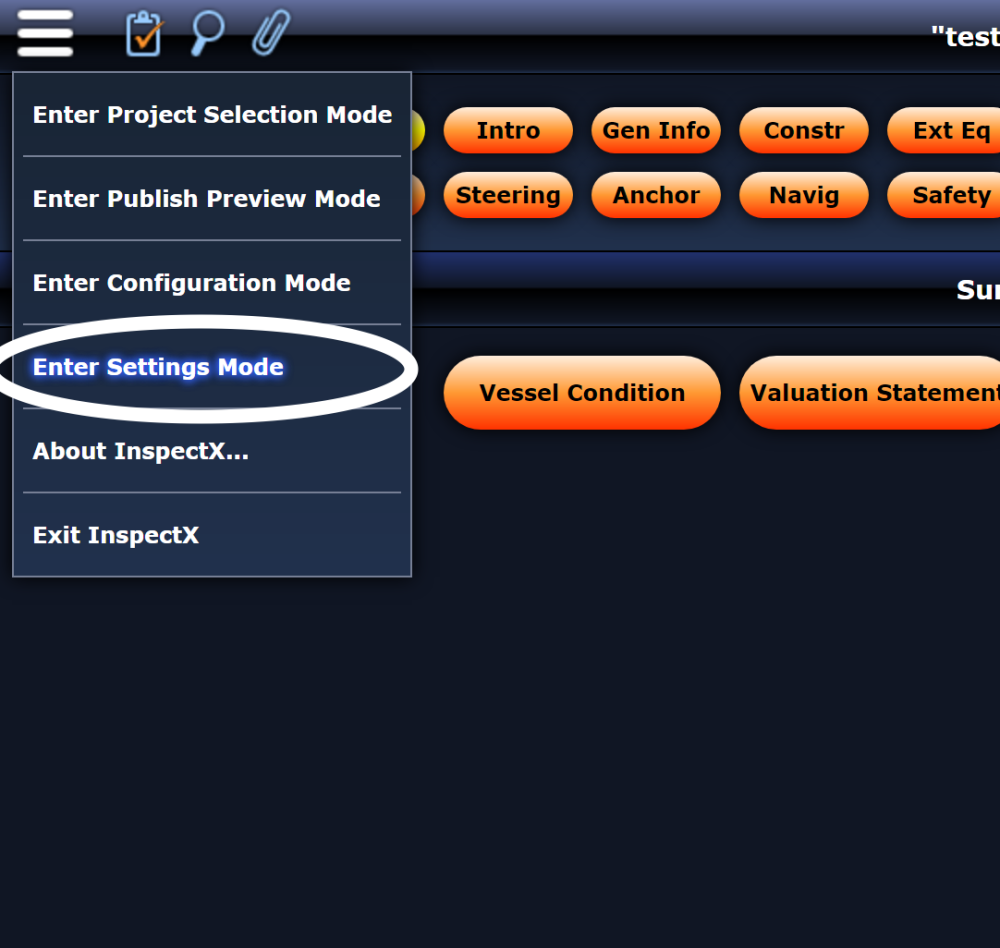
    Adding your company logo and details are done in the Settings Mode.

    1. Enter Settings Mode

    2. Navigate to the Organization tab.

    3. Add or replace the logo with your own by clicking on the image.

    Final formatting

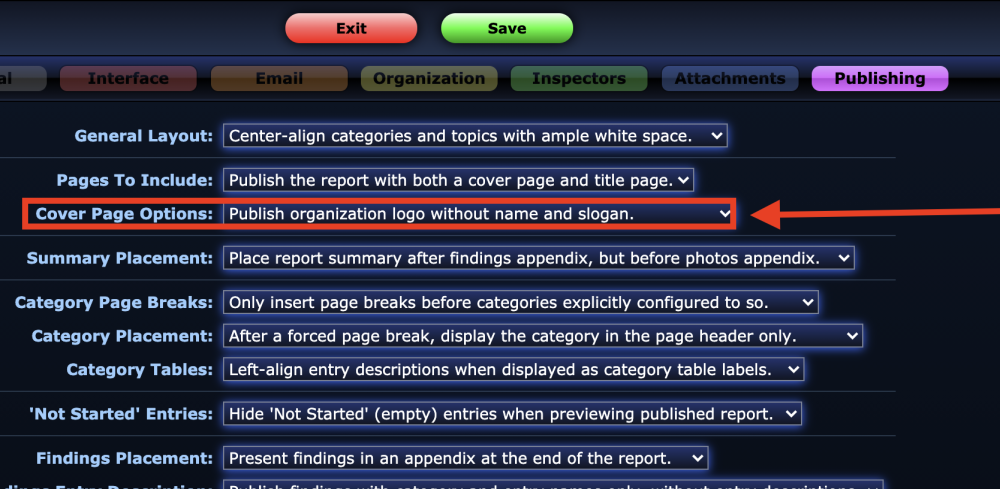
    Depending on your settings you may need to adjust the position or layout of the logo and your organization name/slogan.
    This is also adjusted in the Settings Mode under the Publishing tab Cover Page Options.

    Adding a signature
    Publishing the report
    Copyright © 2025 InspectX — Powered by Manula.com