To edit the GPS coordinates, the first step is to navigate to the appropriate measurement(s). This can be done in two ways:
- Manually Select: If the measurements were recently uploaded, selecting the device, and manually selecting the measurements can be a good option (as described in steps below).
- Conduct Measurement Search: To edit GPS coordinates for measurements that are not easy to navigate to manually, replace steps 1 and 2 with conducting a measurement search to find the correct measurements. See instructions on How to Conduct Measurement Search.
To bulk import GPS coordinates, see instructions on How to Import Measurements.
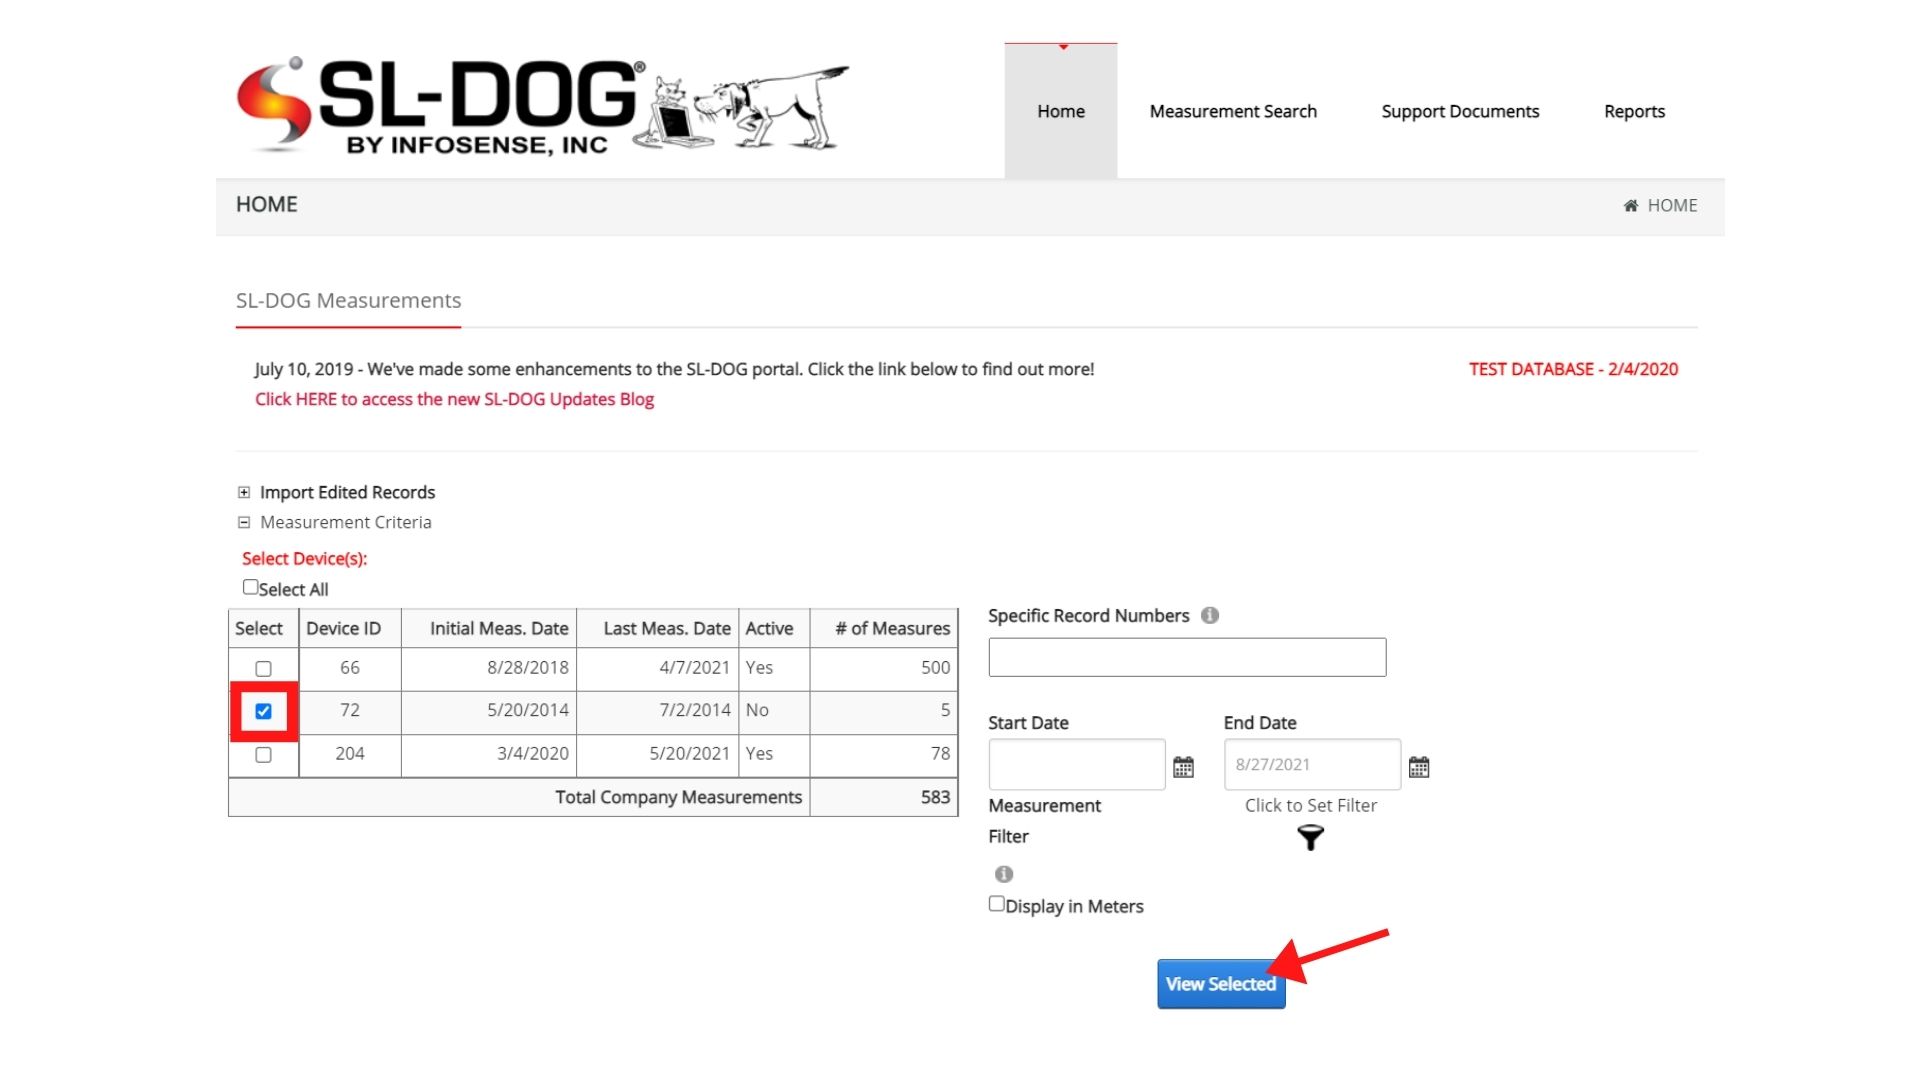
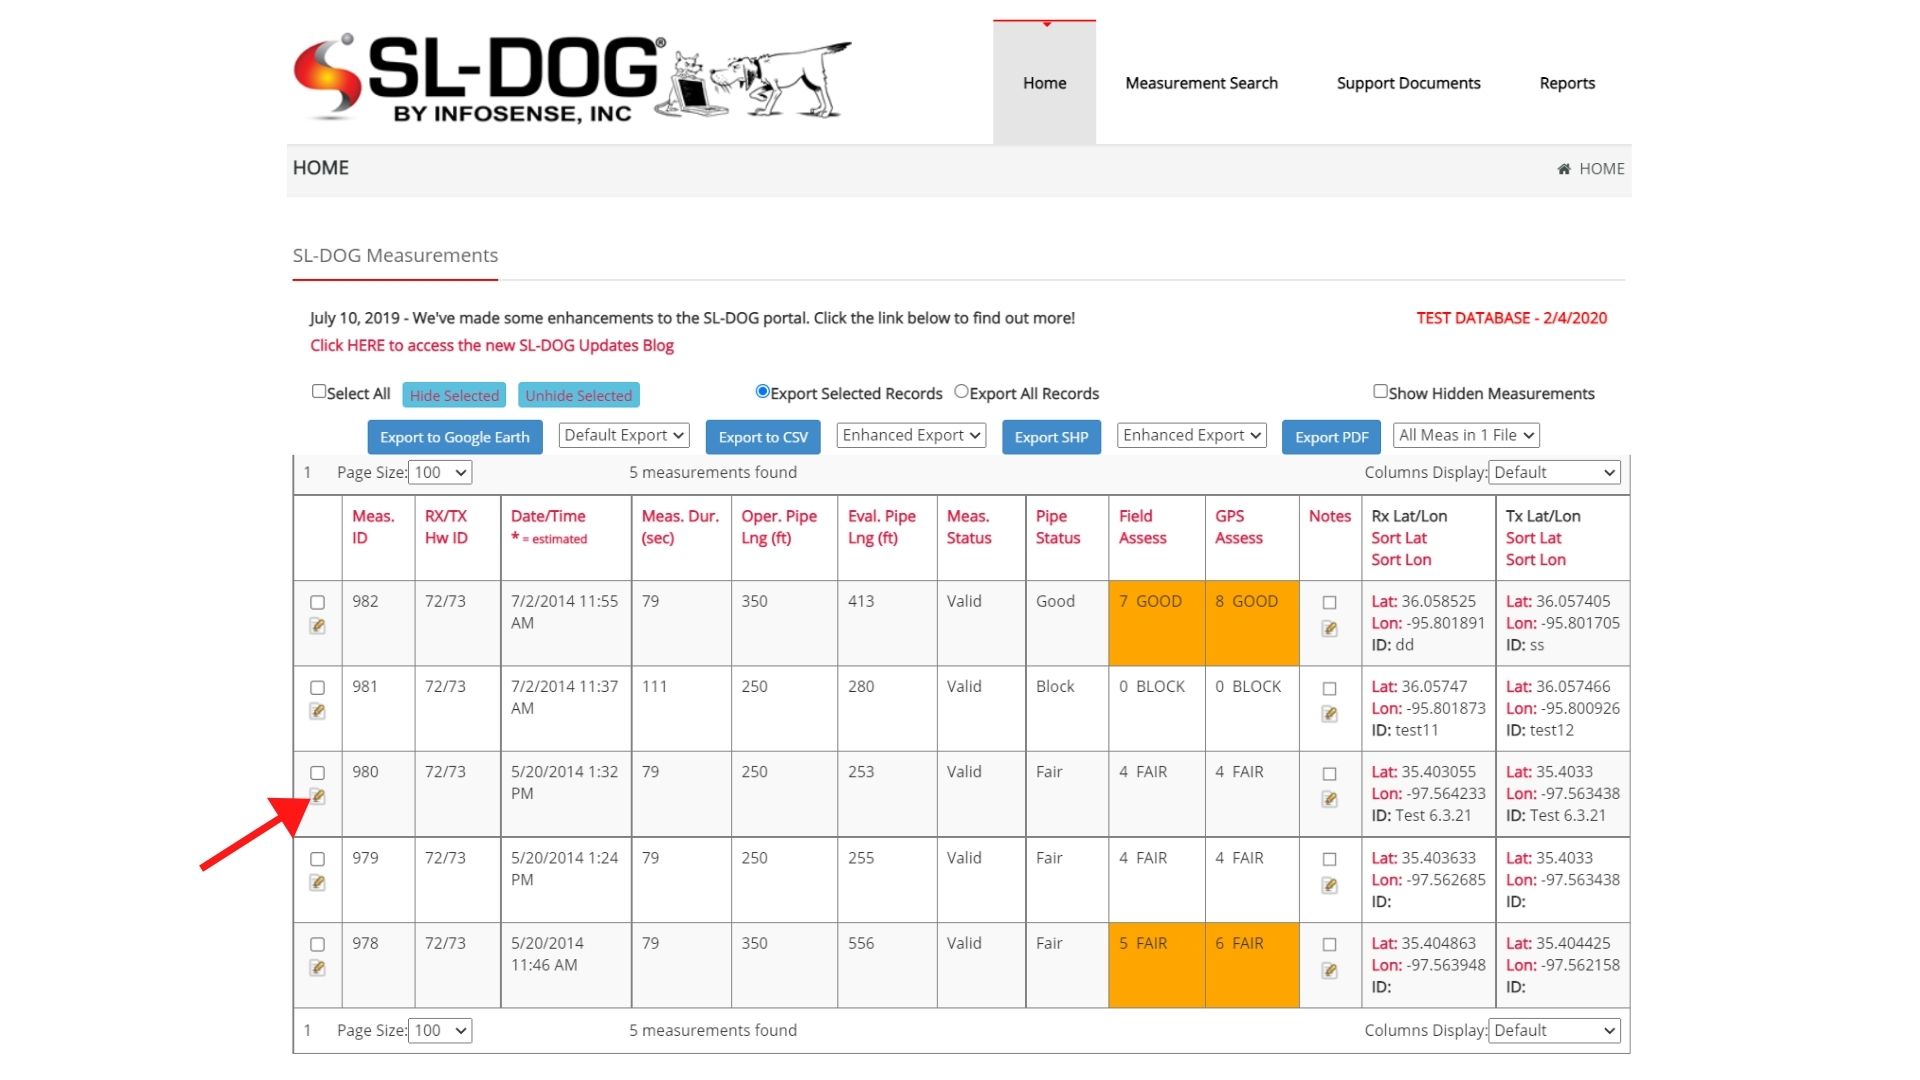
STEP 1. Select Device
Select the box beside the Device ID for the device that took the measurement you wish to edit. If you are unsure of how to find the device ID, see View Devices & Measurements page.
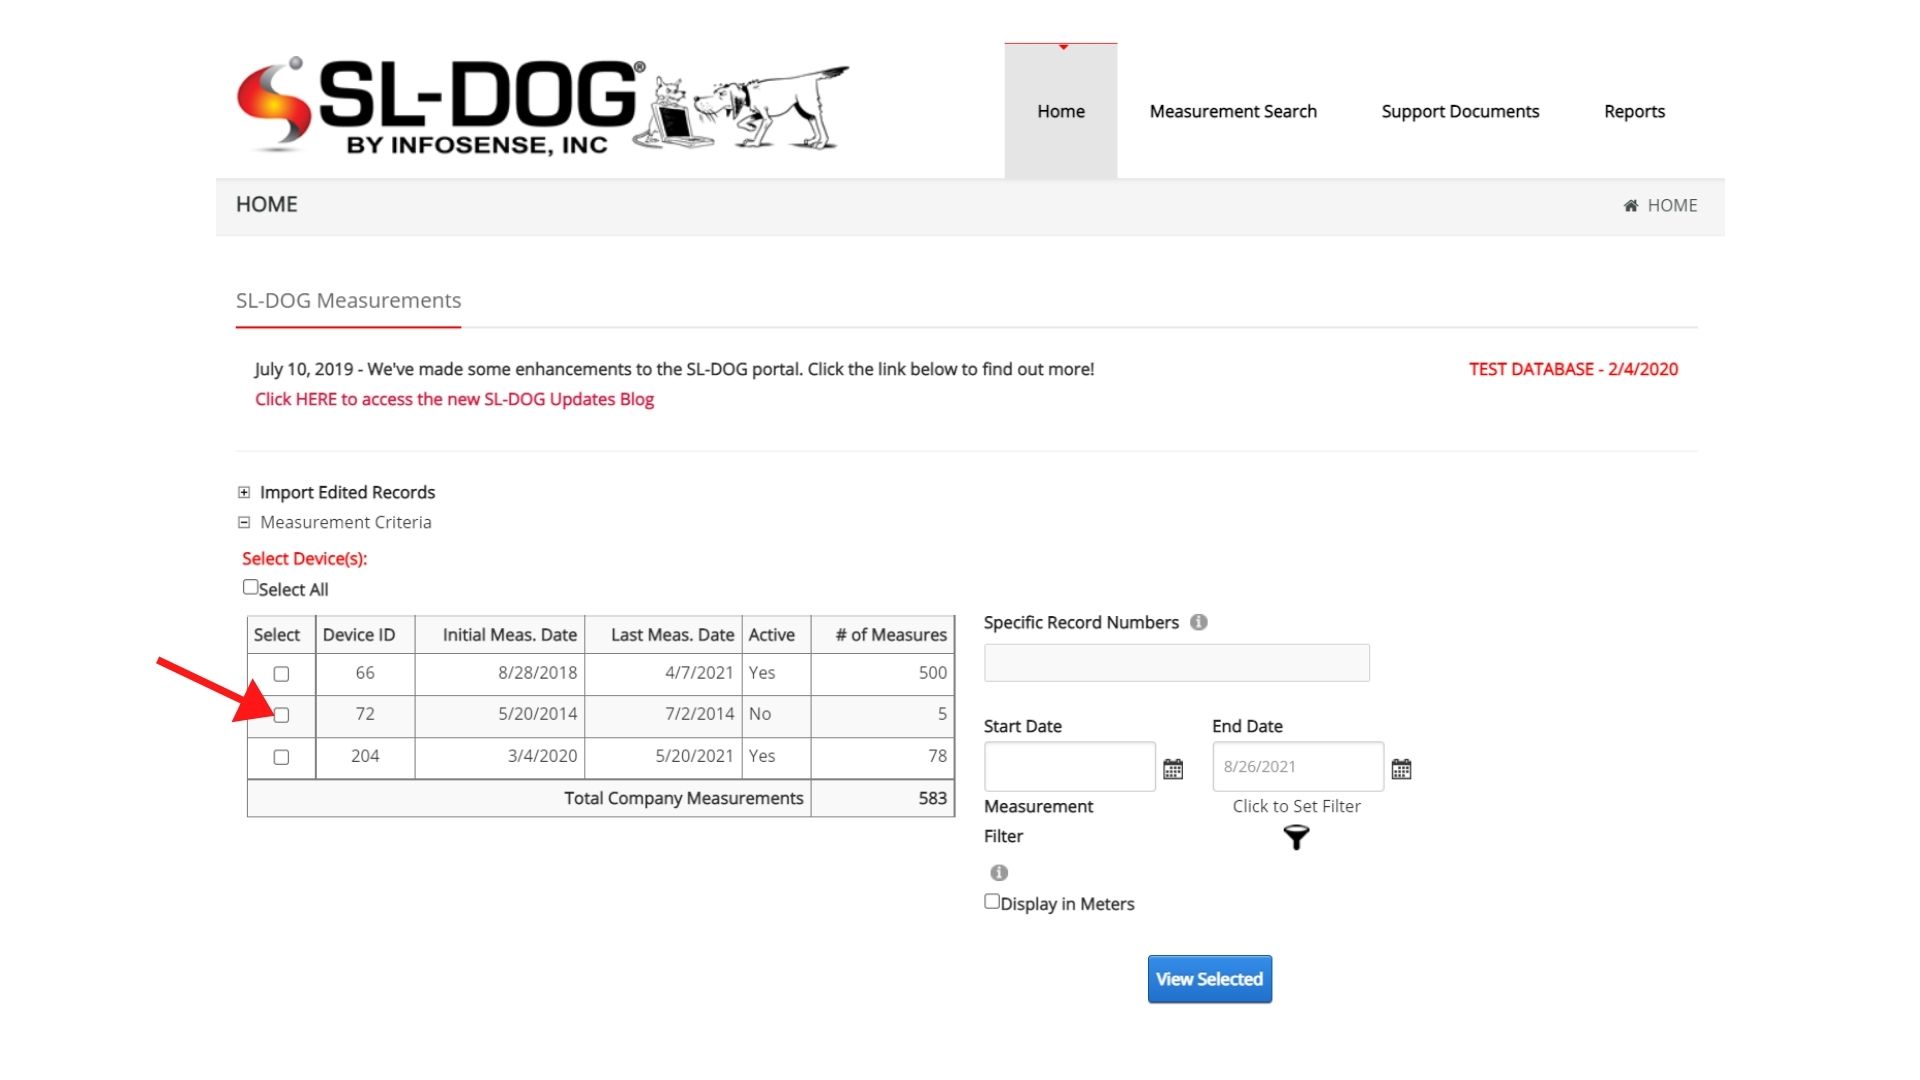
STEP 2. Click “View Selected” button.
![]()
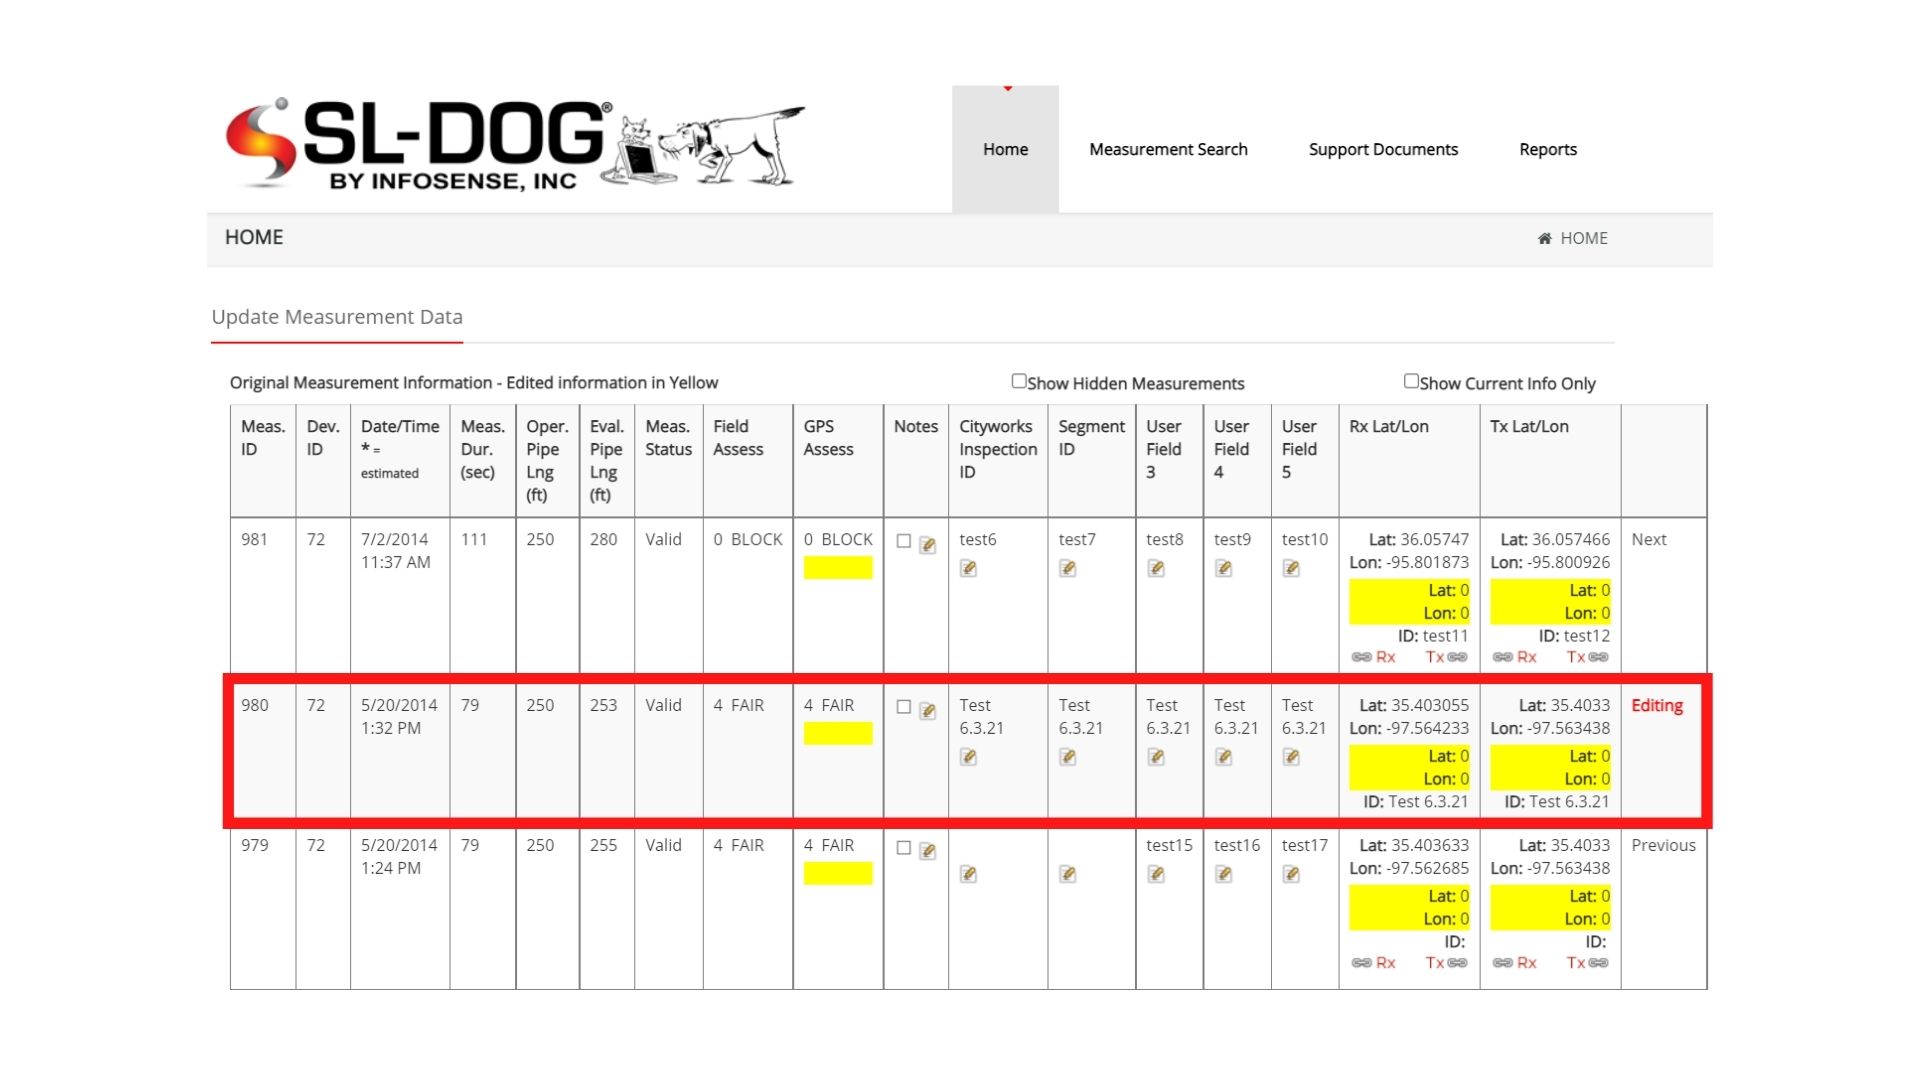
STEP 3. Select measurement
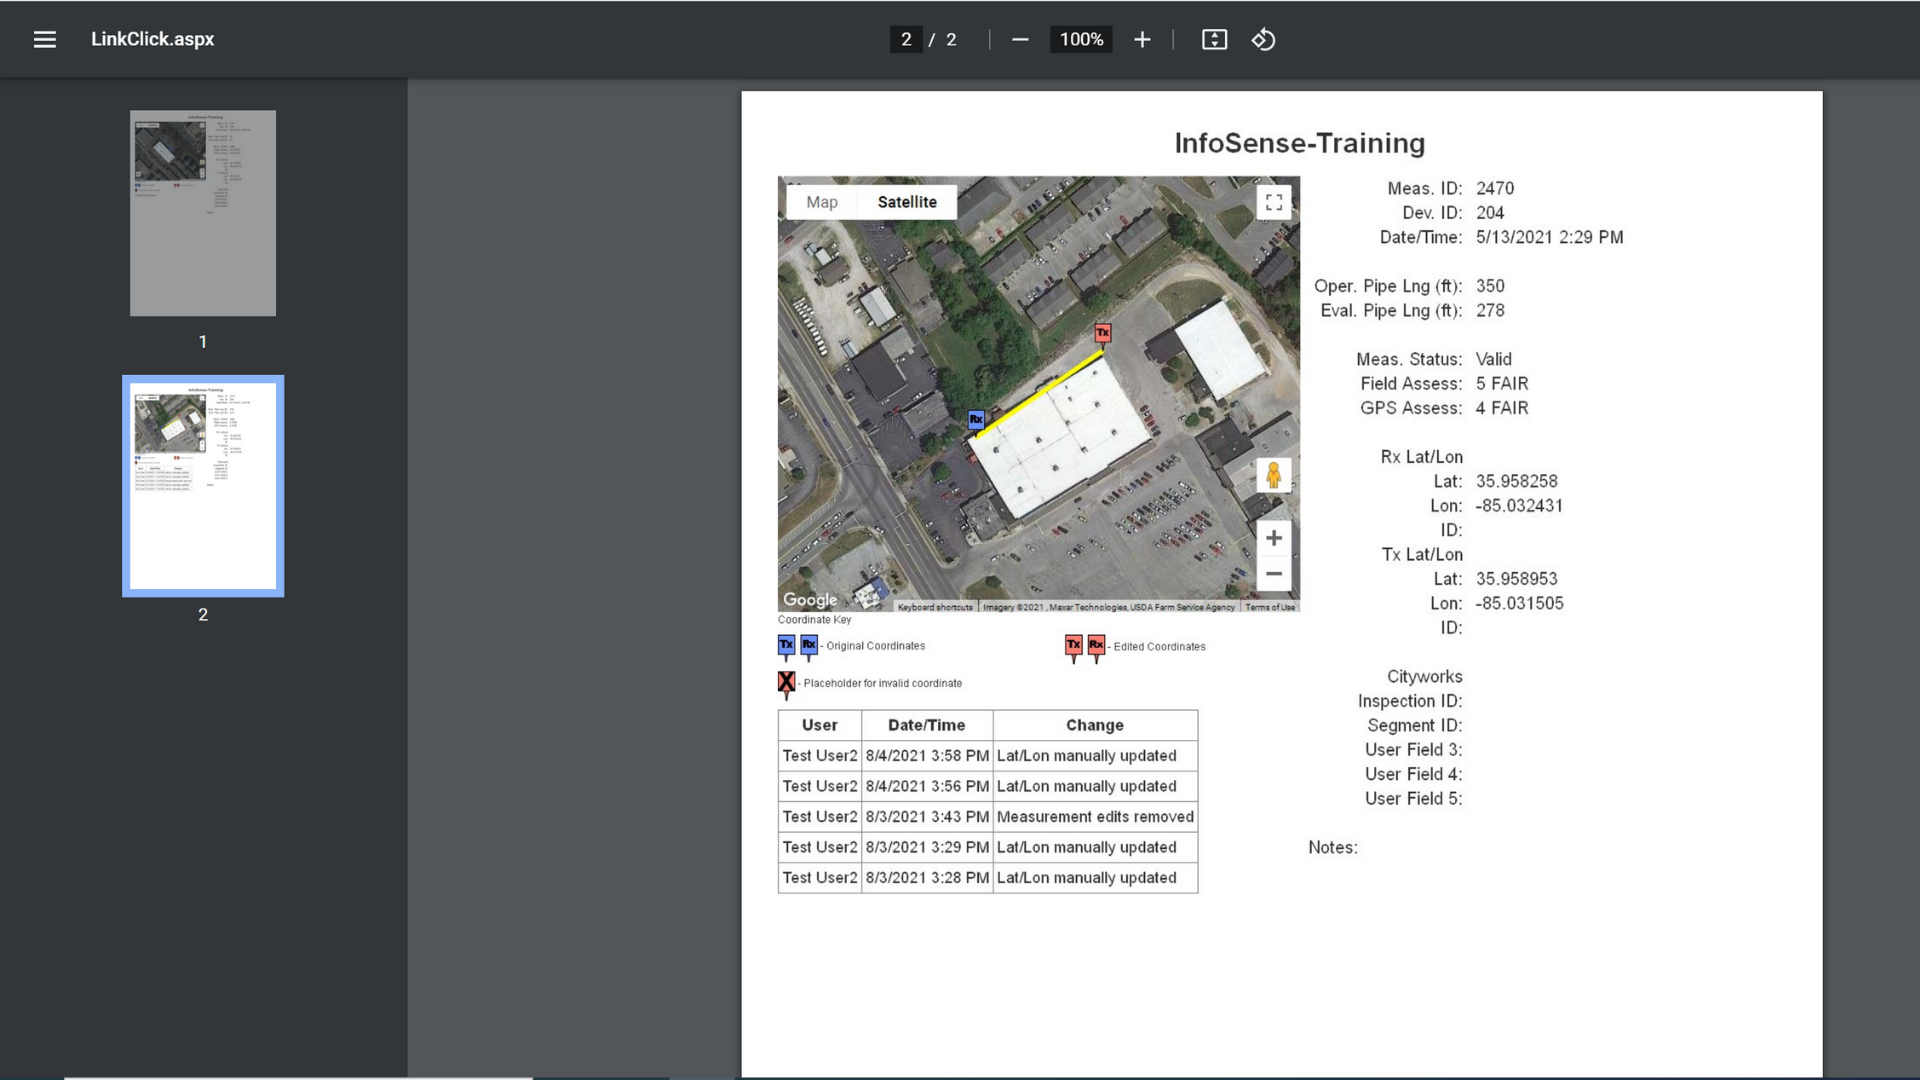
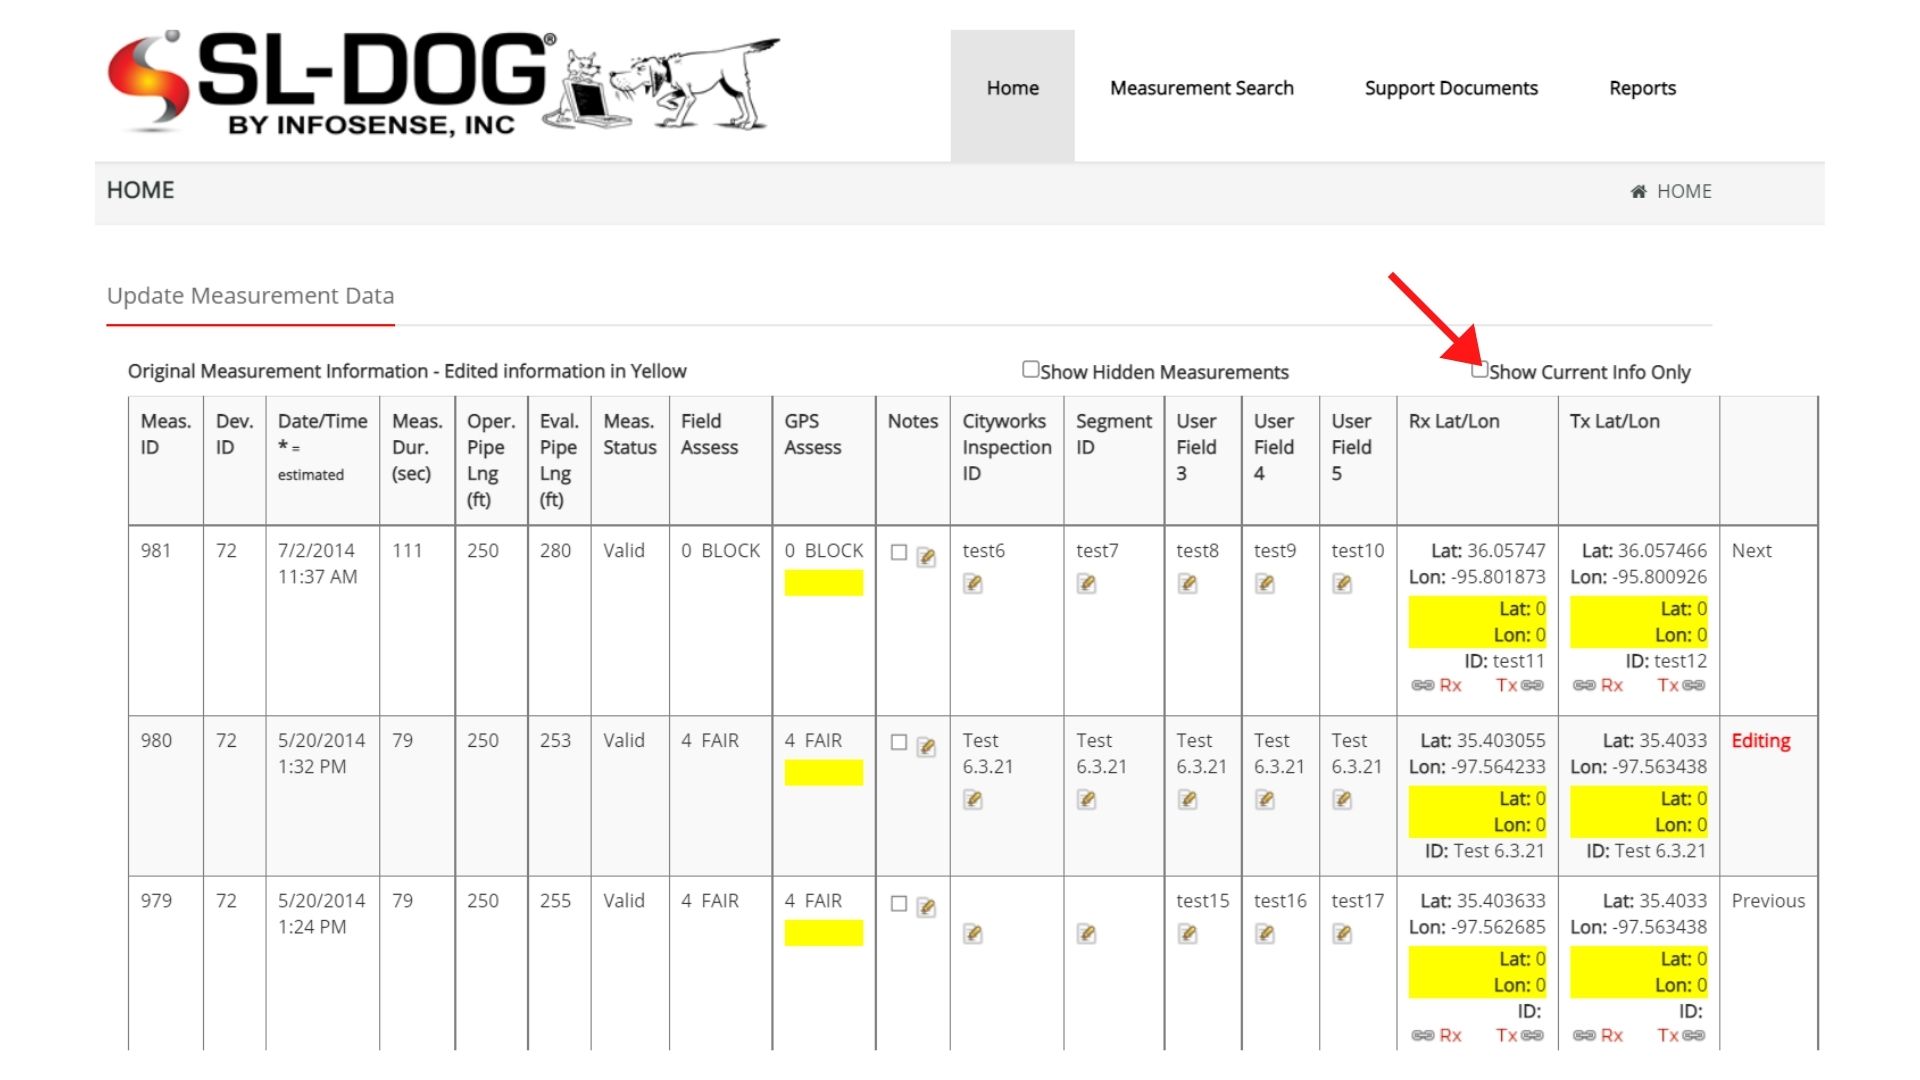
Click on the notepad icon next to the measurements to open the editing view.
Your screen will show 3 measurements, and the one you will edit is in the middle. Meanwhile, the other 2 measurements indicate the measurements taken before and after.
Scroll down to view the map to where your measurements can be found. Additionally, the icons on the map are described as well.
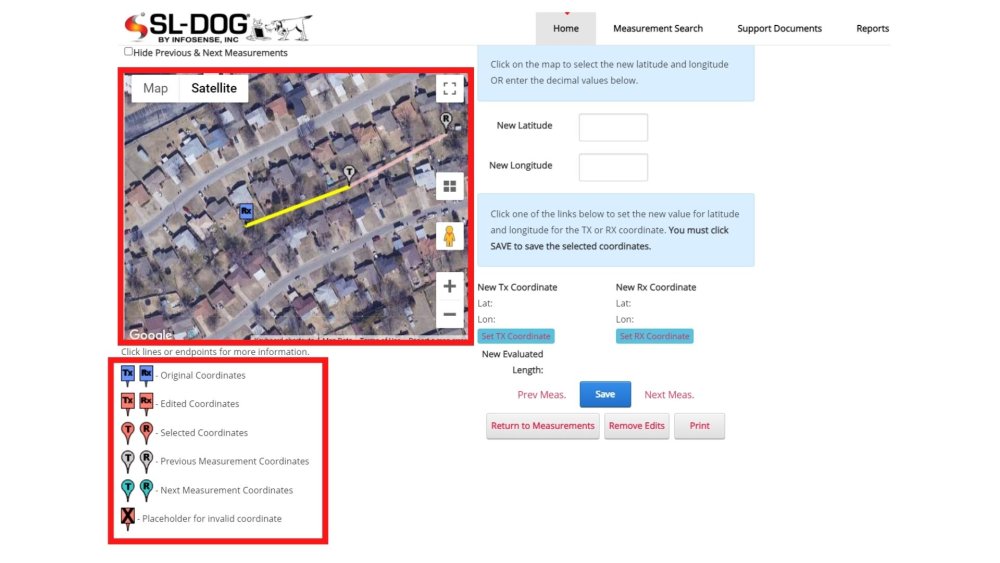
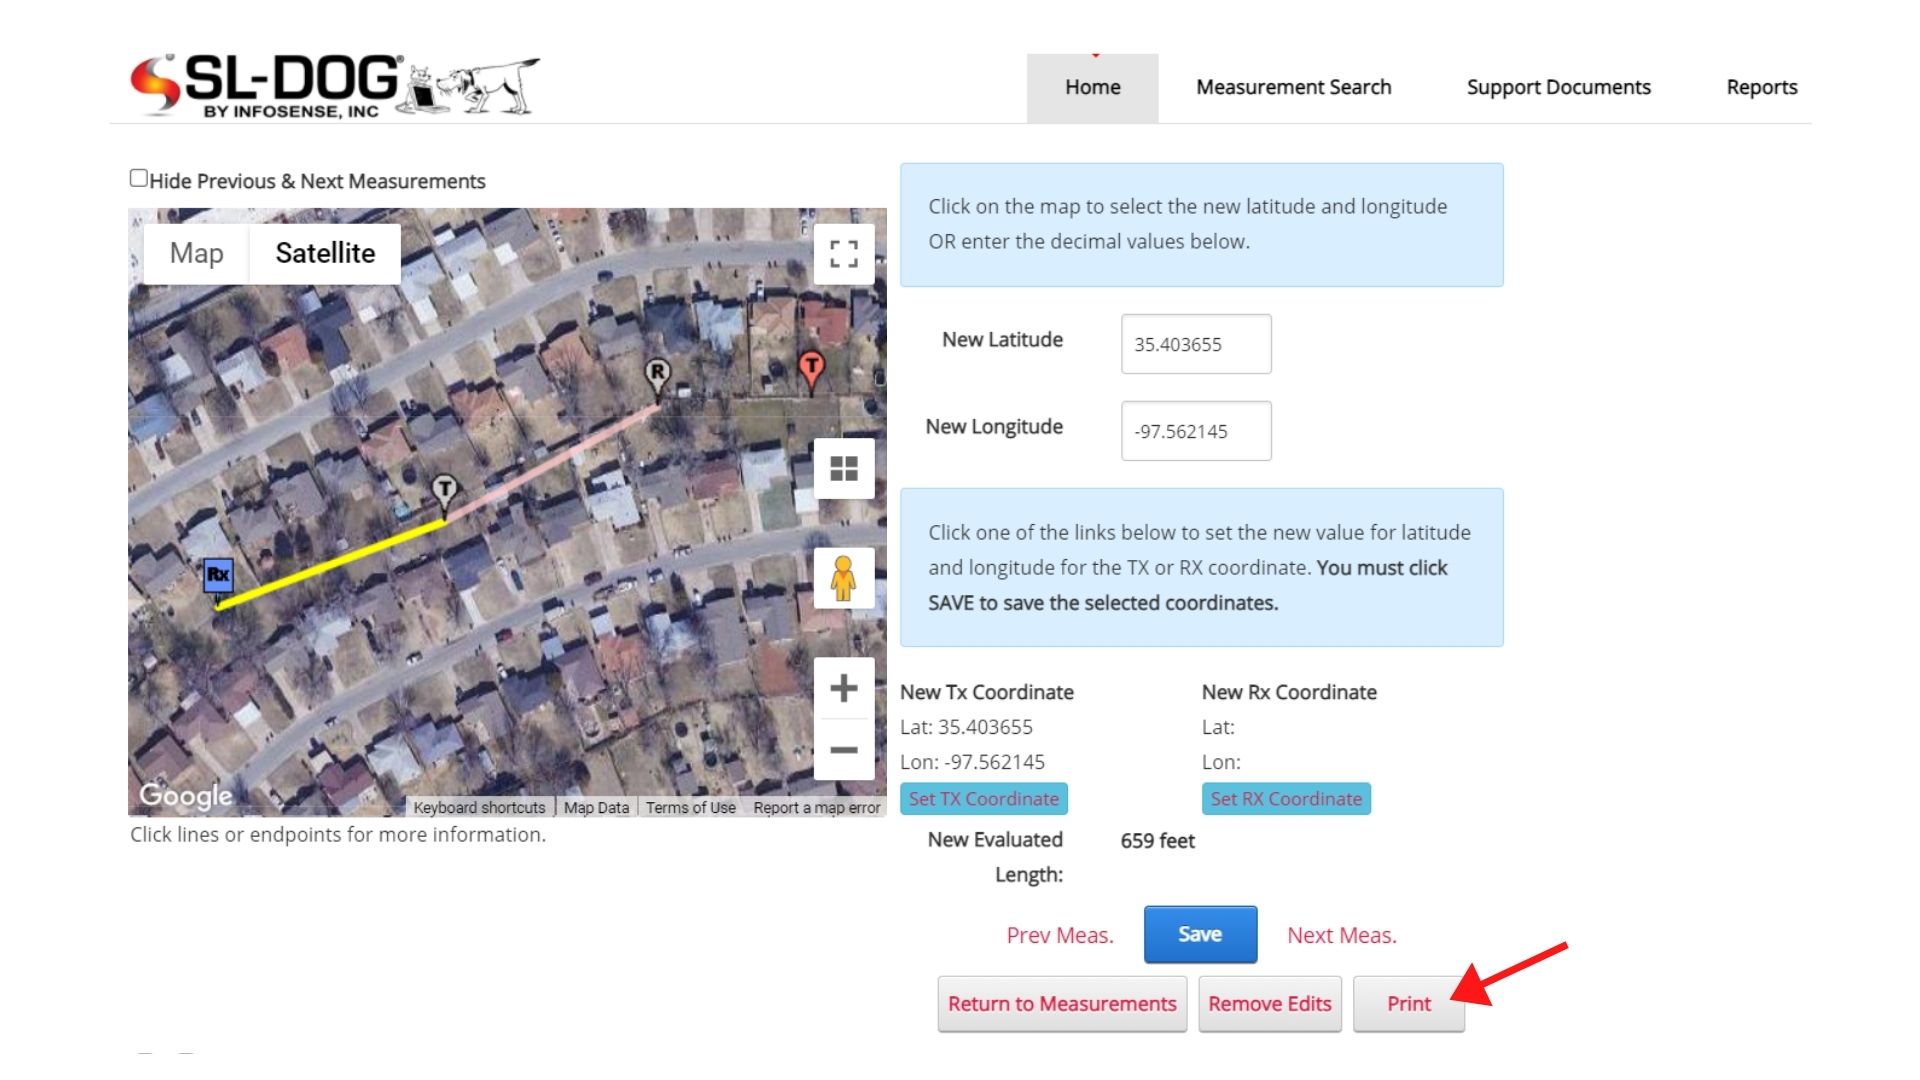
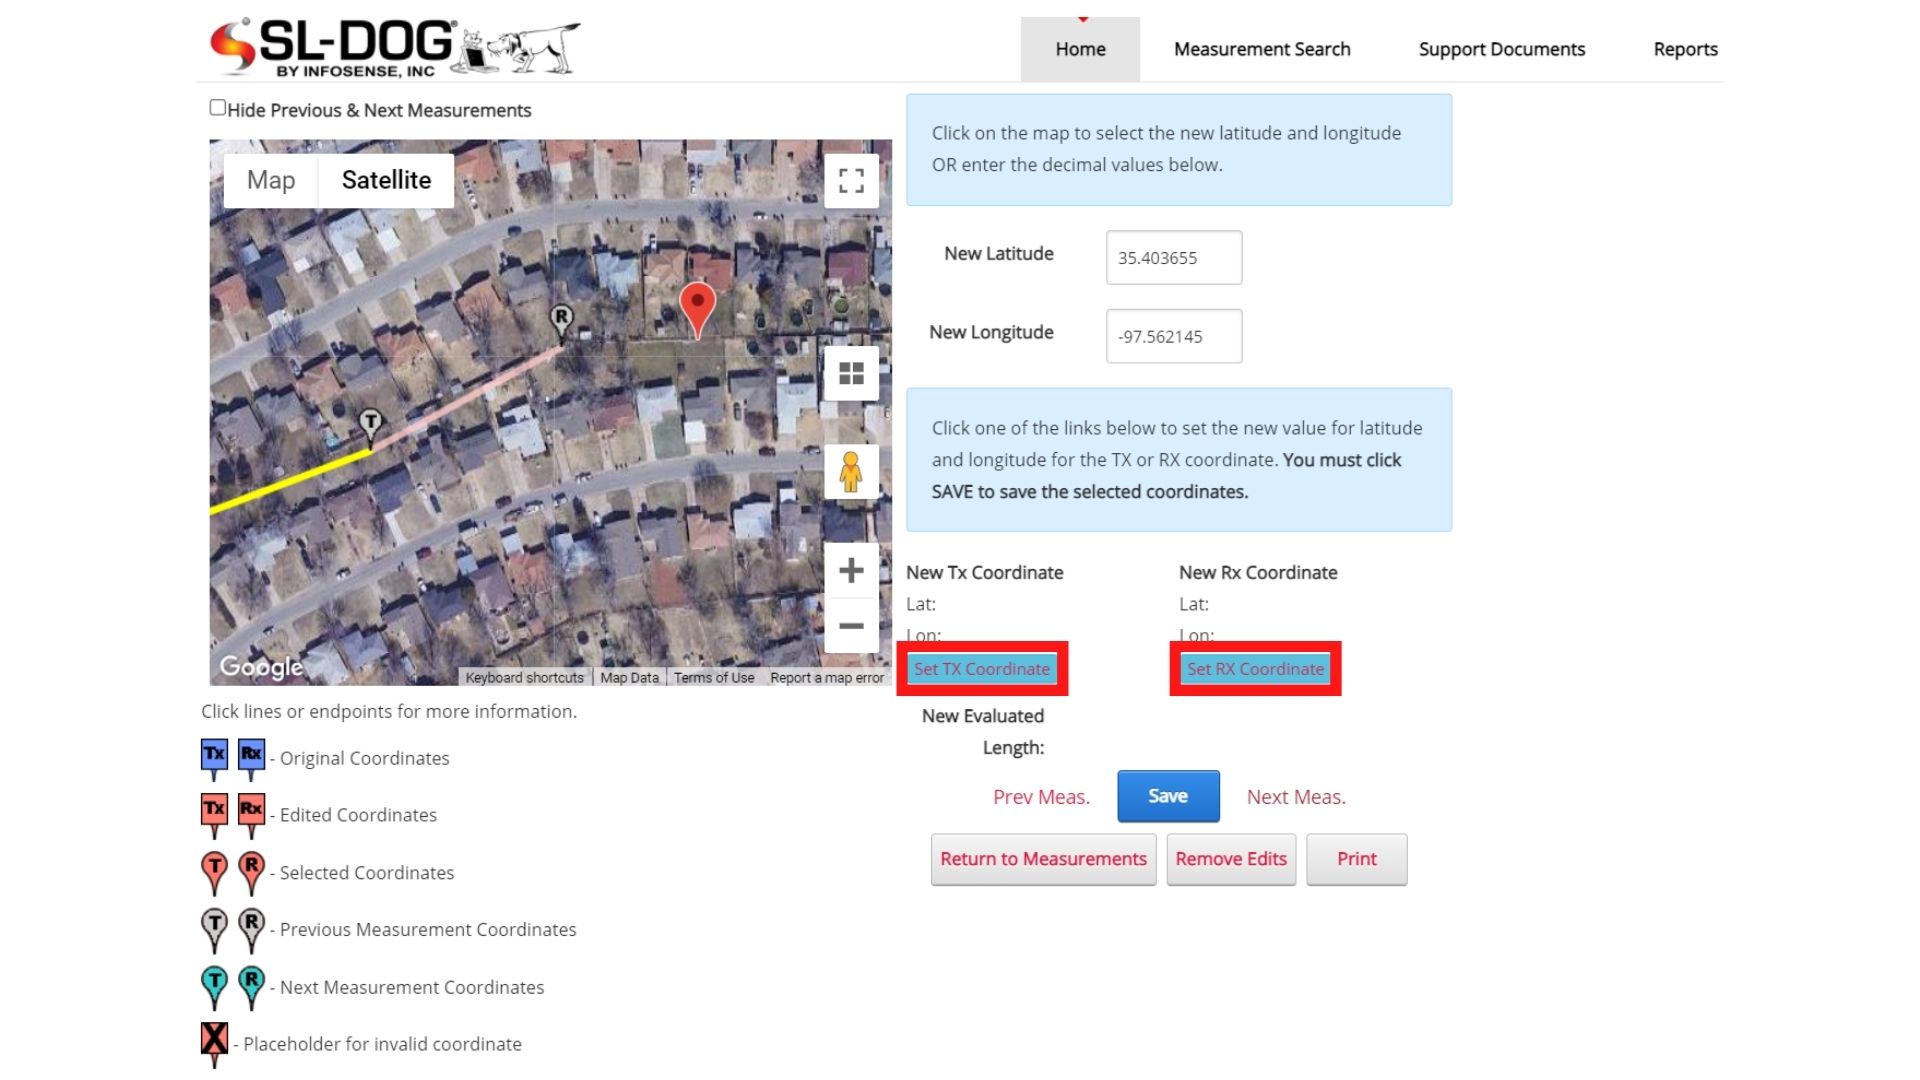
STEP 4. Identify correct GPS coordinates
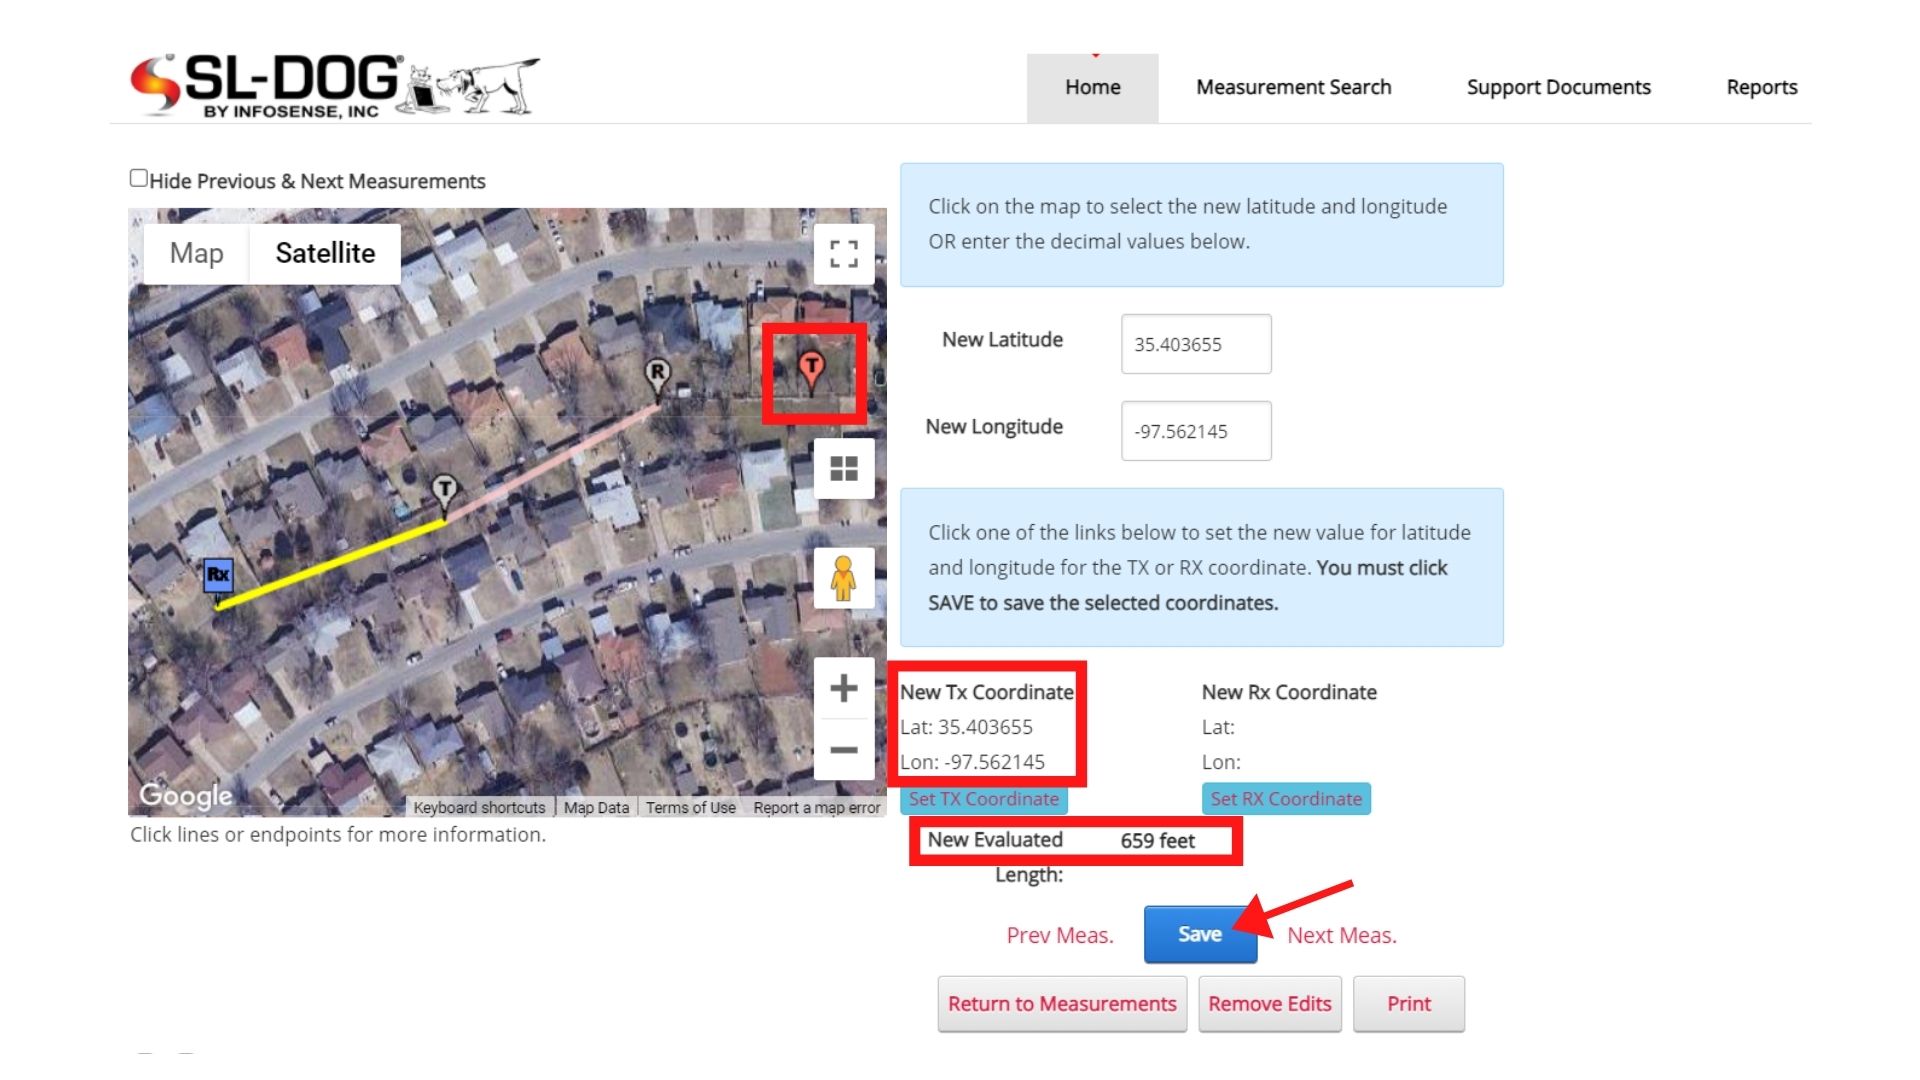
Click on the map where the corrected GPS coordinate should be.
A red location icon will pop up to show exactly where the new latitude and longitude represents. The new latitude and longitude section immediately auto-populates based on where your selected coordinate is.
Enter the corrected GPS latitude and longitude in their respective boxes. The red location icon for edited coordinates will only pop up in the next step.
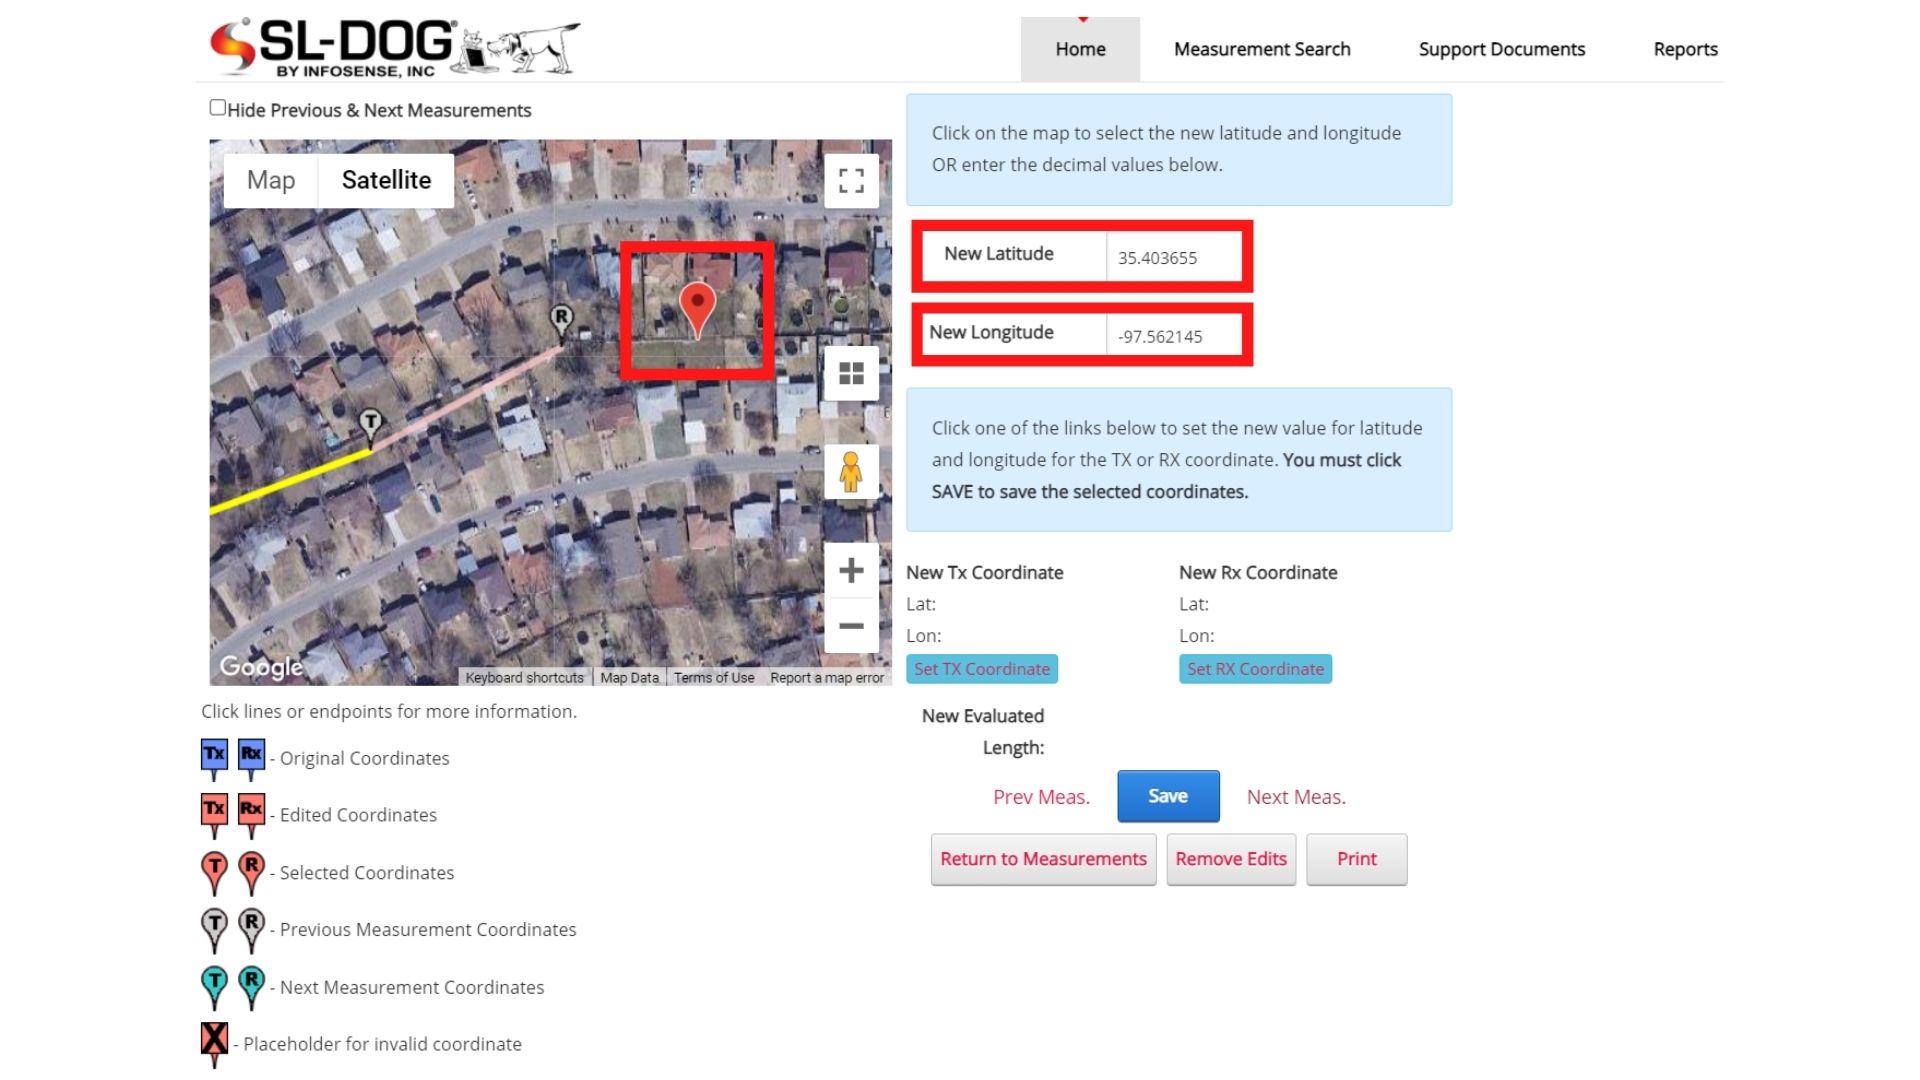
STEP 5. Identify TX or RX
Click “Set TX Coordinate” or “Set RX Coordinate” to indicate which coordinate you want to change.
STEP 6. Click “Save”
Make sure that edits are as intended and click “Save” to save changes.
Other Tips:
To view only the corrected coordinates, you can select “Show Current Info Only” box located above the editing table.
You can revert to original coordinates by selecting “Remove Edits” or cancel changes.

You can create a PDF file of the measurement by selecting “Print”.