
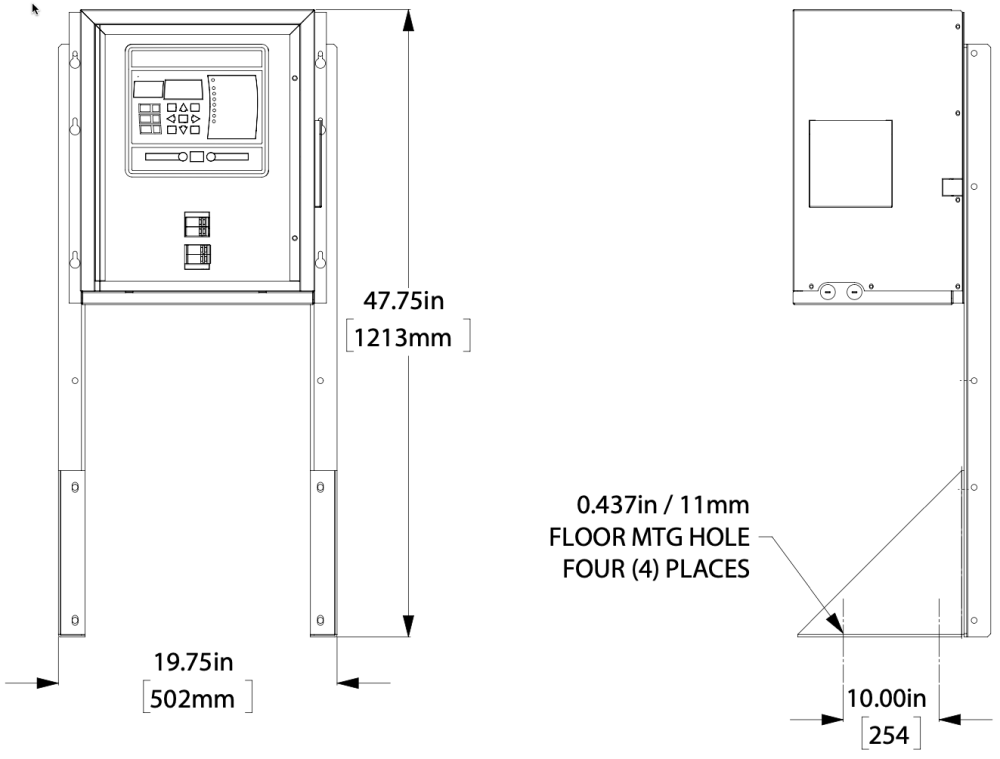
To install ATevo onto a horizontal surface, the standard enclosure does not need to be modified, but a special floor mounting accessory is required. The kit includes a set of mounting brackets that elevate the top of ATevo approximately 47in /1194mm above floor level, with provisions for floor anchoring. The kit also includes appropriate hardware and installation instructions (JA0083-50) for the floor-mounting procedure.
When floor-mounting ATevo, consider the following:
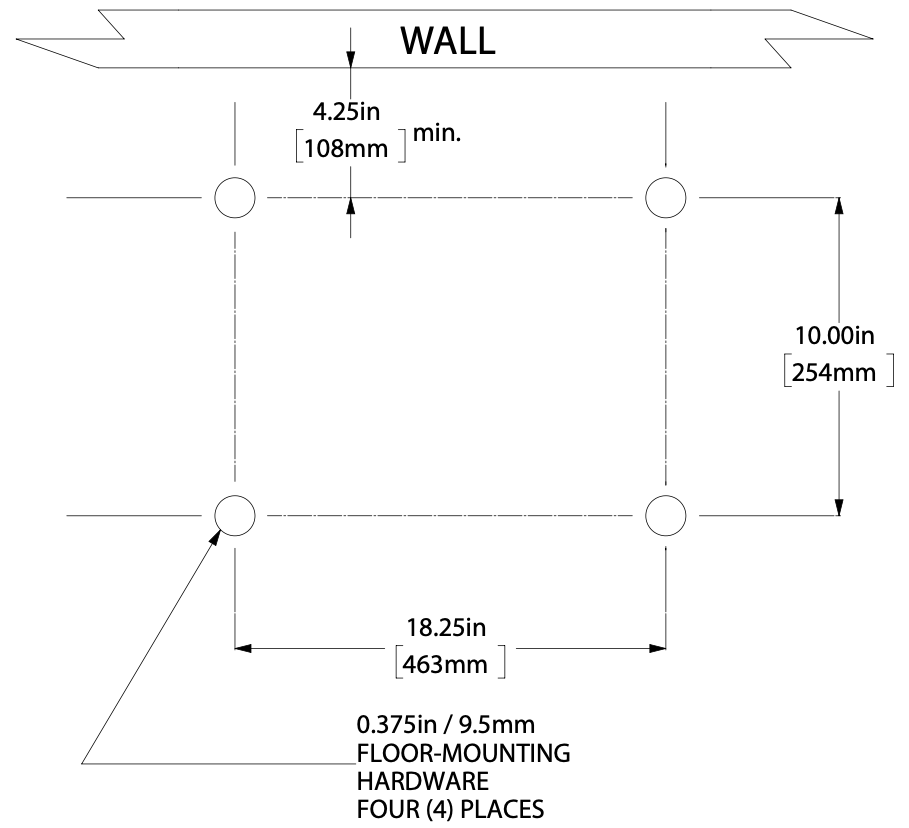
- Locate anchor bolt holes at least 4.25in /108mm from any wall, to allow clearance behind the mounting brackets.
- Select conduit entrances with planned ac input and dc output wiring in mind. By using pre-fab knockouts on enclosure sides or bottom, the enclosure shroud can be removed for internal servicing without removing ATevo from the floor stand.
- Location requirements:
- Free of drips and splatter. If falling particles and liquids are a problem, install a NEMA Type-2 drip shield accessory.
- Between 0 and 122 °F / -18 and 50 °C, with relative humidity between 0% and 95% non-condensing.
- Must be free of flammable or explosive materials.
- Maintain at least 6in /152mm of free air on all vented surfaces for cooling.
- Allow 36in /914mm front clearance for operation and maintenance.
PROCEDURE
Install four (4) 0.25in / 6.4mm anchor bolts (not supplied) rated to support the unit weight plus a minimum safety factor of two (2) times, into floor.
Assemble the floor-mounting accessory on to the anchor bolts as shown. Place ATevo onto vertical posts, add appropriate mounting hardware, and tighten.
Refer to the following graphics for floor mounting patterns and enclosure footprints.
Floor-Mounting: Style-5054 Enclosure
Need more help with this?
Don’t hesitate to contact us here.