
When using the [Existing Projects into Workspace] function
- When you create a RTV project, a RTV project directory (hereinafter referred to as RTV_A project) is created under the CT workspace.
- The user who wants to share the project receives the RTV_A project directory created in the above step, and copies and pastes the RTV_A project directory into the CT workspace path that he uses.
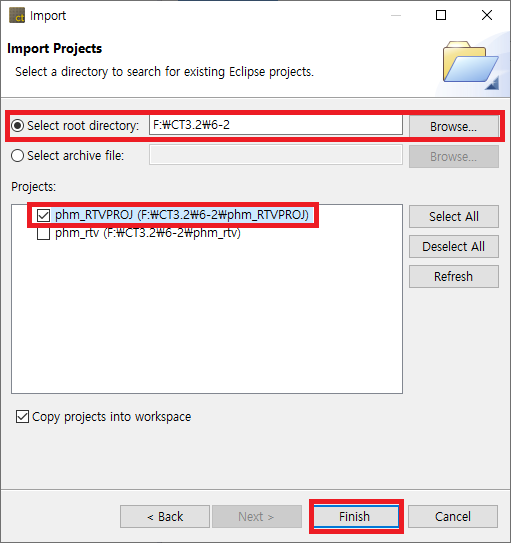
- Select top-level path to the project directory to import the projects using [Import] > [General] > [Existing Projects into Workspace] function.
![]()
- Information required for the project is received from the RTV server, and [the toolchain or resource setting of the project is incorrect. If you want to reset automatically?], Click ‘Yes’ to complete the RTV setup (RTV server and toolchain registration used when creating the project).
- You can see that an RTV project (hereinafter RTV_A’ project) with the same name as RTV_A has been created in the CT test navigator view.
- Right-click the RTV_A’ project in [Test Navigator View] and perform [Reanalysis].
- This should be done when connected to the same RTV server.
When using the [C/C++ Project from RTV Build] function
- When you create an RTV project, an RTV project directory (hereinafter RTV_A project) is created under the CT workspace.
- The user who wants to share the project connects to the same RTV server where the above project was created from CT that he uses, and registers the same RTV toolchain.
- In the project creation wizard, select [C/C++ Project from RTV Build] to create an RTV project (hereinafter RTV_A’ project).
- Import the $(project folder)/.csdata/link.mk file from the RTV_A project folder in the CT workspace and overwrite the link.mk file in the RTV_A’ project folder.
- If you want to share the same test data, check the below.
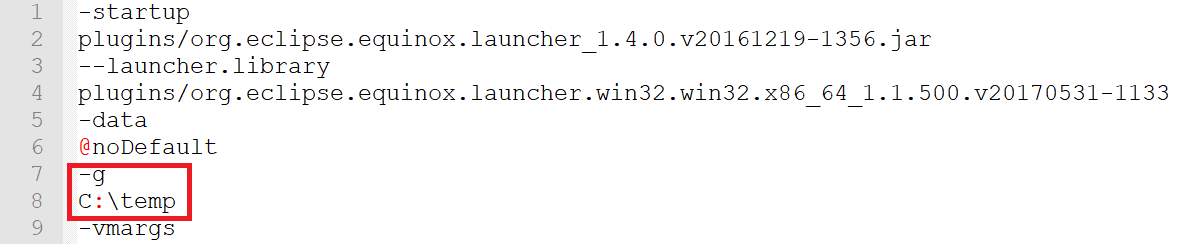
*If the path where the source files are located is long, the entire source file may not be imported properly. If the path where the source files are located is too long, make sure to specify the CT’s global path just below the drive. (ex. C:\temp)
To modify the CT global path, open the CodeScroll.ini file in the location where the CT package is installed and replace the default under the -g option with the new global path to set.
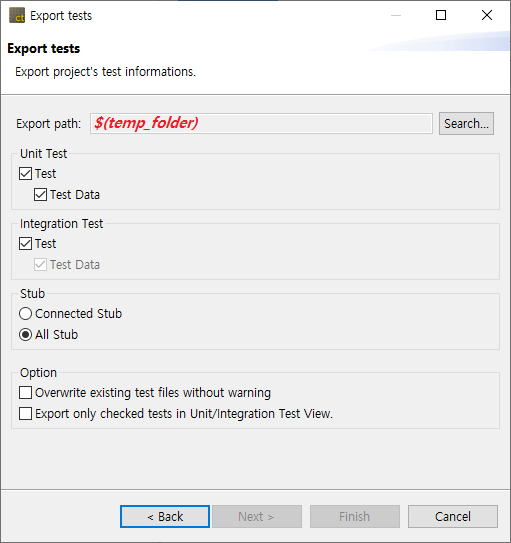
*Even if you share the same project, coverage results may differ if you create each unit test. When you share a test, you must export the test using the [Export] > [Export Test] feature, and then import the test you exported using the [Import] > [Import Test] feature.

Need more help with this?
Don’t hesitate to contact us here.