
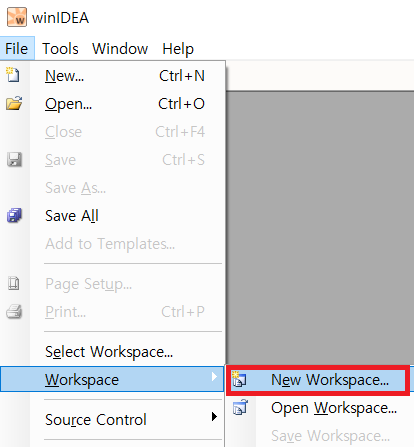
- After running winIDEA, create a new workspace by selecting [File]> [Workspace]> [New Workspace …] from the top menu. Additional workspace settings are required to use the workspace you create for the CT target test.
![]()
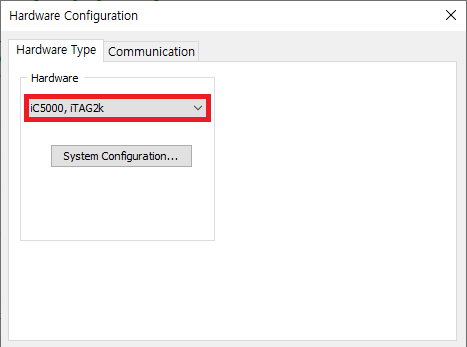
- First, go to the top menu, select [Hardware]> [Hardware…], and then select the type of the connected BlueBox in the [Hardware Type] tab.
![]()
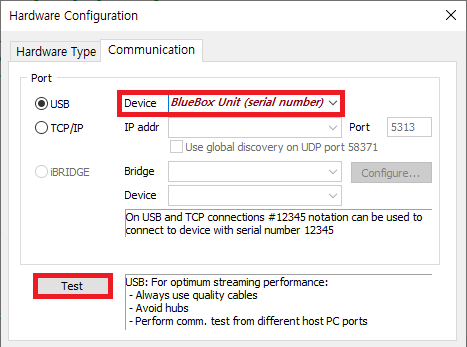
- Next, set the communication method in the [Communication] tab, and press the [Test] button to check the connection to the debugger. Please refer to the iSYSTEM BlueBox manual for instructions on how to connect the debugger device depending on the communication method.
![]()
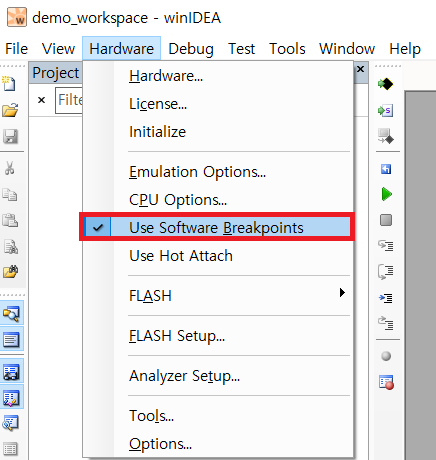
- Click [Hardware]> [Use Software Breakpoints] on the top menu to activate it, and then select the target type to use in the [CPU] of [Hardware]> [Emulation Options…].
![]()

- After the debugger setup is complete, you need to register the binary path of the software under test in the workspace. First, build the source code under test to generate the binary. Then from winIDEA’s top menu [Debug]> [Files for Download …], select [New…] and add the binary generated.
winidea-add-binary-path
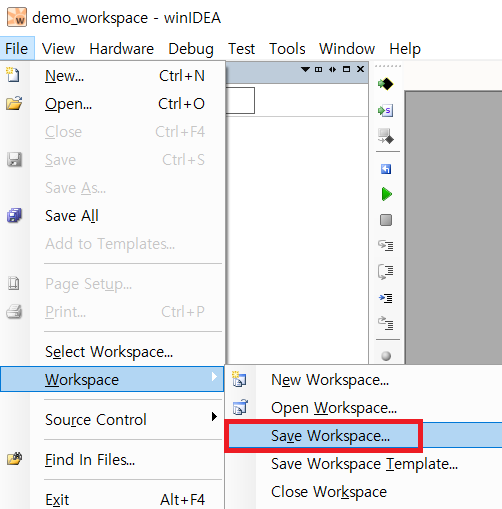
- When everything is set up, save the workspace to create a winIDEA workspace file (.xjrf). The workspace file is used to configure the target test using winIDEA in CT.
![]()
You are now finished creating the winIDEA workspace for the target test.
Need more help with this?
Don’t hesitate to contact us here.
Copyright © 2025 Suresofttech
—
Powered by 