
In this section of the New CAPA form, users can define the details of the CAPA.
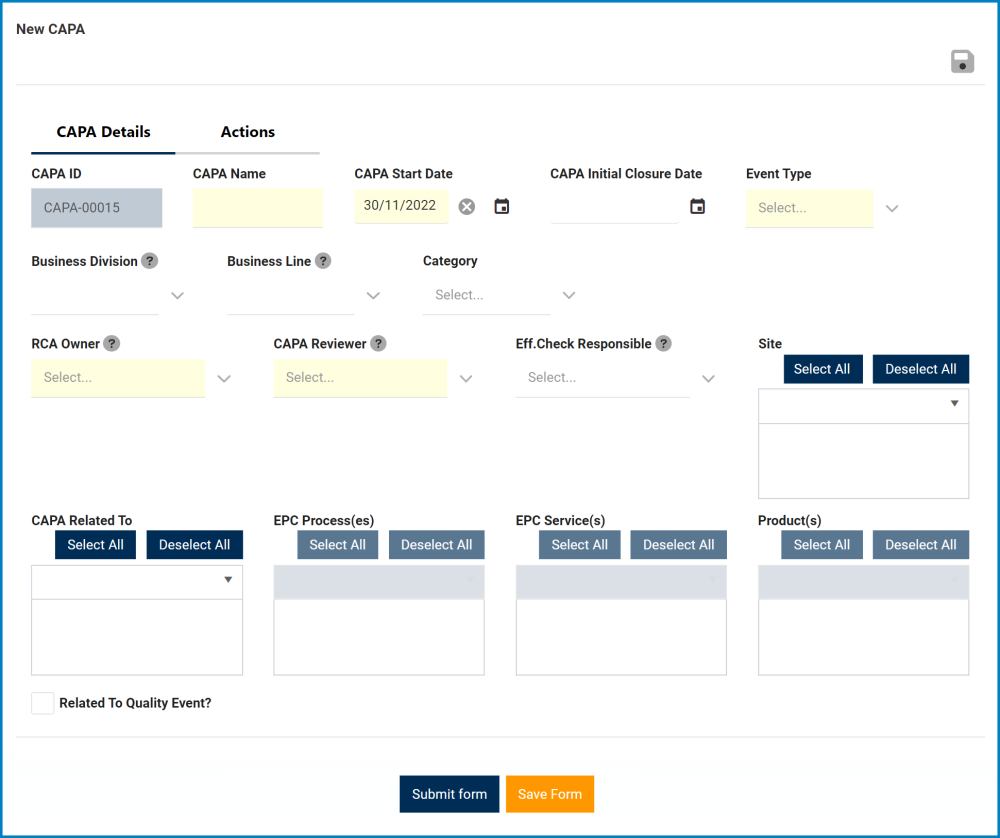
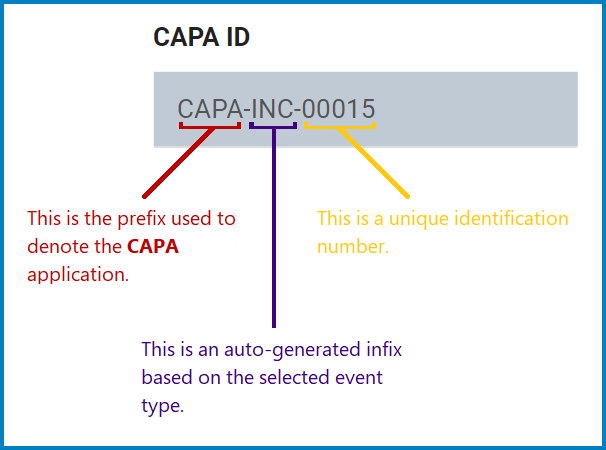
- CAPA ID: This field is automatically populated when a CAPA is initiated. It displays the CAPA ID. Users cannot modify the field.
- When an event type is selected, the CAPA ID will automatically be altered to include the appropriate infix.
- For example, if Incident is selected as an event type, the CAPA ID will be altered in the following manner:
![]()
- For example, if Incident is selected as an event type, the CAPA ID will be altered in the following manner:
- When an event type is selected, the CAPA ID will automatically be altered to include the appropriate infix.
- CAPA Name: This is a text field that allows users to input the name of the CAPA. It is a mandatory field.
- CAPA Start Date: This is a date picker that allows users to input/select the start date for the CAPA. It is a mandatory field.
- This field will automatically be populated with today’s date; however, users can still modify the entry.
- CAPA Initial Closure Date: This is a date picker that allows users to input/select the initial closure date for the CAPA.
- Event Type: This is a single-select dropdown field that displays the list of event types. It is a mandatory field.
- Event Types: Audit Finding (External/Internal), Complaint, Deviation, Incident, Inspection Finding, Non-Conformity, Out-of-Spec, Serious Breach, Variance.
- If Audit Finding (External) is selected from the list, it will display the following field:
![]()
- Audit Plan ID (External): This is a text field that allows users to input the ID of the external audit plan. It is a mandatory field.
- If Audit Finding (Internal) is selected from the list, it will display the following field:
![]()
- Audit Plan ID (Internal): This is a single-select dropdown field that retrieves the list of internal audit plans. It is a mandatory field.
- Internal audit plans are retrieved from the List of Audit Plans section of the Audit application.
- This field essentially allows users to manually create a CAPA for an audit plan—as opposed to triggering the CAPA directly from the Audit application.
- A CAPA, however, can only be linked to an audit plan that has major observations.
- When an audit plan is linked to the CAPA, its details will be included in the form.
- These details appear in the following stages of the CAPA workflow. Users can also access these details if they save the form.
- Audit Plan ID (Internal): This is a single-select dropdown field that retrieves the list of internal audit plans. It is a mandatory field.
- If Inspection Finding is selected from the list, it will display the following field:
![]()
- Inspection ID: This is a text field that allows users to input the ID of the inspection.
- This field essentially allows users to manually create a CAPA for an inspection—as opposed to triggering the CAPA directly from the Inspection application.
- Inspection ID: This is a text field that allows users to input the ID of the inspection.
- If Audit Finding (External) is selected from the list, it will display the following field:
- Event Types: Audit Finding (External/Internal), Complaint, Deviation, Incident, Inspection Finding, Non-Conformity, Out-of-Spec, Serious Breach, Variance.


- Business Division: This is a single-select dropdown field that retrieves the list of business divisions or departments.
- Once a parent department has been selected from this field, it will filter the items in the Business Line dropdown.
- Business Line: This is a single-select dropdown field that retrieves the list of business lines associated with the selected business division.
- All child departments of the selected parent department will be displayed in this list.
- Category: This is a single-select dropdown field that retrieves the list of predefined categories.
- Categories are created in the Category section of General Settings.
- RCA Owner: This is a single-select dropdown field that retrieves the list of users assigned to the RCA Owner group. It is a mandatory field. The user selected will be tasked with executing the root cause analysis.
- RCA = Root Cause Analysis
- For more details on this task, click here.
- CAPA Reviewer: This is a single-select dropdown field that retrieves the list of users. It is a mandatory field. The user selected will be tasked with reviewing the CAPA.
- For more details on this task, click here.
- Eff. Check Responsible: This is a single-select dropdown field that retrieves the list of users. The user selected will be tasked with checking the effectiveness of and approving the CAPA.
- For more details on this task, click here.
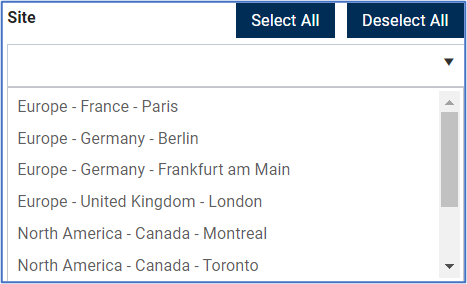
- Site: This is a multi-select dropdown field that retrieves the list of predefined location sites.
- Sites in this dropdown adhere to the following template: [Region] – [Country] – [Site].
![]()
- Site options are created in the Site form. To properly set up a site, however, users will first need to set up the corresponding region in the Region form and the corresponding country in the Country form.
- For example, to establish Montreal as the site for the CAPA, users will first need to set up North America as a region and Canada as a country in the associated forms.
- These forms are all found in the Location section of General Settings.
- For example, to establish Montreal as the site for the CAPA, users will first need to set up North America as a region and Canada as a country in the associated forms.
- Sites in this dropdown adhere to the following template: [Region] – [Country] – [Site].
- CAPA Related To: This is a multi-select dropdown field that retrieves the list of predefined CAPA relations. It allows users to define their CAPA as specific to certain processes, products, services, etc.
- CAPA Relations (Standard): Process, Service, Product.
- If Process is selected, it will enable the EPC Process(es) dropdown.
![]()
- EPC Process(es): This is a multi-select dropdown field that retrieves the list of processes from EPC.
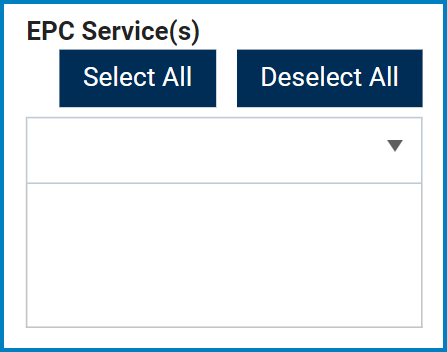
- If Service is selected, it will enable the EPC Service(s) dropdown.
![]()
- EPC Service(s): This is a multi-select dropdown field that retrieves the list of capabilities from EPC.
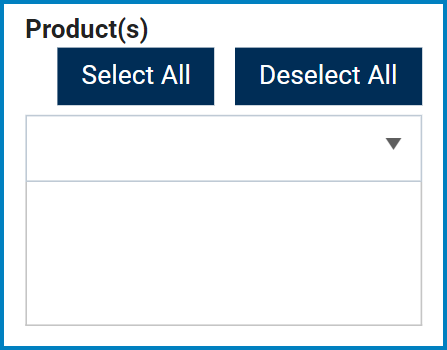
- If Product is selected, it will enable the Product(s) dropdown.
- Product(s): This is a multi-select dropdown field that displays the list of products.
![]()
- Product(s): This is a multi-select dropdown field that displays the list of products.
- If Process is selected, it will enable the EPC Process(es) dropdown.
- CAPA relations are created in the Related To section of CAPA Settings.
- CAPA Relations (Standard): Process, Service, Product.
- Related to Quality Event?: This is a checkbox which, if enabled, allows users to mark out that the CAPA is related to a quality event.
- If selected, it will display the following field:
![]()
- Quality Event: This is a single-select dropdown field that retrieves the list of quality events.
- Quality events are retrieved from the Quality Event List section of the Quality Event application.
- Quality Event: This is a single-select dropdown field that retrieves the list of quality events.
- When a quality event is linked to the CAPA, its details will be included in the form.
- These details appear in the following stages of the CAPA workflow. Users can also access these details if they save the form.
- If selected, it will display the following field:
- Submit Form: This button allows users to submit the form.
- For more details on this function, click here.
- Save Form: This button allows users to save the form.
- For more details on this function, click here.


Post your comment on this topic.