
Create a Sector Manual Data
Enter the Location in which you which you wish to create a new sector.There on the top right corner the Create Sector button can be found.
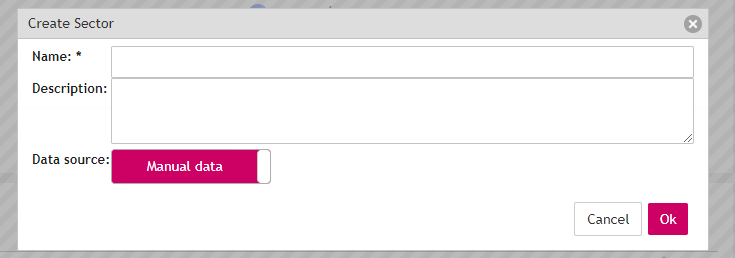
To create a Sector, click on the Create Sector button:

Choose a name for your Sector, a description(optional) and select Manual Data, then click ok:
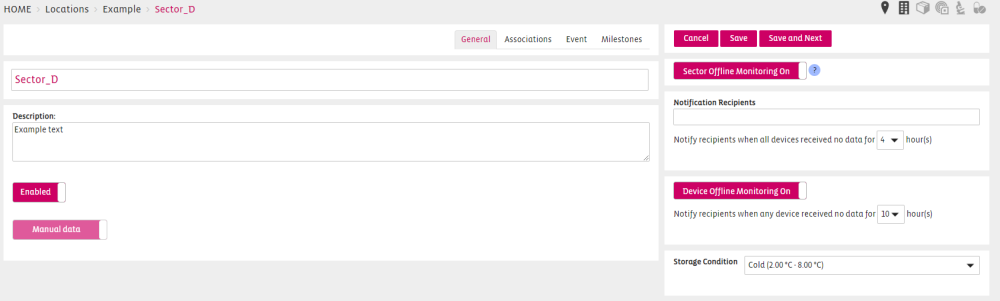
Modify Storage Conditions
![]()

You can choose a Storage Condition for your sector which you have predefined under Site Settings / Storage Conditions.
Associations to a Sector
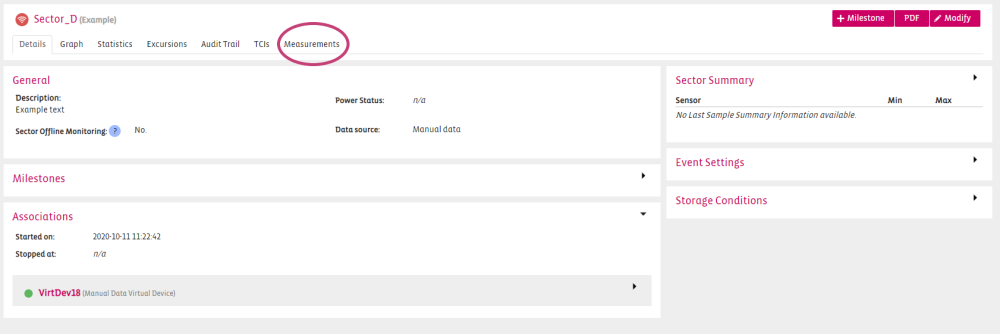
The system will automatically generate a virtual device for the sector. It’s not possible to conduct any changes in the associations tab of the sector settings.

Add an Event Profile to Sector
Before adding an Event Profile to the sector, make sure you have created a profile with appropriate event rules.
Adding an Event Profile to a Sector can be done from the Modify screen of the Sector. Click on the “Event” tab in the Modify screen:

Click on the Monitoring button to enable Event Monitoring and select “created”: Event Profile from the dropdown list:

Click on  to save your changes.
General view of the sector
For the manual data sector a new tab will be visible with the name measurements.
In this tab the manual added data will be listed in a table with one of 3 different states.
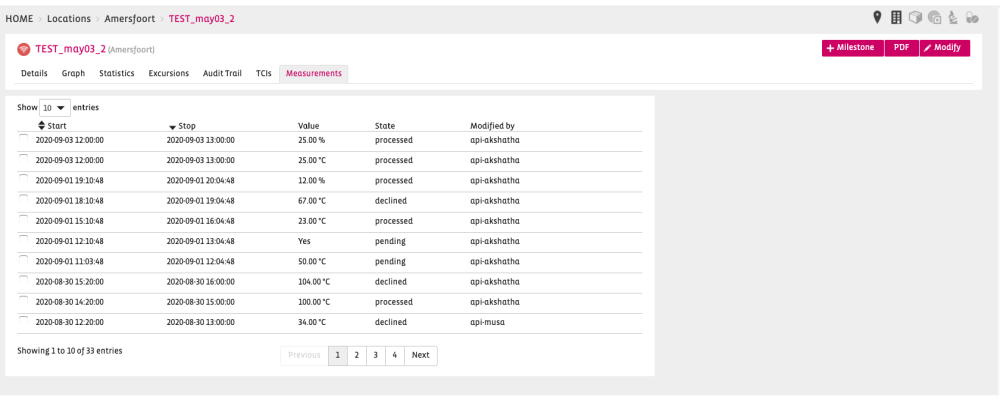
The 3 different states are as follow:
| State | Meaning |
|---|---|
| Pending | Data was entered |
| Approved/declined | Data was peer reviewed |
| Processed | Data handled by Smartview |
Also visible in the table is the user responsible for the last change of state. Information of all changes with the responsible users can be found in the PDF report for the sector.
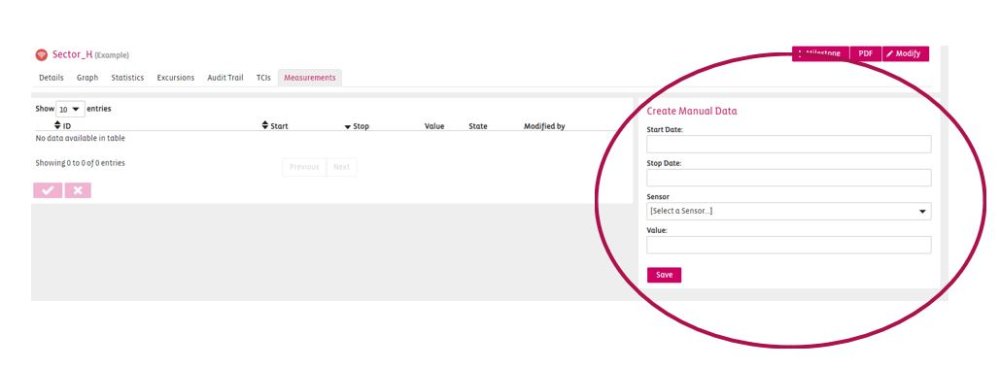
Adding manual data
A Manual data entry can be created on the right side of the measurement window
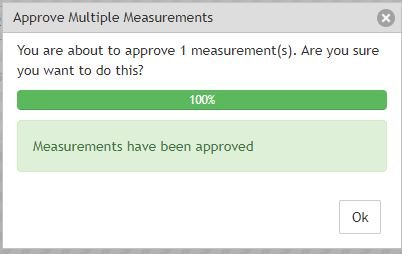
Approving/declining Data
The entered data can be approved on the bottom left side of the measurement window.
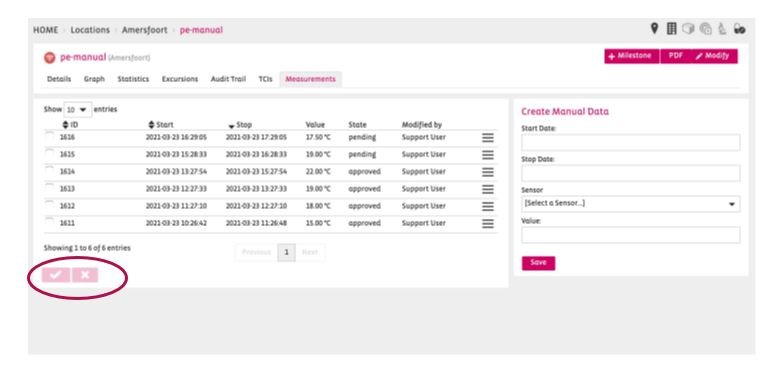
After selecting the action a popup will confirm if the action as successful
Notification if the network is offline
The Customer (Site Contact) will receive a notification in any case if the network is offline for more than 60 minutes.
If the notification is turned on by default it cannot be changed in the back-end of SmartView. Please contact support@berlinger.com if you want to turn OFF/ON network notification at all.
Add a Notification for a Location
If a Sector of a Location is offline the contact person of the location will be notified per Mail (eg. people on site)
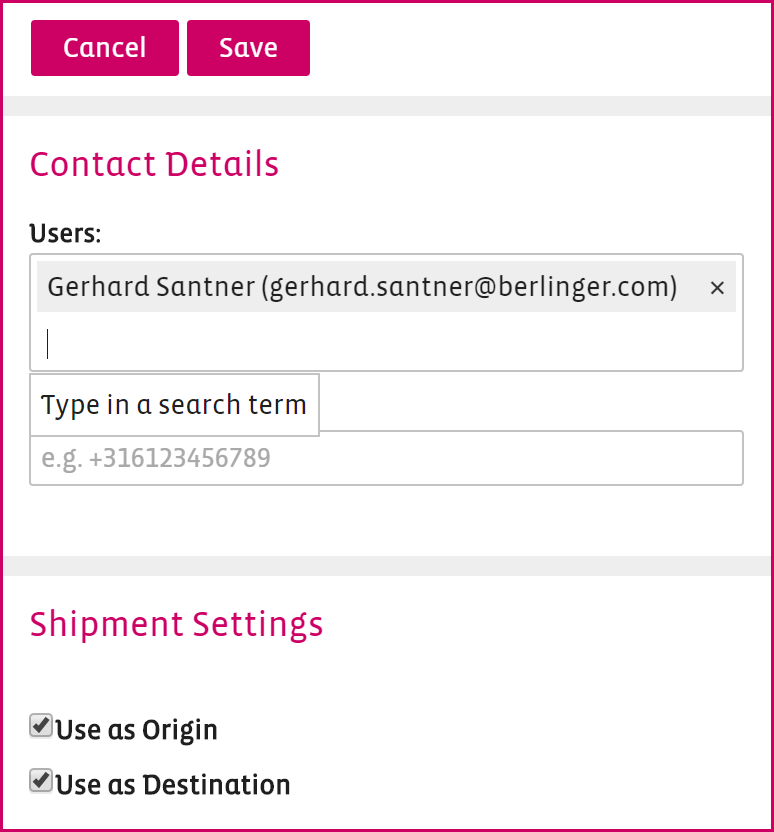
You can modify users (add and remove) on the right by pressing the button to modify.
Add or remove Users from the notification list
Notification for a sector
When sector offline monitoring is enabled SmartView will send e-mail notifications to SmartView users. This functionality can be configured for each sector, including time interval and recipients. Press Modify on the right.
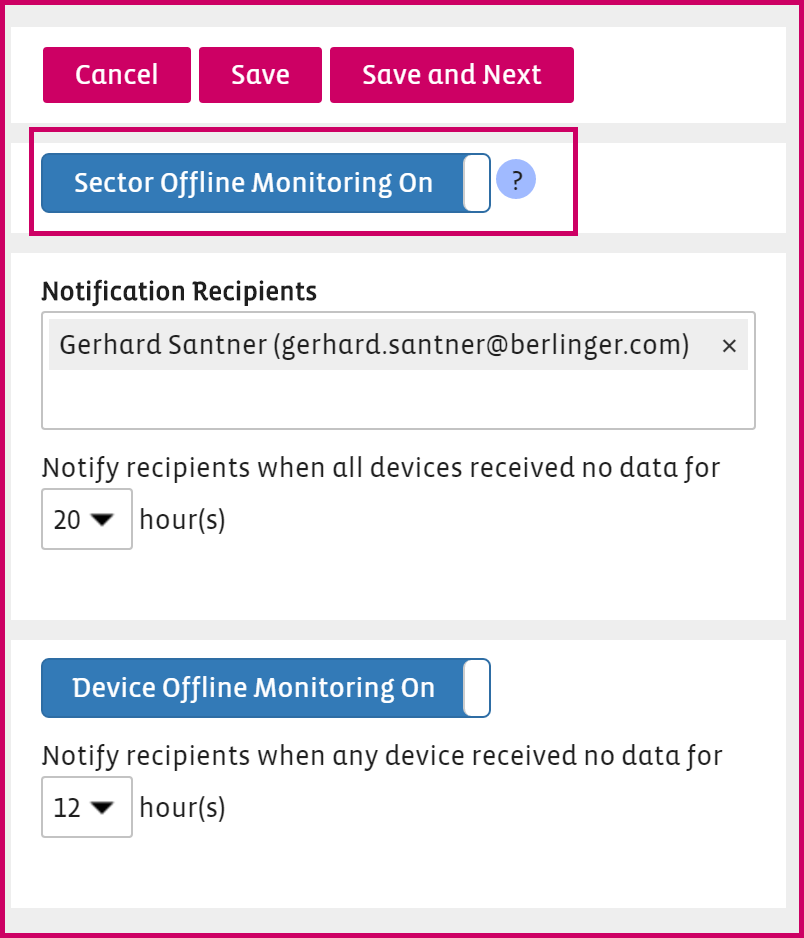
NOTE: Users have to set up these notifications for their Sectors to benefit from this functionality.
Notification for a device
When no device measurements are received from the sector for the user-defined period.
This functionality can be configured for each sector, including time interval and recipients.

The notification for devices can be set ON or OFF.
If it is ON the notification will be sent to the user-defined above within the notification recipients.
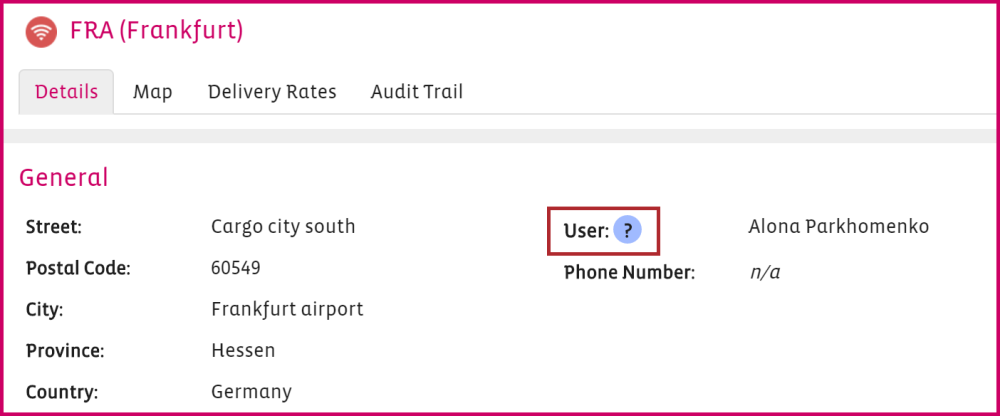
Location User question mark – This user(s) will be used for the location offline/online notifications.
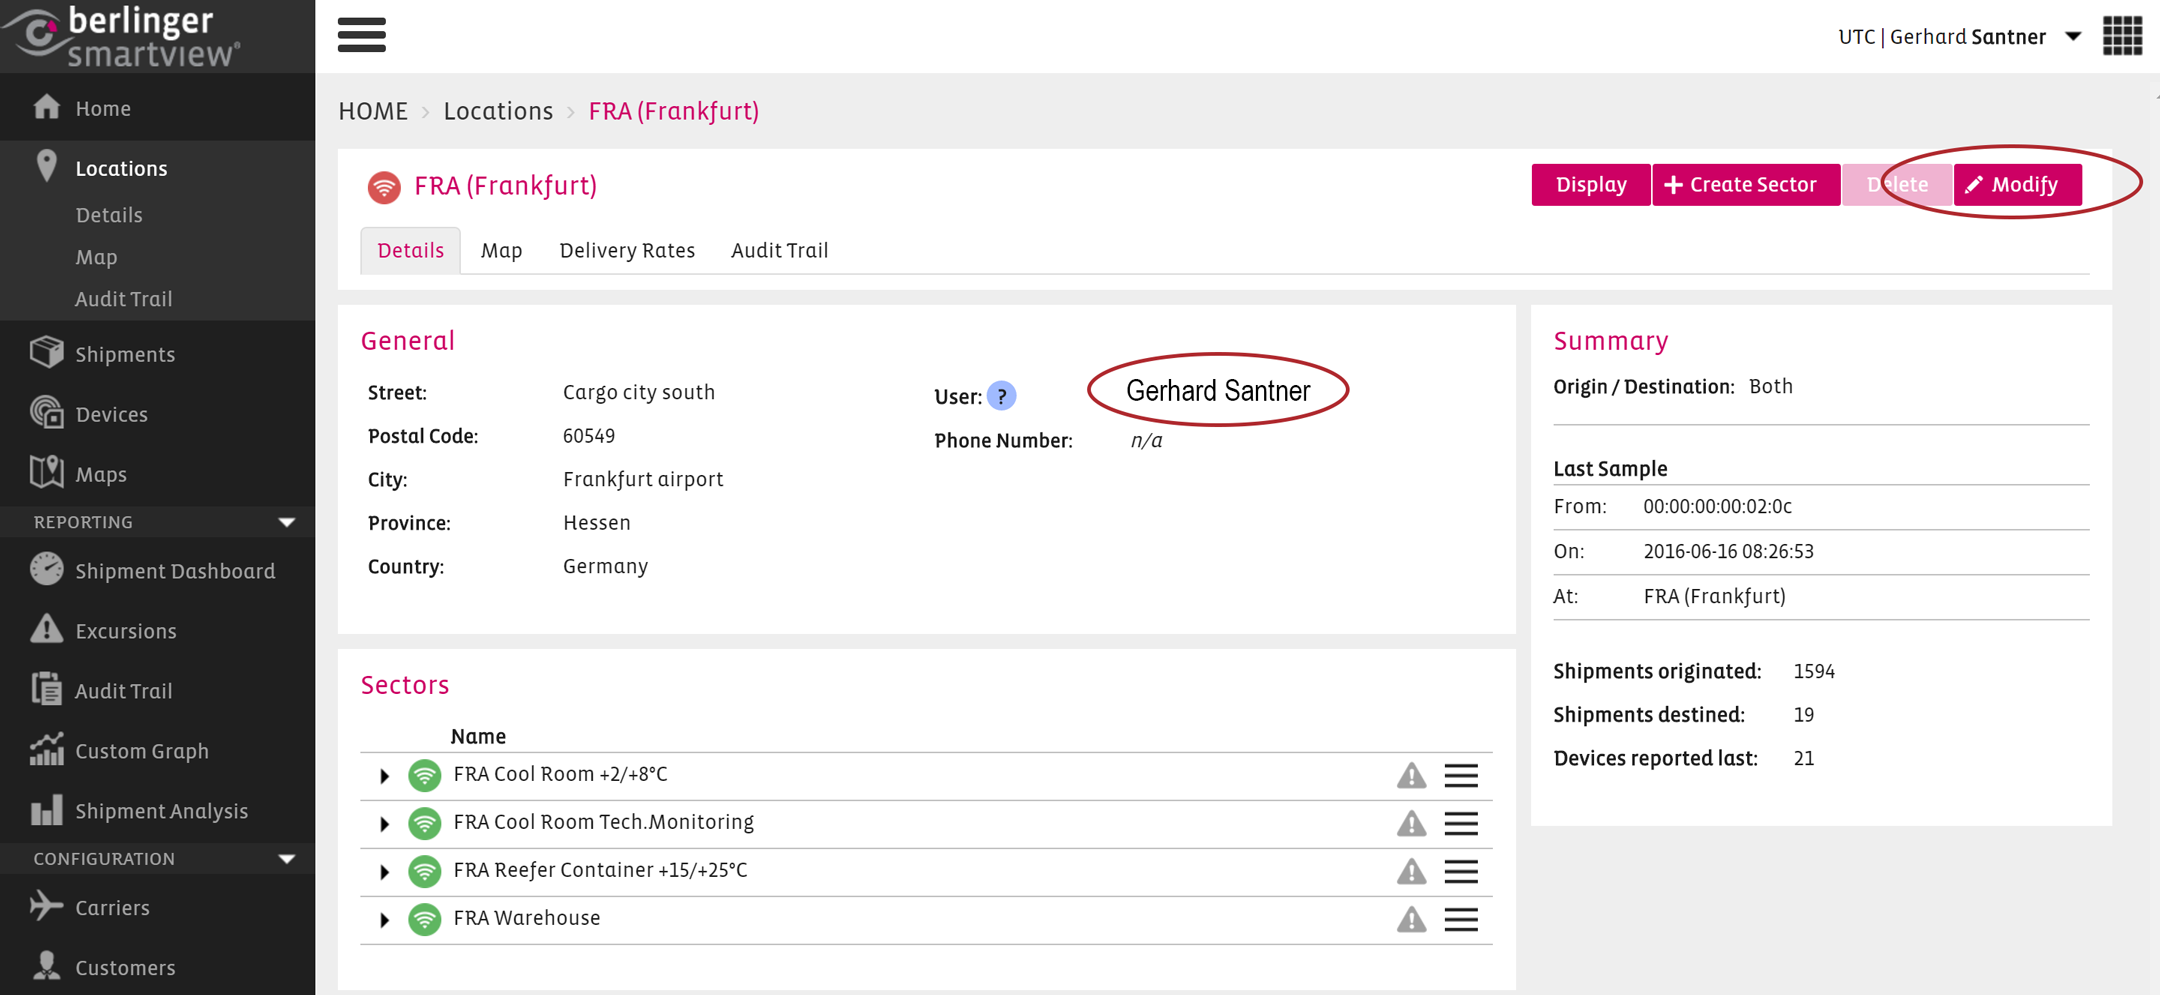
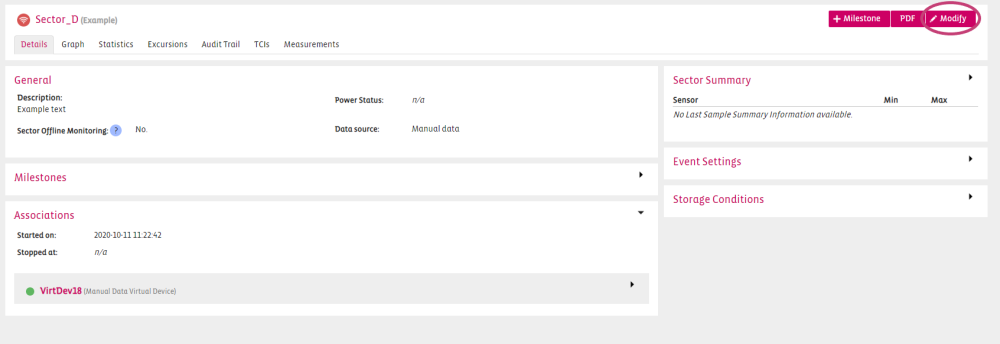
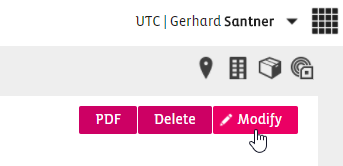
Modify a Sector
If you want to change entries in a Sector, click Modify on the right side.
You can modify all entries which you have put in when creating the Sector.
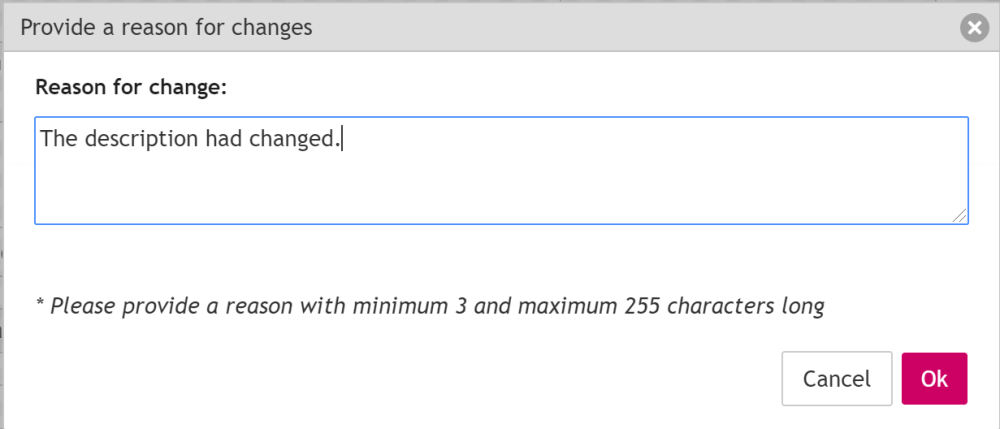
Reason for change
If the “Reason for Change” has been enabled by the Admin in the site settings then all changes made to sectors will require the user to provide the reason for the change.
This information will be visible in the Audit Trail.
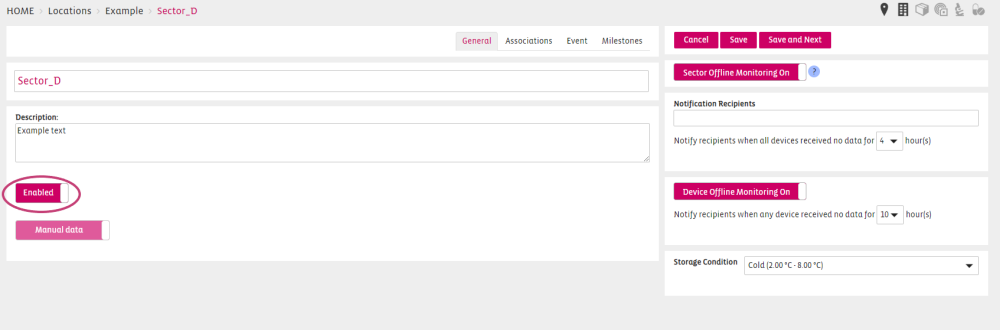
Enable/Disable a Sector
If you want to enable or disable a sector use the toggle Enable/Disable on the bottom of the details tab in modify mode.
Choose to modify in the sector tab
Scroll down to the toggle Enable/Disable and change settings.
Click save to save your settings.