
When you fist select Configure Entity, the configuration screen is displayed, and on the left, under Configuration the General options is selected displaying the General Settings area in the main part of the screen.

Use the General Settings section to configure the following:
- External content type name – The external content type name is important to the business user who will be configuring the business data web parts as they will need to understand the type of data that will be returned. For example dbo.CRM_CUSTS would not be meaningful to an end user.
- Version Number – This is the version of the model file which allows you to increment the version of your model file after making changes to it.
- Title column – The title column is the column that provides you the list item menu drop down list that contains links to Edit Item, Delete item and custom actions. You can also type the title column using the Business Data Web Parts.

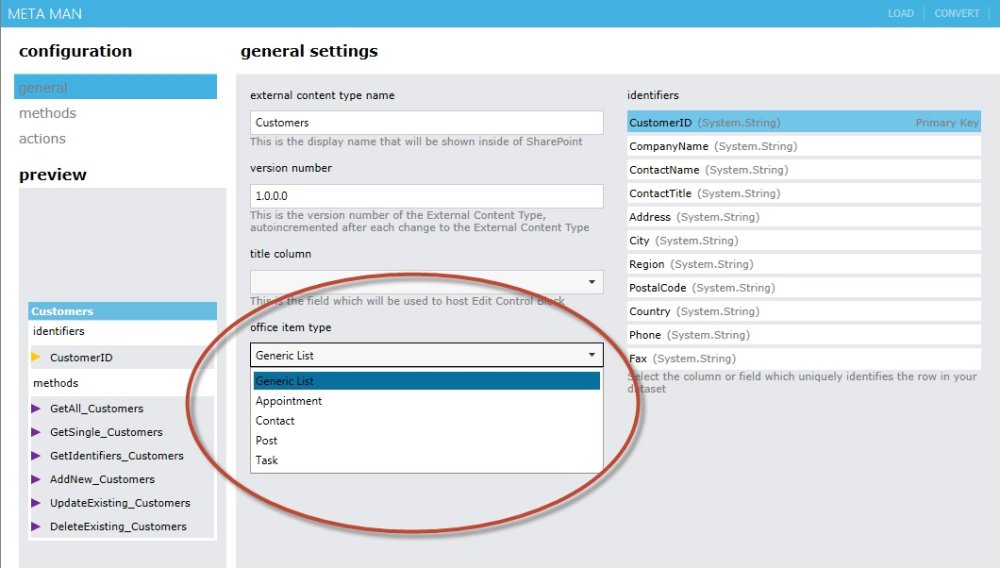
- Office Item Type. You can use the office item type drop down list, to control the behaviour of your external data within a Microsoft Office application. Microsoft Outlook has specific views for different data types, for example, it allows you to view contacts as business cards, or as a list, appointments within calendars. Once you set the office item type, you will need to map the columns from your external data source to the Microsoft Office column types, for example Last Name in the external content type mapped to the Lastname Office data type.
Note: The Office Item Types have required mappings. For example Last Name and Full Name are required for the Contact Office Item Type
To set the Office Item Type:- In General Settings section, from office item type drop down list, select Generic List, Appointment, Contact, Post or Task.
![]()
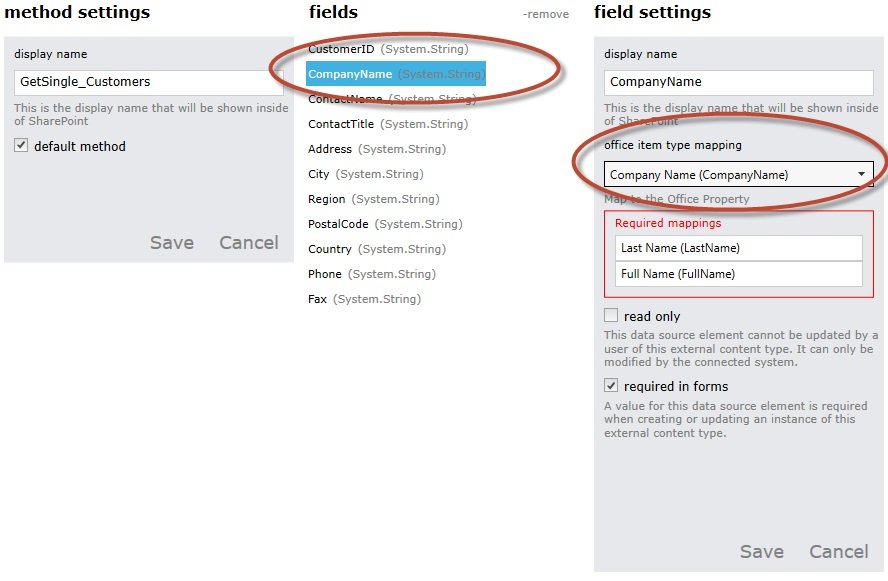
- Under Configuration, click ‘methods’ and then select the Specific Finder Method.
- Under fields, select the column that you wish to map to display the field settings section. The Map to Office Property section displays the required mapping for the Office Item type you selected.
- From the office item type mapping drop down list, select the appropriate Office Item type, for example, Last Name (LastName).
![]()
- Click Save and then click OK in the Information dialog that states that thee mapping was successfully saved.
Tip: For more information on using the Office Item Type can be found in the Walkthrough: Mapping Office Item Type properties to External Content Types fields.
- In General Settings section, from office item type drop down list, select Generic List, Appointment, Contact, Post or Task.
- Identifiers – The identifier in a column within your table or view that contains only unique values and is used by the IDEnumerator method and Specific Finder method. This is detected automatically for you, but can be changed.

Feedback
Copyright © 2025 Lightning Tools
—
Powered by 
Post your comment on this topic.