
BCS connector for Dynamics Online
To connect to Microsoft Dynamics Online, you will require the following information:
- Secure Store Target Application Created
- Microsoft Dynamics Online Server URL
- Username
- Password
- BCS Connector for Dynamics.WSP deployed to each SharePoint WFE. (This is not a requirement for the WFE where BCS Meta Man is installed).
Creating the Secure Store Target Application
So that your SharePoint users can authenticate with Microsoft Dynamics Online, you will need to create a Secure Store Service Application to pass through the credentials to the Microsoft Dynamics Online environment. To configure the Secure Store Service Application:
- Navigate to SharePoint Central Administration.
- Under Application Management, Click the link to Manage Service Applications under the Service Applications
- Open the Secure Store Service Application
- Click *New *to create a New Manage Target Application.
- Set a Target Application ID such as ‘CRM’
- Set a Display Name such as ‘Dynamics CRM’
- Provide a Contact Email address for the Target Application
- Leave the Target Application Type as Individual and accept the defaults.
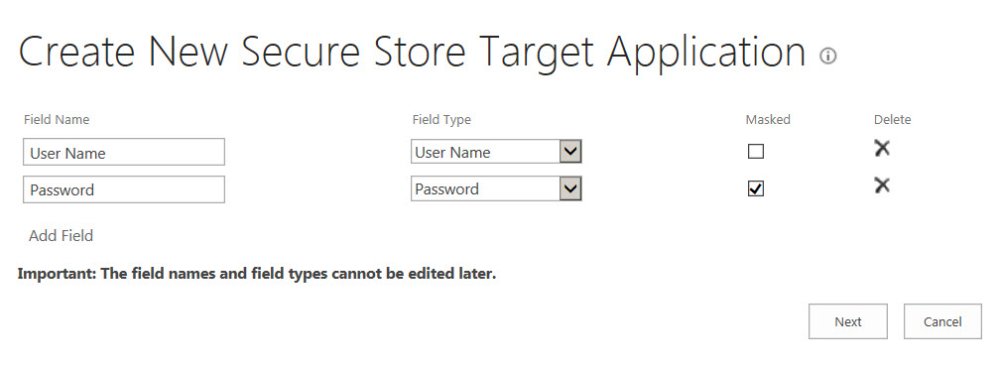
- Click Next.

- Provide two fields:
Password as type Password
- Click Next
- Set the Target Application Administrator
- Choose Ok
- Select the newly created Target Application and click Set Credentials

- Click Ok.
Creating the External Content Type with BCS Meta Man
To create the External Content Type, please follow the below steps:
- Open BCS Meta Man
- Click Dynamics Online
- Enter the URL of the Dynamics Online Server URL
- Enter the Username for an account allowing BCS Meta Man to configure the External Content Type
- Enter a Password for the Account
- Select the Secure Store Service Application that you created using the above steps. Note that the Secure Store Service Application is used after the deployment of the model file.
- Click the blue arrow to connect

- Drag a table such as Contact onto the model diagram.
- Select the required methods such as Finder, Specific Finder, IDEnumerator, Creator, Updater, Deleter.
- Click Create.
Feedback
Copyright © 2025 Lightning Tools
—
Powered by 
Post your comment on this topic.