
If we need to display information in a hierarchical structure in the form, we can see the Tree Control.
Web Example of the Tree Control:
Step by step how to create the tree selector
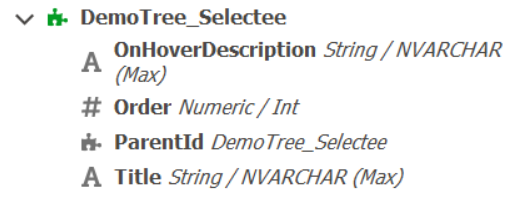
1. Create Selectee Entity – Create an entity that will be used in selected using the tree control.
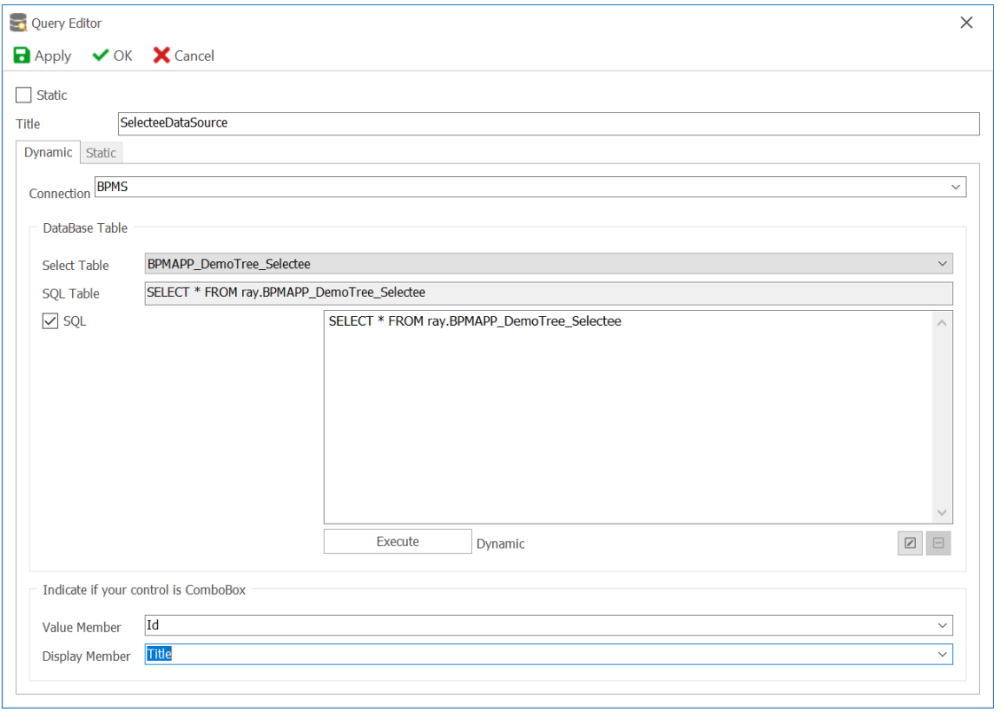
2. Add Drop Down Data Sources
- Forms > Dropdown Data Sources
- New
- Give a name ex SelecteeDataSource
- In “Select Table” choose the table for the entity we created in step 1 (ex: BPMAPP_ DemoTree_Selectee).
- Copy/Paste the query into the box.
- In “Indicate if your control is ComboBox” panel, for “Value Member” choose “Id” and for “Display Member” choose “Title”
![]()
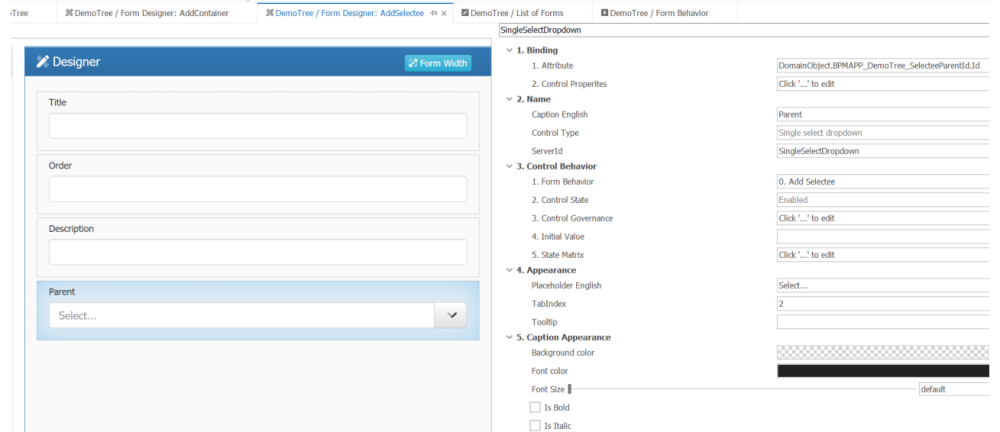
3. Create Add Form
In “Form Properties” window, for “Entity” select the entity we created in step 1 (ex: Selectee).
- Create Draft
- Switch “ParentId” textbox for a “Single select dropdown”. Click “Control Properties”. In “Single Select” tab, select the dropdown data source create in previous step (ex: SelecteeDataSource).
![]()
This is the entity of which an attribute will be populated using the tree as a selector.
Ex: ContainerEntity with the following attributes
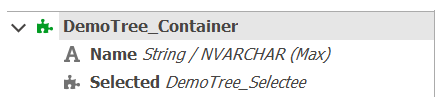
- Title (NVarChar)
- Selected (Guid) Reference Forgein key to the Id of the entity we created in step 1 (ex: Selectee).
5. Create Tree Form
Create new form that will hold the Tree control. In designer’s child window click on “Form Entity” tab.
Here we will create the form entity of our tree control.
- Add List
- Add a “New Field” and give it a name and title (ex: List). Keep in mind that it will be a collection/list of objects to be displayed in the tree.
- Check Complex Type checkbox.
- In Complex Type panel, check “Is a list” and select the entity we created in step 1 (ex: Selectee)
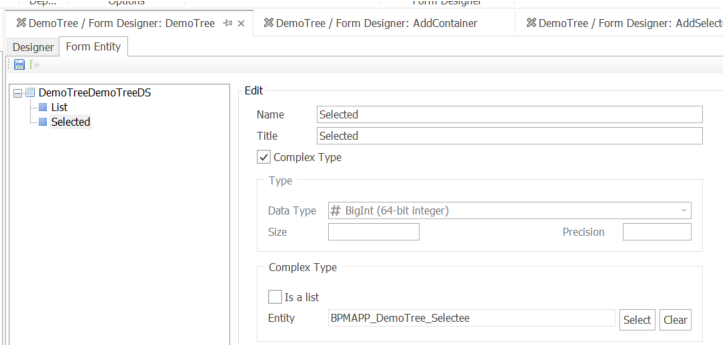
- Add Select
- Add a second “New Field” and give it the name “Selected”.
- Check Complex Type checkbox.
- In Complex Type panel, do not check “Is a list” and select the entity we created in step 1 (ex: Selectee)
- Save and close the form
- Build the application
![]()
6. Create Add Container entity form
- In “Form Properties” window, for “Entity” select the entity we created in step 4 (ex: ContainerEntity).
- Create Draft
- In case Selected is not a “Single select dropdown”, please switch it. Bind the control to the Id of Selected.
- Click “Control Properties”.
- In “Single Select” tab, select the dropdown data source create in step 2 (ex: SelecteeDataSource).
- Save and close the form.
- Open it again and select Selected dropdown control. Click on “Control Governance”. In “Selector” tab click on the + next to “Browse form behavior”. Give a name ex: Selection and choose in Form, choose the tree form created in step 5. Click on OK.
![]()

7. Define Selection form behavior in tree form.
- Open the tree form created in step 5.
- Add a Tree control.
- Select the control and in right panel, click on Binding > Attribute. Select the field you created in the Form entity (ex: List).
- Click on Binding > Control Properties
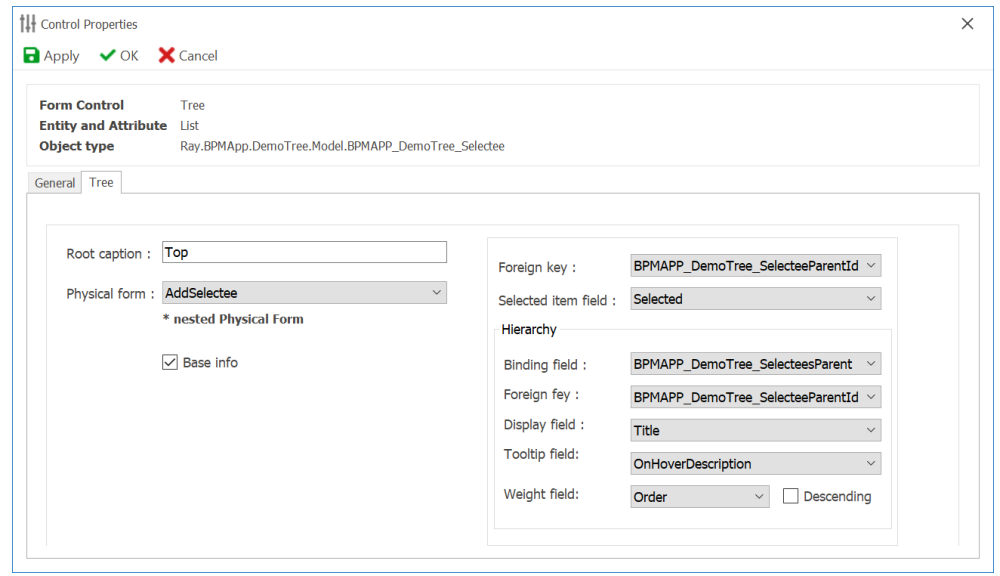
- Click on “Tree” tab.
![]()
- For “Root caption” enter any name you want to see as the root (top element) of tree.
- Click on OK
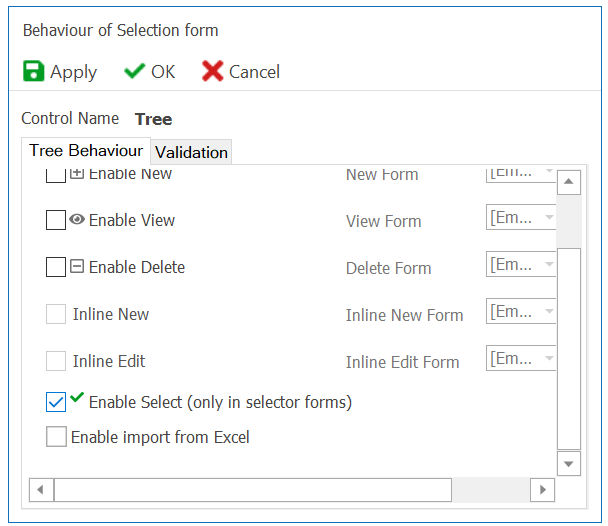
- In Form Behavior click on the behavior created in the selector window of single dropdown and click on Form Governance. Check Enable Select.
- Click Ok and Deploy
![]()
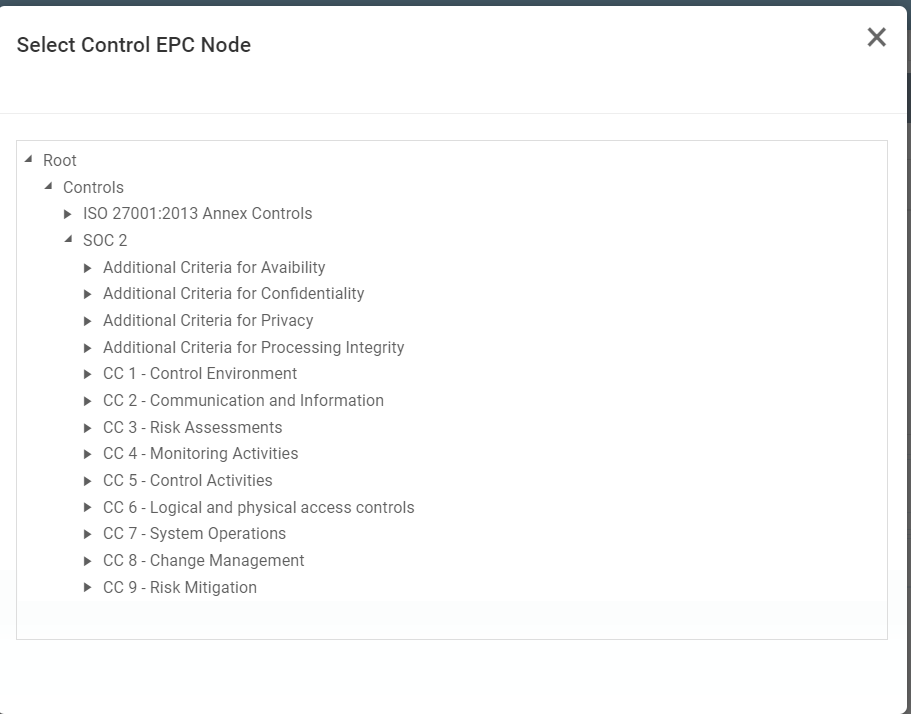
8. Usage Of Tree
To test the app, create some Selectee instances using AddSelectee form. Make some of them children of others using the Parent dropdown.
Now create a Container instance.
When you click on the Selected dropdown, tree form should open.
Double click to select a Selectee item.