
The Swap feature provides the ability copy configurations between various user components in CUCM. This Swap Tool can swap or copy configuration between:
- Devices – swap phones or device profiles of the same or different model
- Users – migrate device associations and ownership to a new user
The Swap feature can help perform common tasks without building a job.
Using the Device Swap Feature
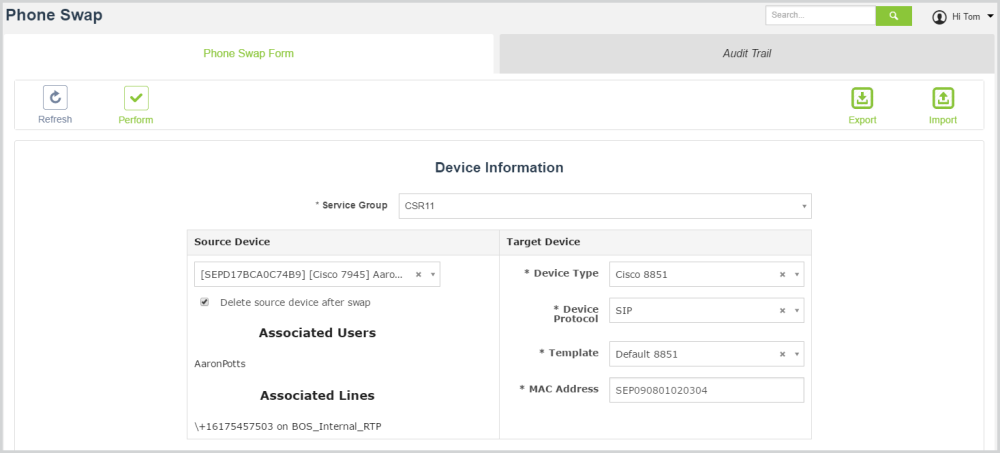
The Device Swap tool provides the ability swap configurations between most phone and device profile models. This tool is very useful when you need to replace a user’s phone or profile with the same or different model. Device swap will provision the new device, copy all applicable settings, apply device ownership and associated the new device with the user. The tool also provides the option to delete the old device upon successful completion of the swap. This feature can be equally as useful when adding a new device to a user as it will copy over pertinent settings and perform all proper associations.
Using Device Swap:
- Select Swap from the Actions menu
- If required, select the appropriate Service Group
- Select the Source Device Type: Phone or Device Profile
- Locate the Source Device. This is the device you want to copy.
- If you wish to delete the source device upon successful completion of the swap, select the “Delete source device after swap” checkbox
- Select the Target Device Type. This is the model of the target device.
- Select the Target Device Protocol. This may vary depending on the model.
- Select the Target Device Template. The Template is used to configure required settings which are not available to be copied from the source device. For example, if you are going from a SCCP phone to SIP phone, the SIP profile will be configured using the Template.
- Click Perform to complete the swap
- Enter the device name or MAC address
- Click Perform to complete the process
The End User Swap tool provides the ability to migrate all line and device associations from one user to another.
Using User Swap:
- Select Swap from the Actions menu.
- Select the End-User Swap Form Tab.
- Select the appropriate Service Group.
- Select the Source End User.
- If you wish to delete the source user upon successful completion of the swap, select the “Delete source end-user after swap” checkbox.
- Select “New User Account” to create and new user during the process or selecting and existing user as the target. Note – all existing associations will be removed from target user.
- Click Perform to complete the swap.
The Swap feature can also be used in bulk to migrate phones or device profiles. There are two methods to perform device swaps in bulk.
Method 1 – Bulk Swap using CSV Template:
- Select Swap from the Actions menu
- If required, select the appropriate Service Group
- Select the Device Swap or End-User Swap tab
- At this point, you can download the CSV template by clicking Export located at the top right corner of the page. Optionally you can proceed to populate the remaining fields and Export the template with all the settings prepopulated.
- Populate the Exported CSV Template and when complete, click the Import button to upload the template.
- Upon uploading the Template, the system will process the swaps. Do no close your browser or navigate away from the page
- The process will complete and provide a summary of the processed items
Method 2 – Bulk Swap using Advanced Search:
- Select Swap from the Actions menu
- If required, select the appropriate Service Group
- Select the Bulk Swap Tab
- Click the Search Devices button
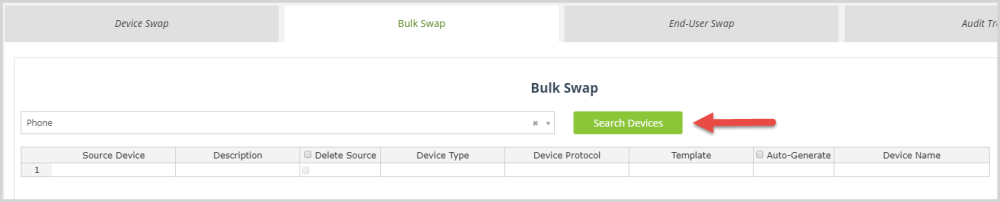
- Search for the phones to be swapped using the Search Phones section.
- As devices are located, you may click “Add to List” and repeat the search for more devices to be added to the list. Alternatively, click the “Add to List and Close“ button to complete adding to the list and return to the Bulk Swap page.
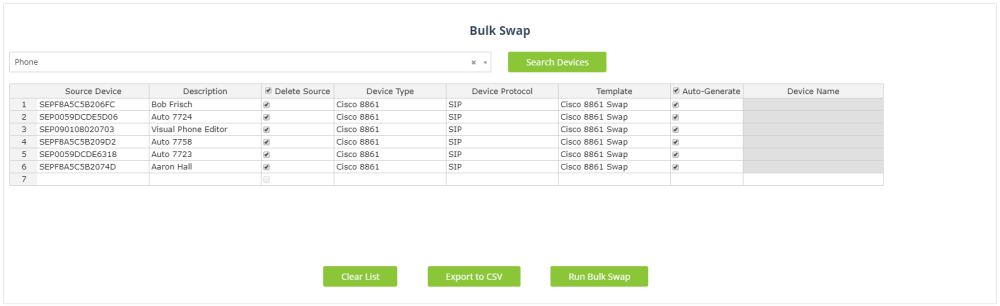
- On the Bulk Swap page, click “Run Bulk Swap” to process the swap for all devices in the list. Alternatively, you can select “Export to CSV” to process the job later.

Post your comment on this topic.