
The Provisioning Manager Auto-delete phone feature can monitor the registration status of phones over a period of time and delete phones that exceed a configured unregistered term.
To Configure Auto-provisioning Job:
- Log into Provisioning Manager with an Administrator account
- Select Automation from the System menu
- Click on the Auto-delete Phone tab
- Click *Add *to configure a new Auto-delete phone task
- Configure the Name
- Check enable (This will enable the task to run once scheduled)
- Set the “Not registered in the last” period
- Choose the Action
- Choose the “Update frequency (Hours)” (This is how often the system will check the device registration status)
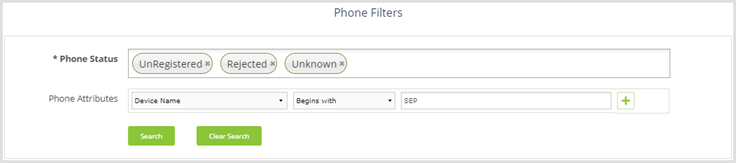
- Configure the Phone Filters sections
- Click Save to complete the configuration
- Repeat the process to create additional tasks
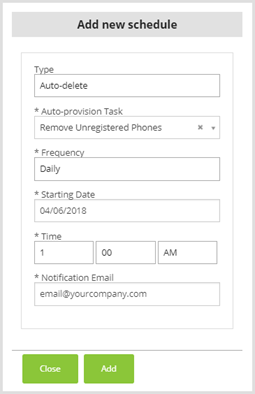
Scheduling the Auto-delete phone Jobs:
- Select Schedule from the Actions menu
- On the menu, click Add to schedule a job
- Select the Auto-delete type
- Select the Auto-delete task
- Choose the frequency to run the task
- Choose the starting date of the task
- Set the task run time
- Set the notification email
- Click Add to schedule the task
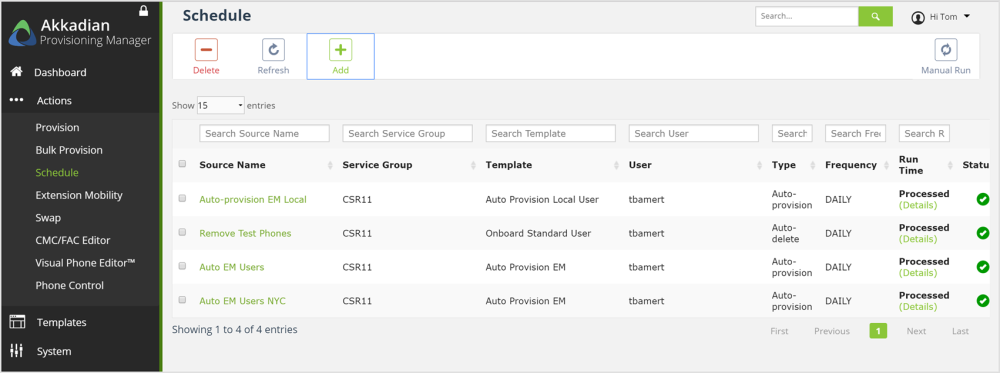
The schedule for any Job can be edited by clicking on the Source Name or the job can be deleted by checking the box next to the scheduled job you wish to delete and clicking the Delete button.
Post your comment on this topic.