
Unlike the Tabular add-in which have to be installed on everyTabular user’s machine the main workbook is a shared resource, so its set up only once at a shared location and then all users access it from there. Setting up the Tabular main workbook is done only once when Tabular is installed for the first time. You don’t need to perform this every time when you upgrade to a new version and instead you should use the One click upgrade functionality to update the data.
Setup steps:
1. Download the Tabular Main Workbook zip file (Tabular_x.x.x.x.zip) from the download section of our website (Client Area-> Download Tabular).
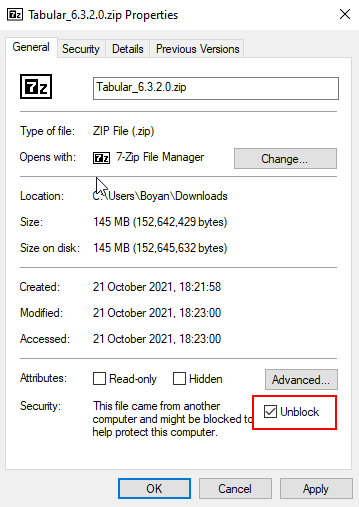
2. Check if the file is not blocked by your network protection.Do that by right clicking on the zip file, navigate to properties and if there is a checkbox or button labelled “Unblock”, click it and apply.
3. Then unzip the file to where you want the Tabular entry point (this is where you create returns from and the Database file is placed). It should be placed on a shared network drive that all user have read/write access as the Database file is in this file structure and every user will connect to it.
4. As the system keeps in database and in Excel workbooks some paths that should be absolutely the same for all users. You need to configure if the system will use mapped drive paths or UNC paths. UNC path is the default configuration for Tabular which should work in most setups. In some cases though like when using DFS replication you might need to change this configuration and ensure all Tabular users have the same mapped letter drive to the location of the Tabular files. More information and steps to do this configuration you can find here. If you have a more complex network structure you can contact our support and they will help you with the setup.
Post your comment on this topic.