
In order to deploy SDK/J applications such as PriApps to Ricoh ESA MFPs there are a number of settings that have to be configured on the MFP itself beforehand. This section describes the settings for Platform 10.XX, 11.XX and 12.XX Ricoh ESA MFPs.
In addition, a Java memory card and updated device browser may need to be installed depending on the model. The Ricoh ESA Supported Device Matrix details the requirement for each Ricoh ESA MFP model.
SP Mode Settings
Putting the device into SP Mode
Put the device into SP mode by hitting the following combination on the MFP panel
- RESET 806182 and hold the C button for a few seconds
This will bring you to the screen below:
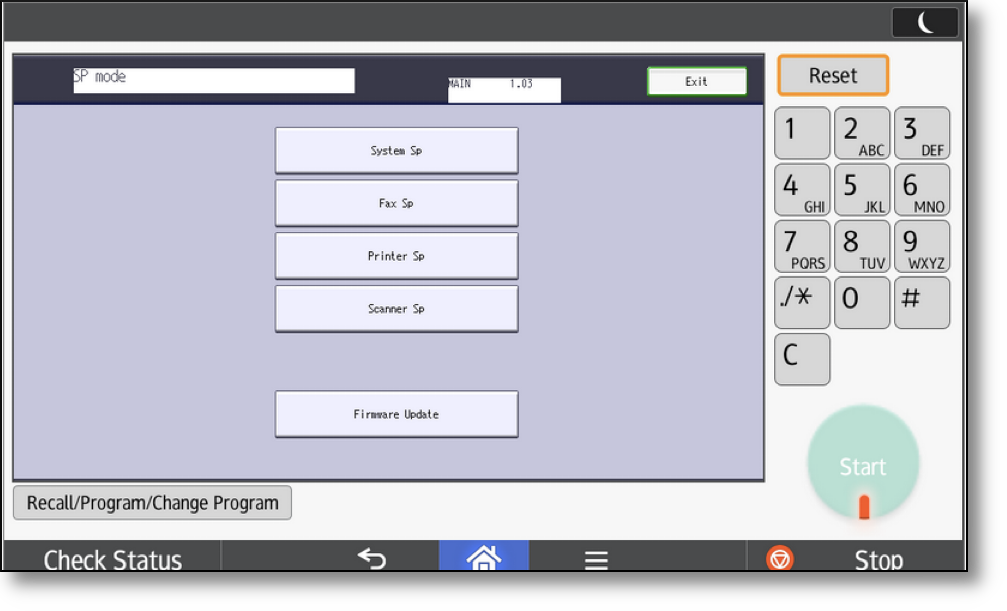
Configuring the SP Mode settings
Touch the System SP button
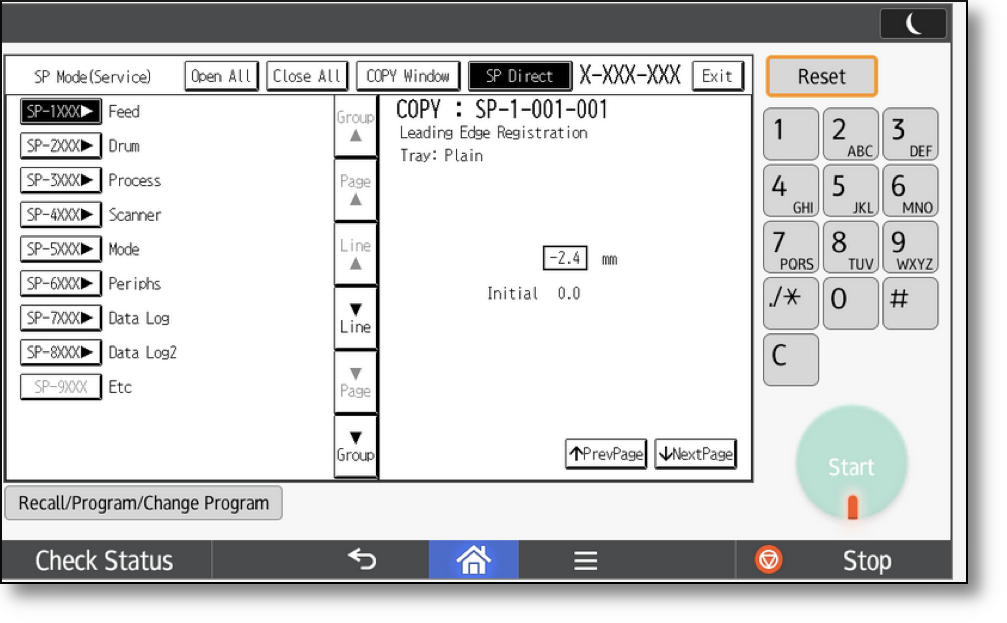
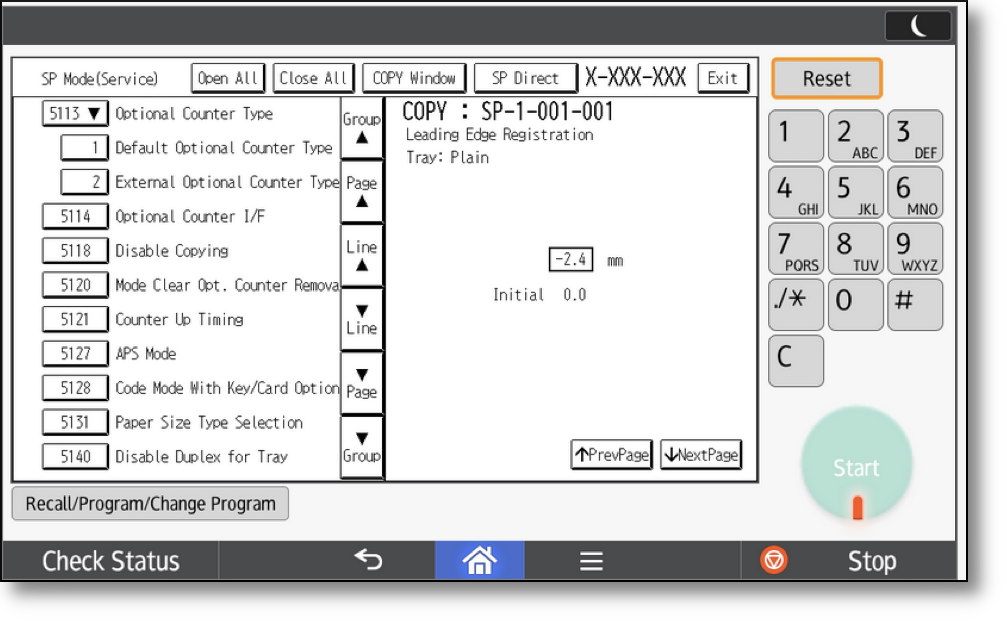
It is necessary to set SP 5113-2. This can be accessed by selecting the SP-5XXX Mode button and scrolling down the subsequent screen until SP 5113 is reached.
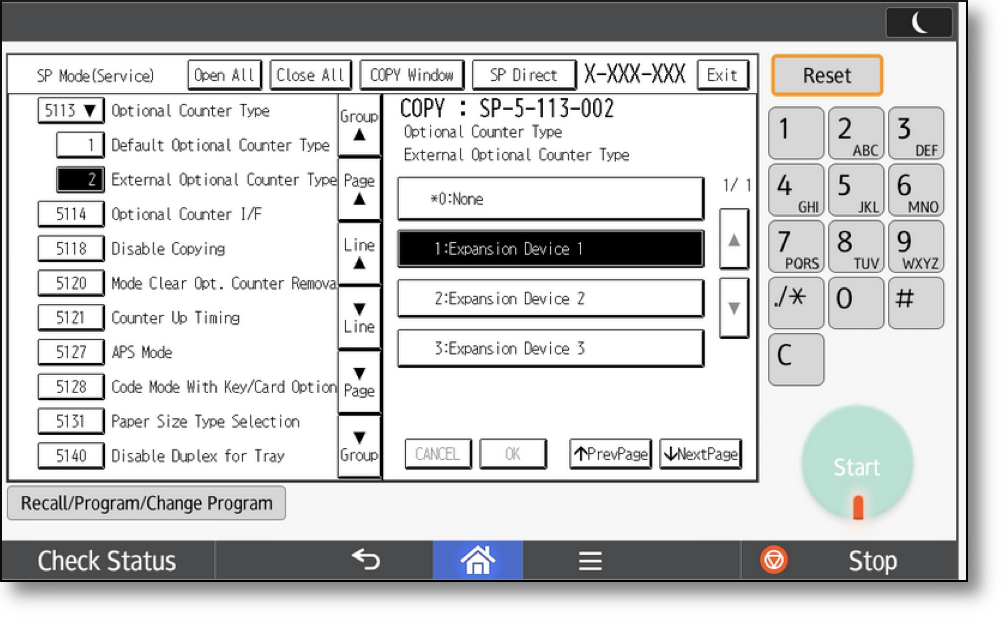
Select 2 under 5113 External Optional Counter Type. Then select 1:Expansion Device 1 and select OK to save the setting.
Select the Exit button to exit from SP mode.
User Tools Settings
Go to User Tools on the MFP using the hard key on the panel.
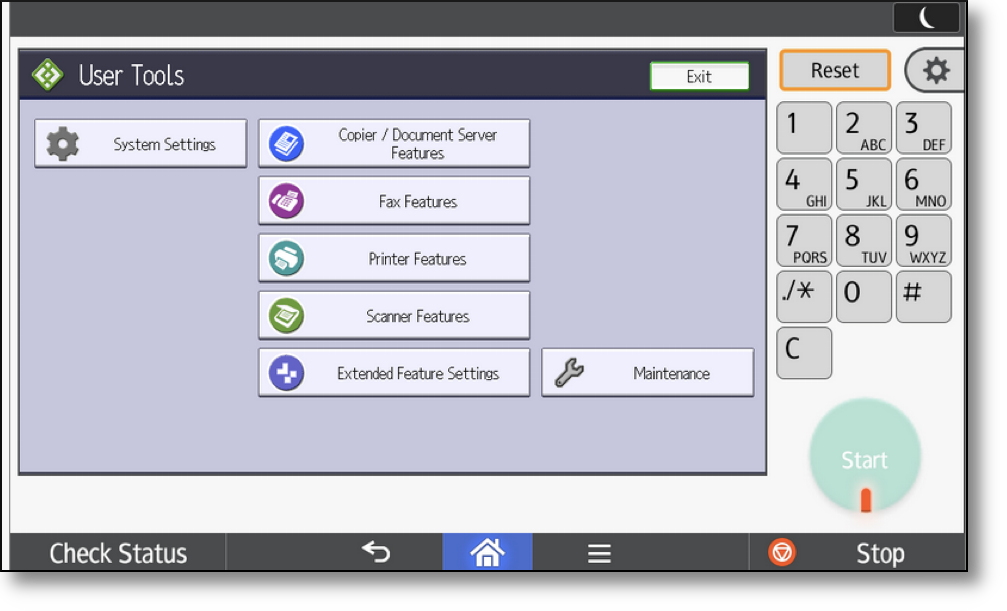
Select System Settings followed by the Administrator Tools tab.
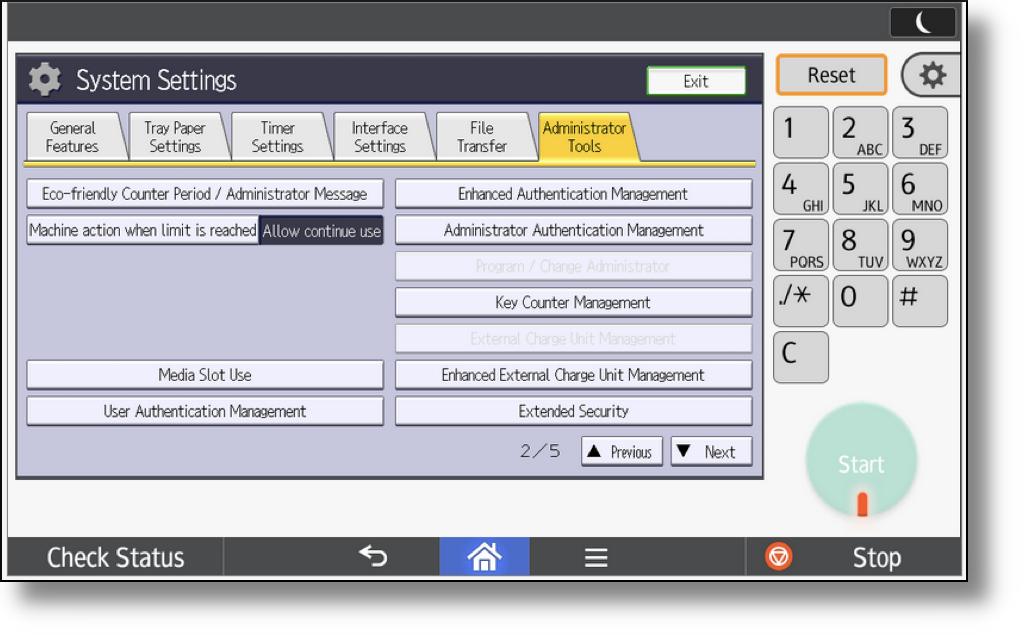
Scroll down and select Enhanced External Charge Unit Management
Now select the functions you wish PriApps to track so that they are all highlighted.
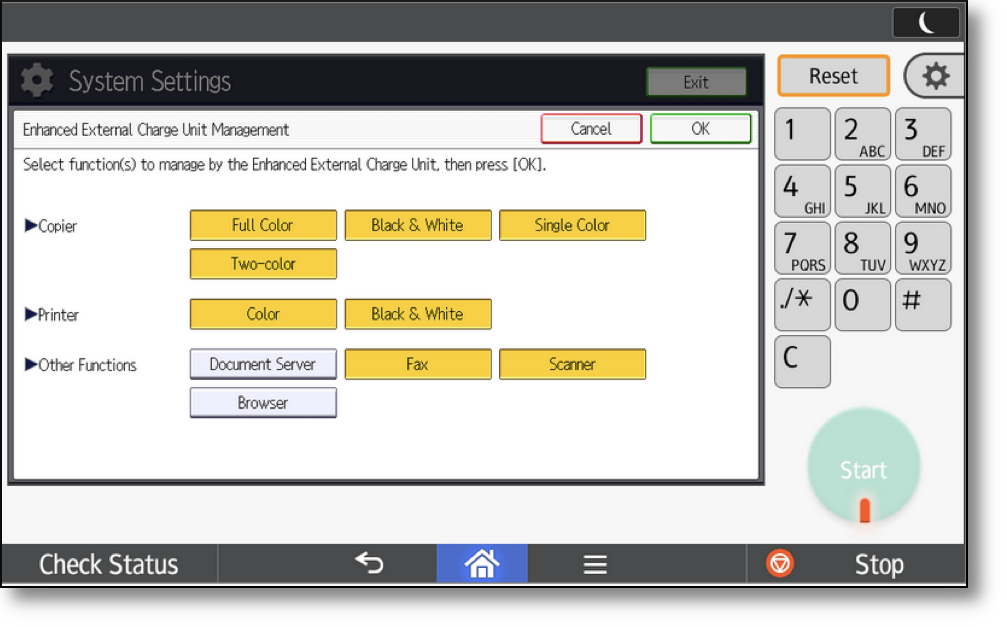
The example shows a typical set of functions.
Touch OK to save the selection and return to System Settings. Select %(color-orange)*Exit*%to return.
Once completed, the MFP is ready to have the PriApps SDK/J application installed and configured.
Need more help with this?
Contact PriApps Support