
To print via PriApps from a MacBook the user must first be created / defined within PriApps (see Creating & Administering Users)
Configuring the MacBook
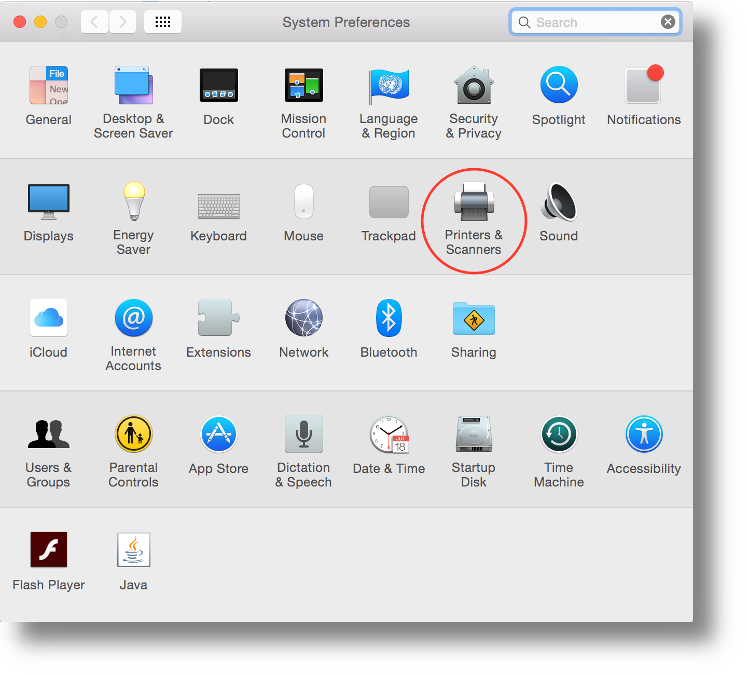
Start by accessing System Preferences and choose Printers & Scanners
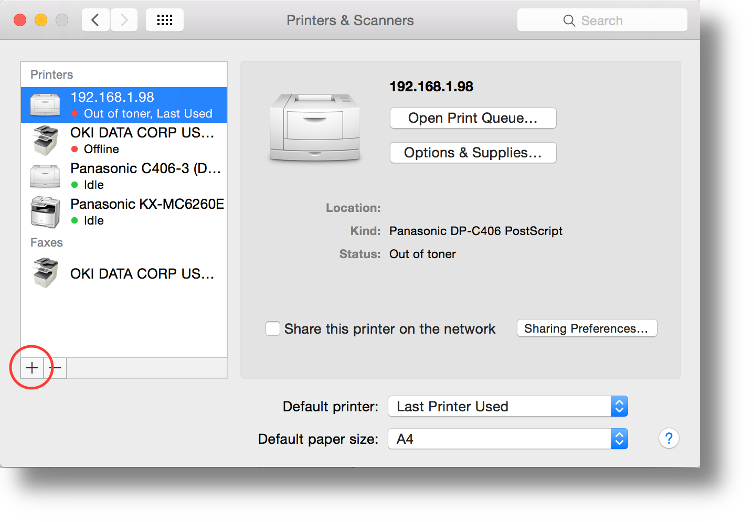
Click on (+) to add a new printer.
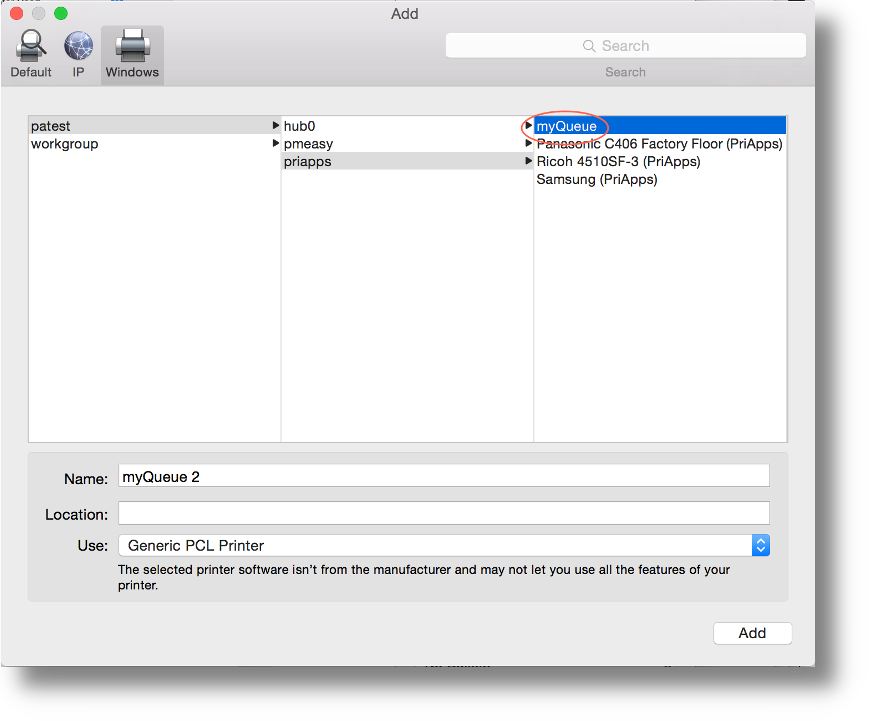
Now click on the Windows button and browse to the printer share on your PriApps Application server that is to be added.
Choose the appropriate driver in the dropdown at the bottom and click Add. If you have a Mac driver for the printer you should use it otherwise use a Generic driver.
You will be prompted to authenticate by the PriApps Application server. Be sure to use the AD / Entra ID / LDAP credentials of the user of the MacBook and not an Administrator account. This ensures that all printing done from the MacBook will be attributed to the user. Remember to choose to store the credentials in your keychain so that you do not need to authenticate each time.
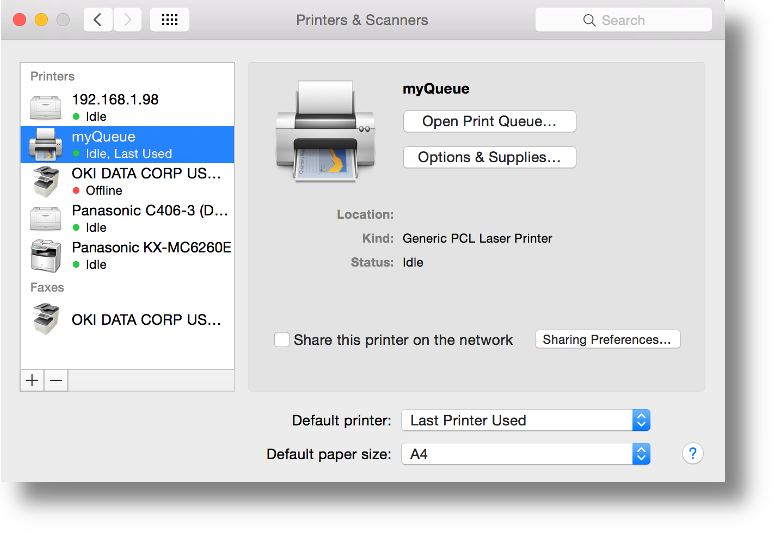
The PriApps myQueue / printer is now added. The user can now print from their MacBook, via PriApps, and release their print jobs at any managed printer / MFP they have permissions to access.
Need more help with this?
Contact PriApps Support