
While it is possible to submit print jobs from a Chromebook by configuring the PriApps myQueue as a printer, PriApps provides a more integrated and secure solution using its Chrome Extension.
To allows Users to submit print jobs to a PriApps Application Server from a Chromebook, users must first install the PriApps Print Extension. Once installed, print jobs are sent to the PriApps Application Server, where they are held until the User releases them on the PriApps Managed Device of their choice.
Users can either install the PriApps Print Extension manually, or Google Enterprise and Education administrators can automatically deploy (force install) the PriApps Print Extension on managed devices or accounts.
Adding the User’s Google ID
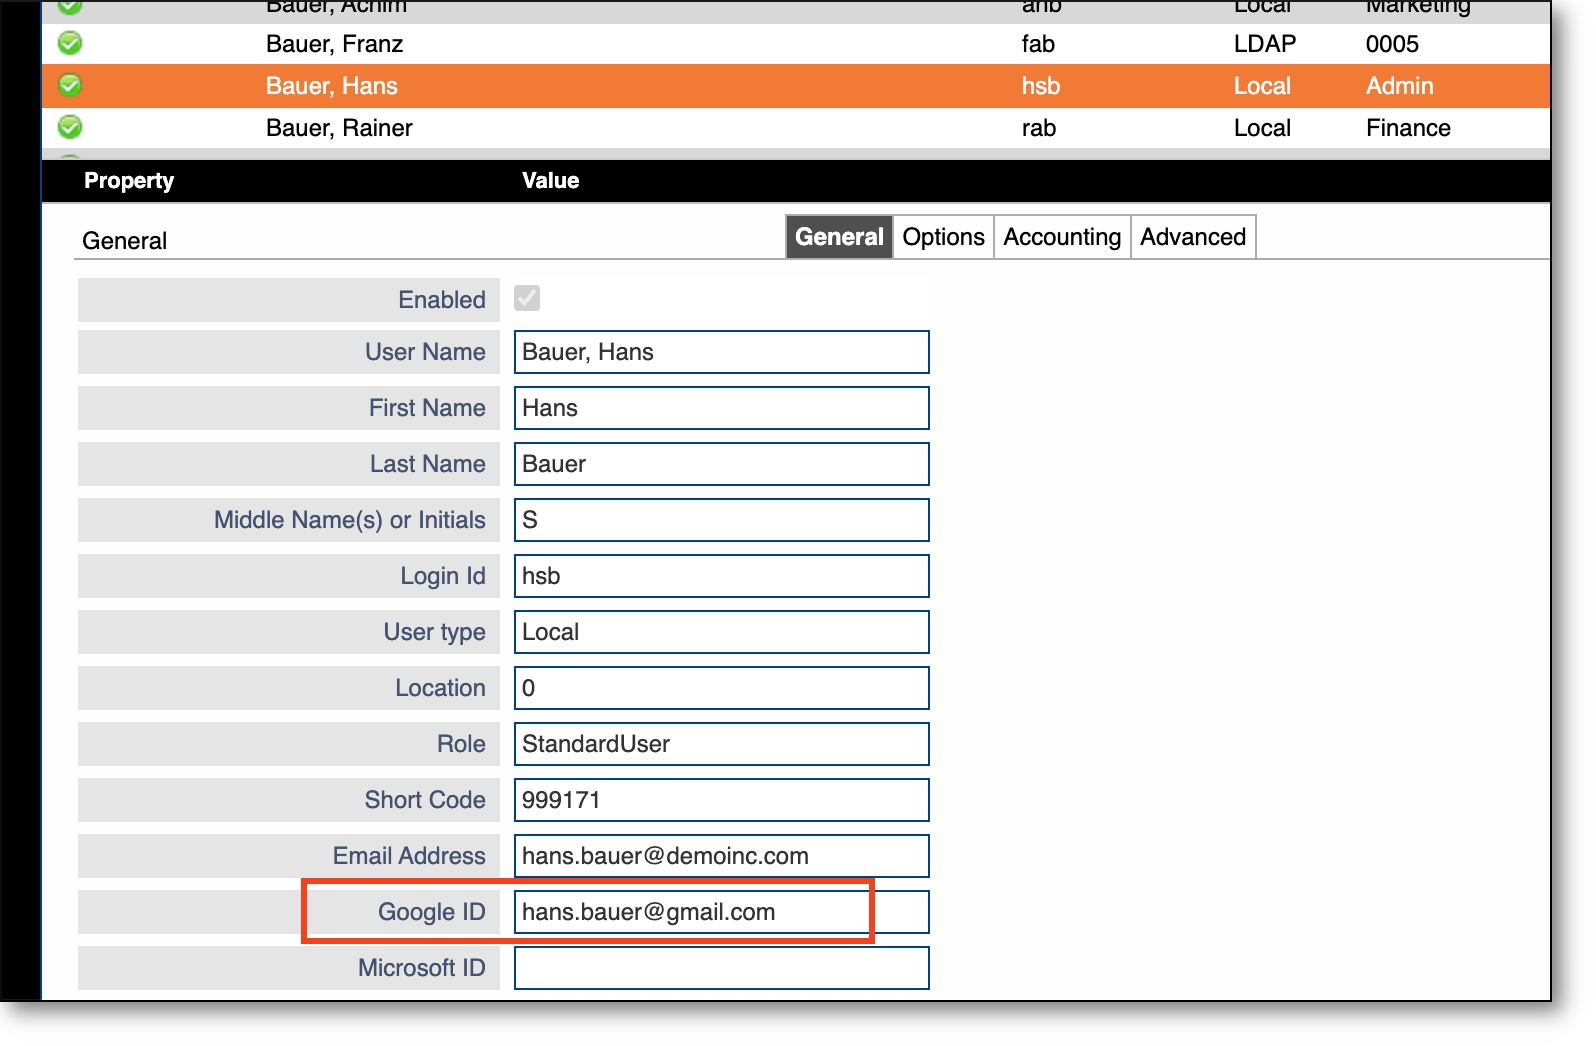
Before installing or deploying the PriApps Print Extension, the Google Account ID that the user signs into their Chromebook with, must be entered against their user account within PriApps.
The Google Account ID can be imported when setting up a PriApps system if it exists as a Field attribute within Active Directory, LDAP, Entra ID, or the User Identity management system that is used to populate and synchronize users.
See Creating & Administering Users
Alternatively, a User’s Google Account ID can be added to an existing User account within PriApps. In the PriApps Admin UI select the Users & Security menu option, then select Users
Find the User Account you want to enable Chromebook print for, then enter their Google Account ID in the Google ID field.
Once a User’s Google Account ID has been added to their PriApps User Account, the PriApps Print Extension can be installed & configured on their Chromebook.
Deploying the PriApps Print Extension Automatically
Google Enterprise and Education administrators can automatically deploy (force install) the PriApps Print Extension on managed devices or accounts.
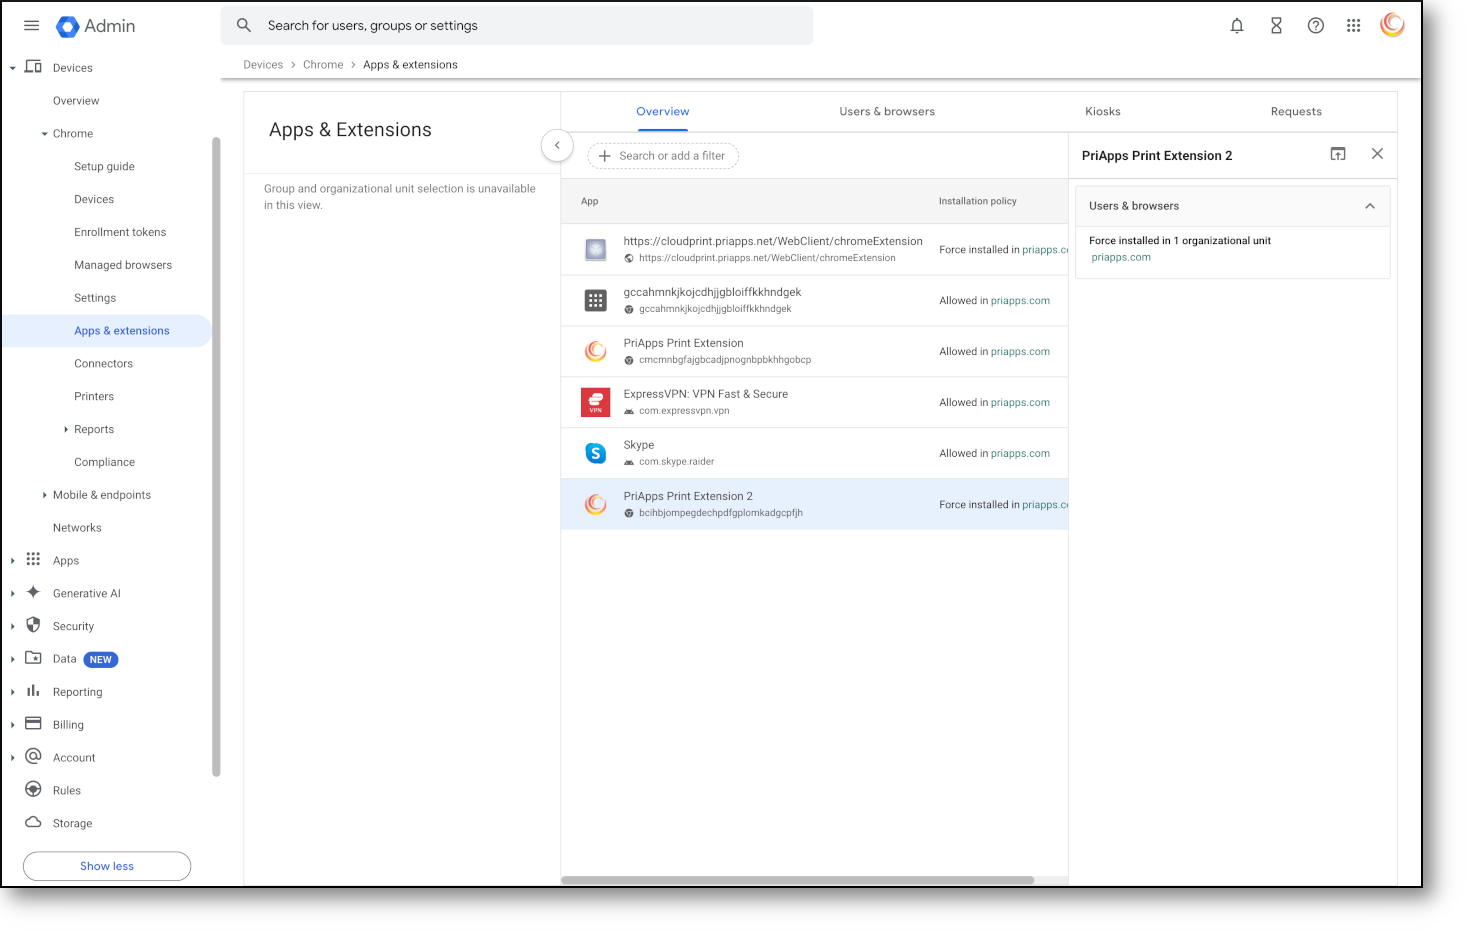
Up-to-date instructions on how to automatically install apps and extensions to managed Chromebooks or Google Accounts can be found here -https://support.google.com/chrome/a/answer/6306504
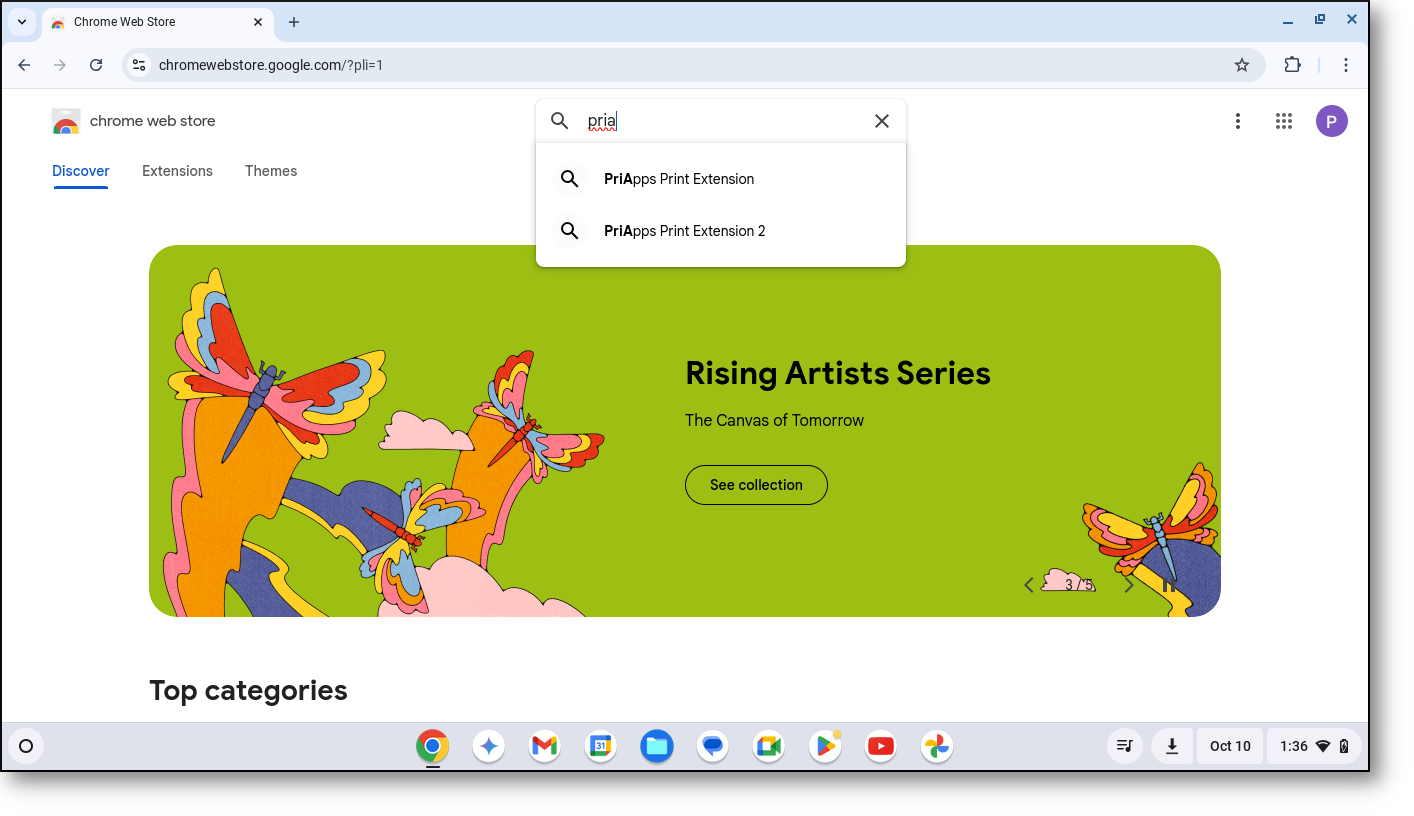
Installing the PriApps Print Extension Manually
Search for the PriApps Print Extension on the Chrome Web store
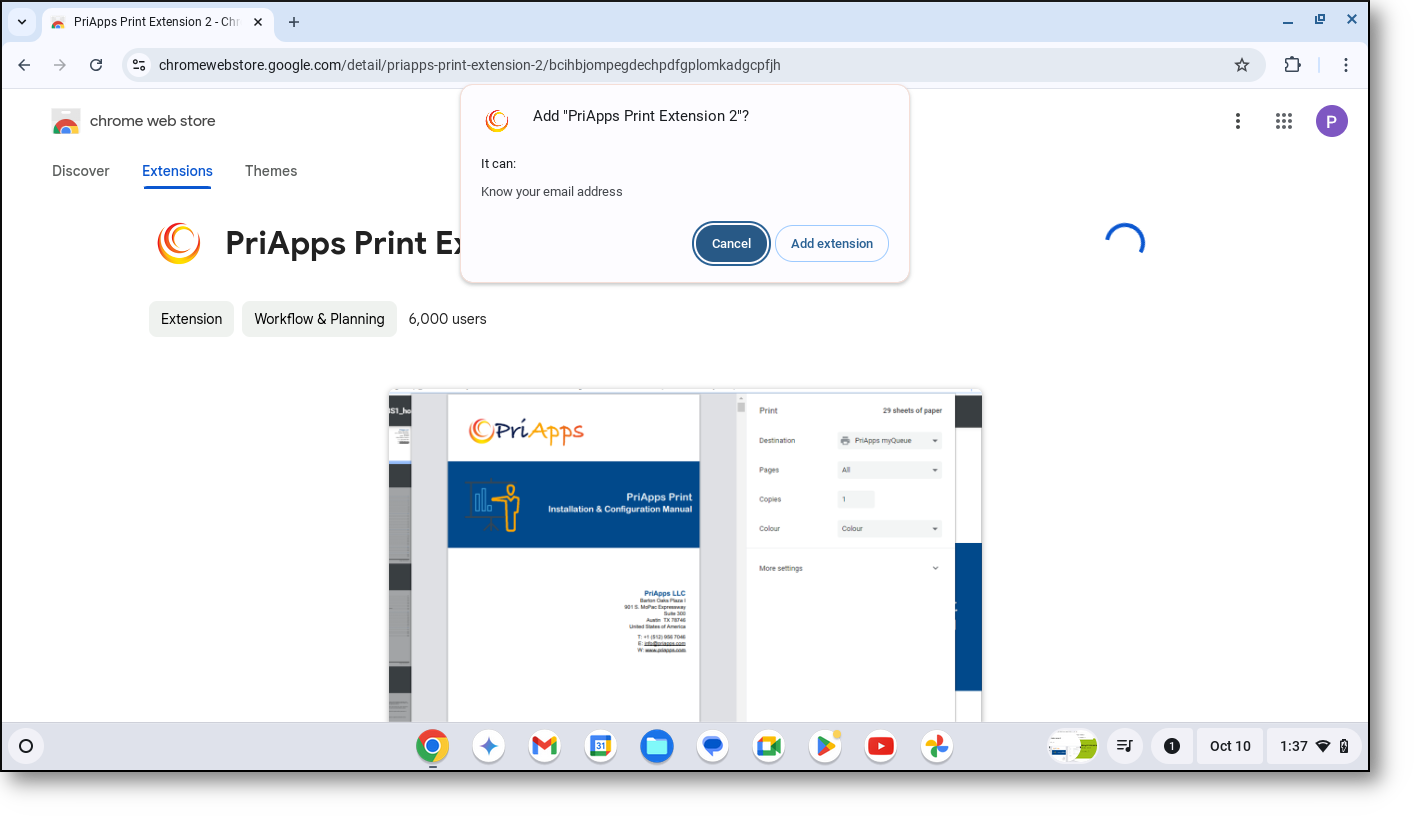
Select Add to Chrome.
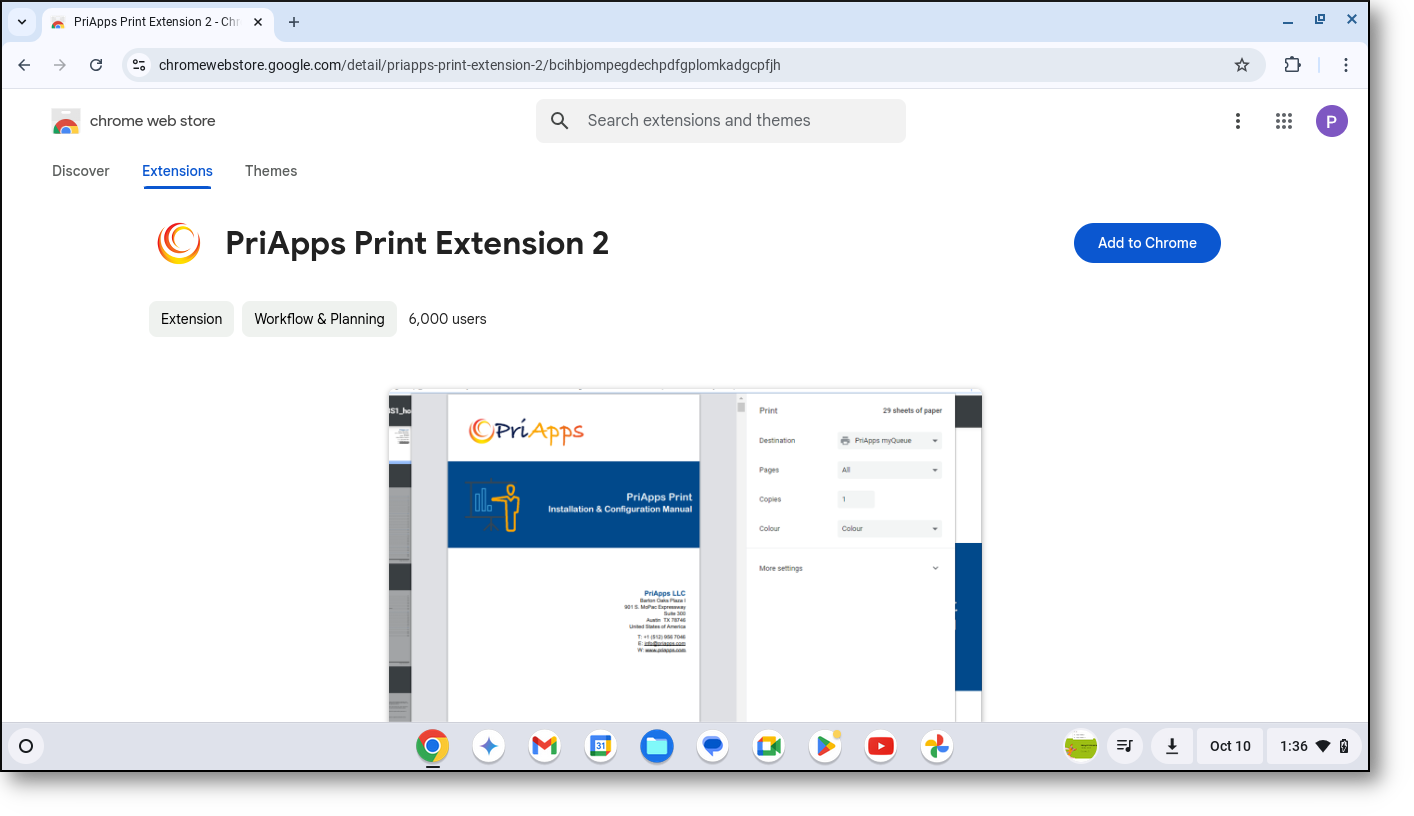
Select Add Extension.
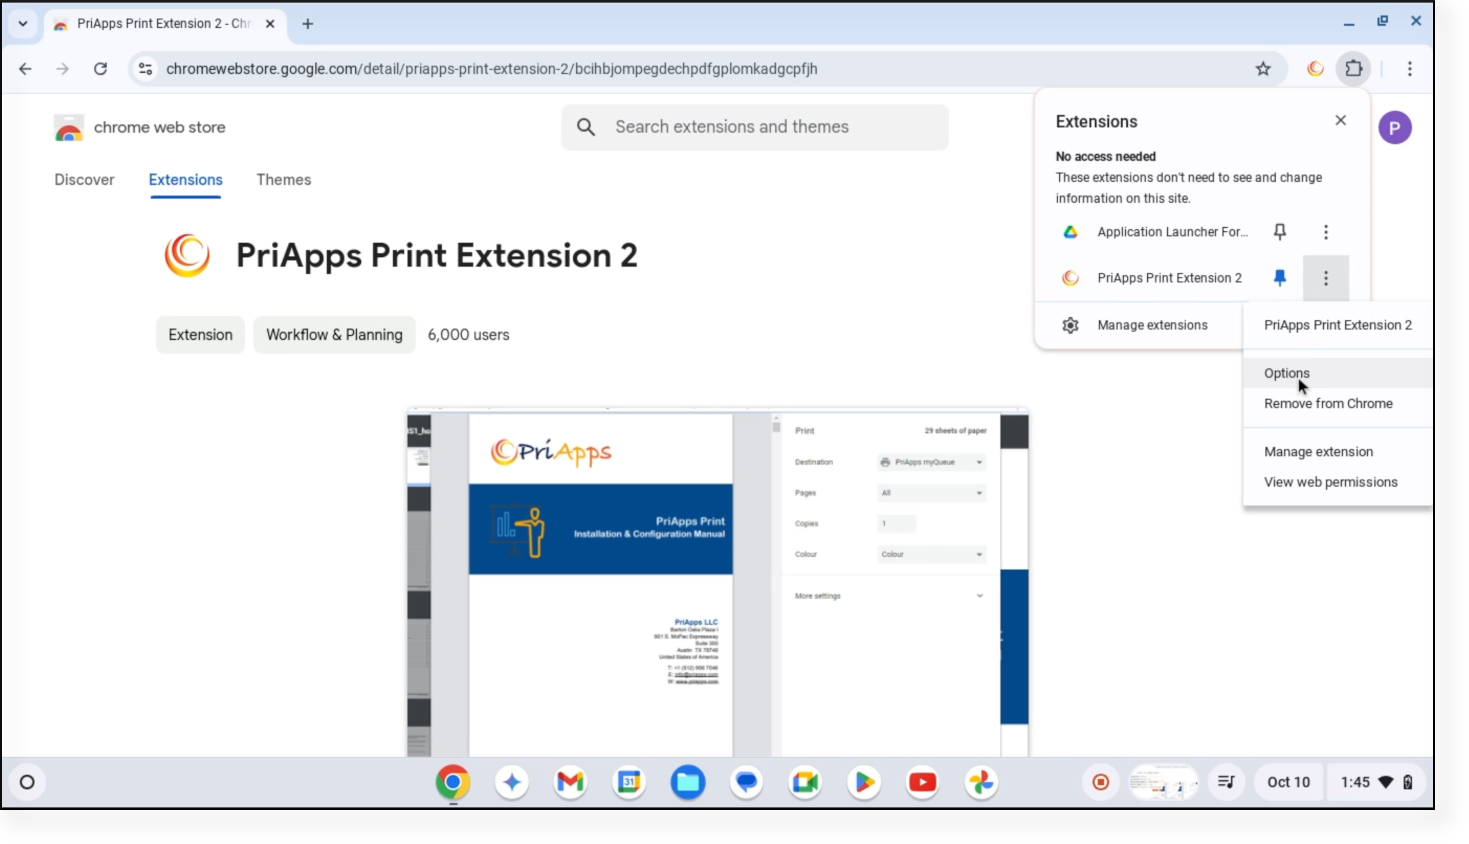
Select the Extensions icon within your Chrome Browser then select Options from the PriApps Print Extension menu
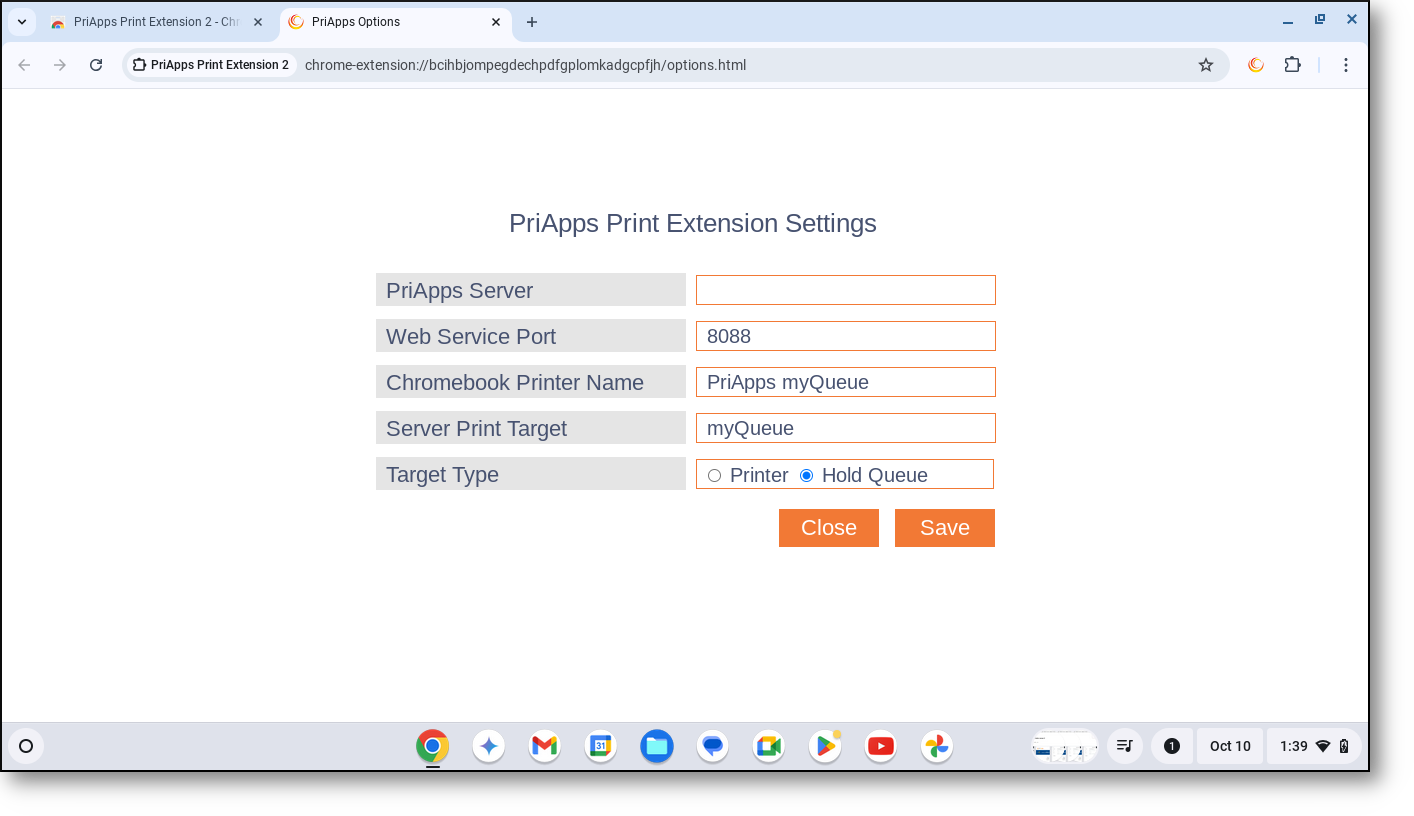
Enter the IP Address of the PriApps Application Server in the PriApps Server field. The Web Service Port should be 8088. All other settings should be populated with the default values. Only change these if your PriApps installation has customized settings.
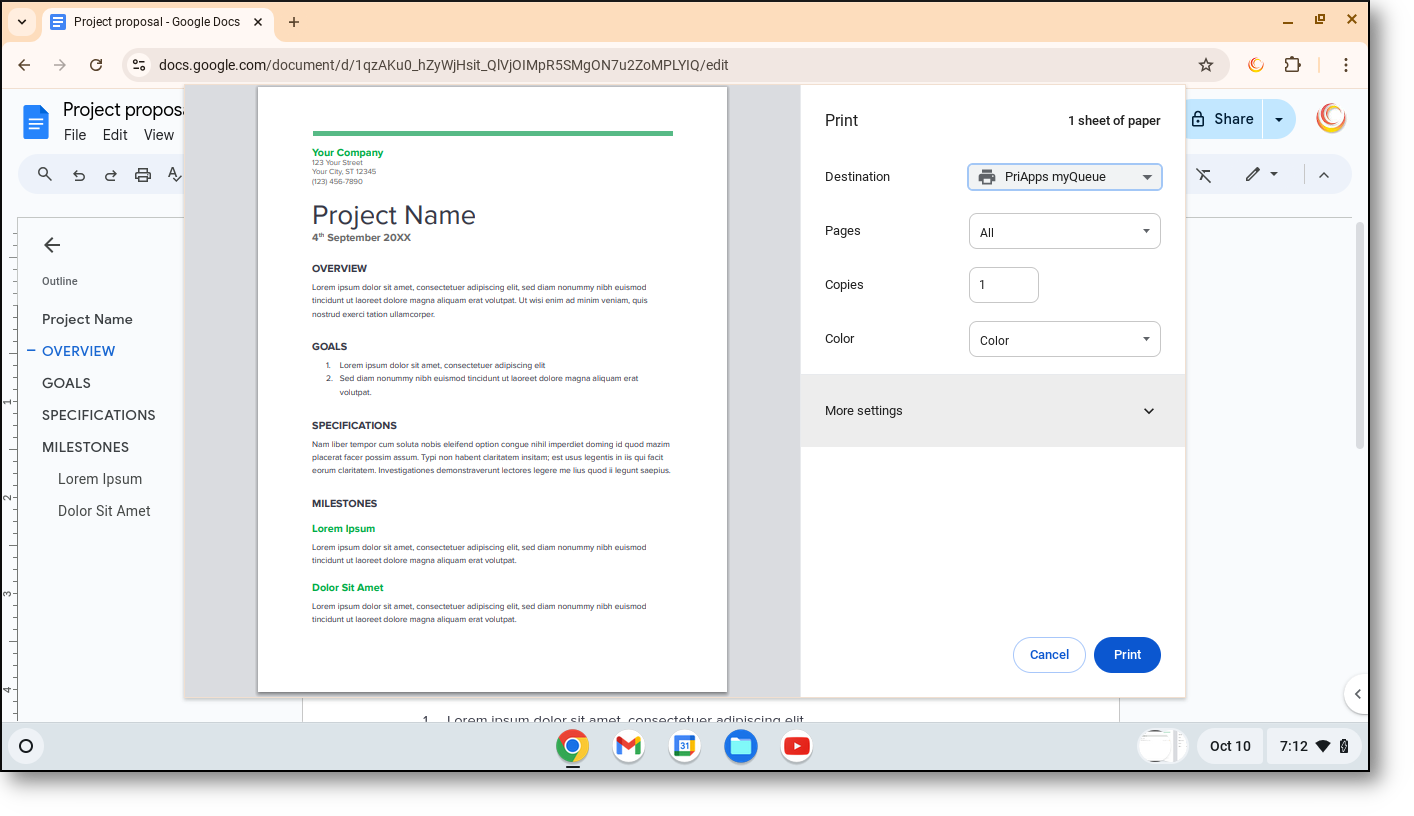
The first time a User selects Print after the PriApps Print Extension has been installed they will need to select the PriApps myQueue as the Destination Printer.
If the PriApps myQueue is not listed on the drop down, select See more
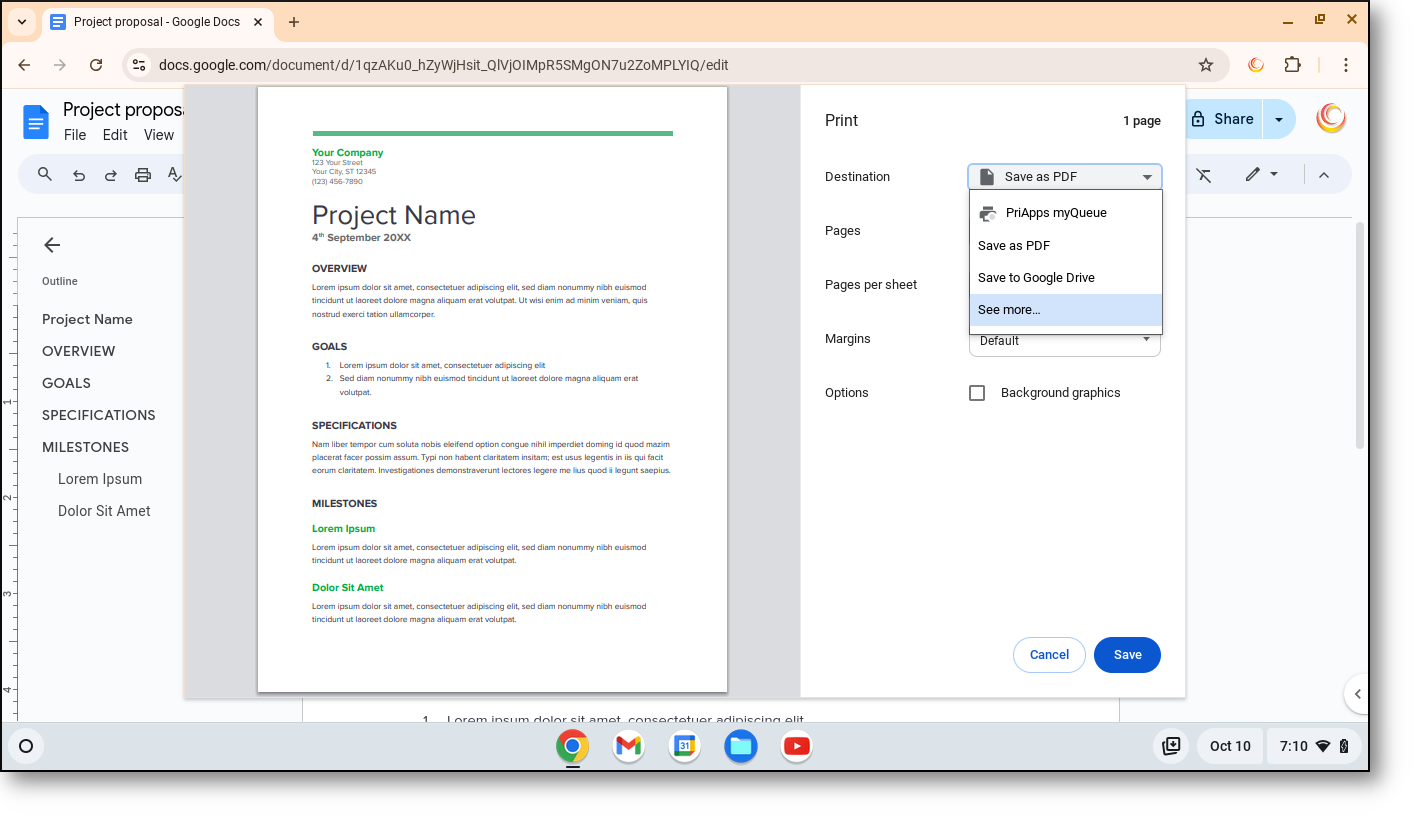
Select the PriApps myQueue, which will be identified as the PriApps Print Extension

Now when the User selects PRINT, the jobs will be sent to the PriApps Application Server and the User will be able to release the print job(s) from their Chromebook along with any other print jobs they have submitted, at any PriApps managed printer, MFP, or copier via the PriApps touchscreen app, their ID Card / door access badge, or their mobile device.
Need more help with this?
Contact PriApps Support