
To create a new requisition, click Requisition Entry/Approval under Modules.
Generate a requisition number by clicking the blue requisition number button and tab over to the Vendor field.

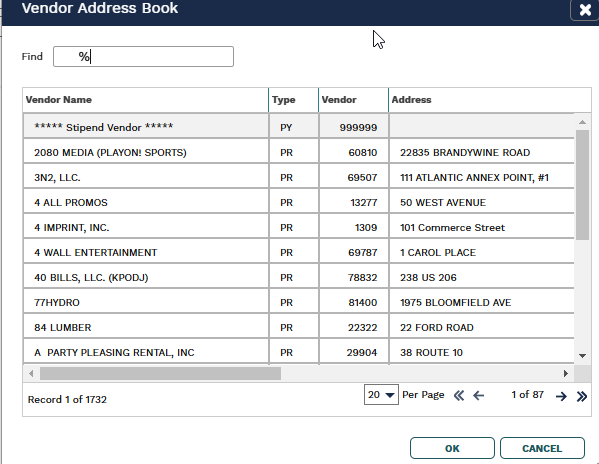
If you know the number of the vendor you’re using, you can enter it into the first vendor field, and then tab, a dialog box will come up to confirm your selection and intended address. The vendor’s information will automatically populate. If you mistype it, the search list will appear. Tab over to the Order field.
![]()

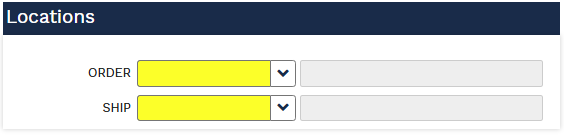
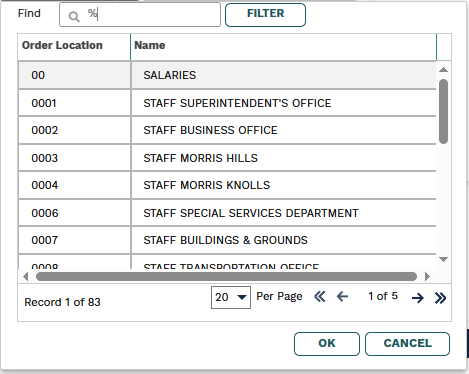
Enter an Order Location and a Ship Location. Both fields must be completed for your requisition to be approved. Use the black arrow next to the field to display a list to choose from. Tab over to the Requestor field.
The requestor field should be the contact person for the order if the vendor has questions. Tab over to the Phone field. Enter the phone number of the person you listed in the Requestor field. This will be printed on the PO. Tab down to the Order Type field.
![]()
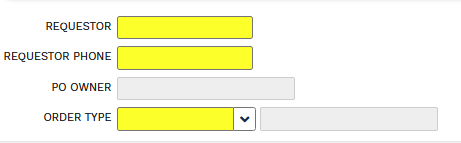
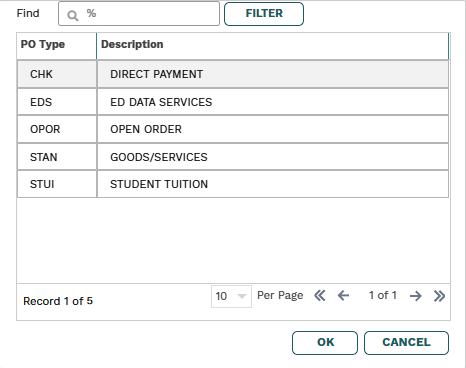
There are multiple Order Types; a complete list is included in this manual. Select the appropriate type. Tab down to the Internal field
![]()
Special Intructions
A – BOSC TICKET # OR NOTE TO BOE
This is an internal field you will use to enter your BOSC ticket or a note specific to those approving.
B – Header Code
There are multiple Header Codes. A complete list is included in this manual. Select the appropriate type and then tab.
C – PO NOTES AND/OR CONTRACT AWARD INFO
Use this field to enter anything required or necessary – See the Order/Header Type and Special Instructions table for reference.
D – PO FOOTER / SHIPPING / DELIVERY INFO
Use this field to communicate any packaging or label instructions to the vendor.

Once you’ve completed the Special Instructions area, click on the Items tab. Once on the Items tab, you will enter the details of your order – you can move from field to field by using the Tab key.
![]()

Use the following as a guide when entering your items. If your requisition is not entered correctly, it will be disapproved.
- Your item must be described in as much detail as possible.
- Requisitions with multiple sizes or styles (custom garments) must be broken down by size, color, style, etc.
- When inputting anything for recurring annual fees/dues, denote the school year, i.e., 2025-2026.
- All requisitions for goods/tangible services MUST include actual, estimated, or free shipping. %
- ACTUAL is when you use the amount listed on a quote, proposal, catalog, or website.
- ESTIMATE is when you estimate 10 percent of the total order for shipping.
- FREE is used when free shipping is quoted, or free shipping is provided as part of the agreement.
- You will get a warning when you enter a zero-dollar line item (e.g., free shipping), but you can bypass it.
- If you need an additional line item, press the + sign icon or enter at the end of an entry. If you need to delete a line item, you will use the trash can icon.
- When you’ve entered all of your items, click on the Accounts tab to move on.
The third tab, Accounts, identifies the GL account number used for your requisition. The account selection will also dictate the appropriate approval chain for the requisition.
![]()
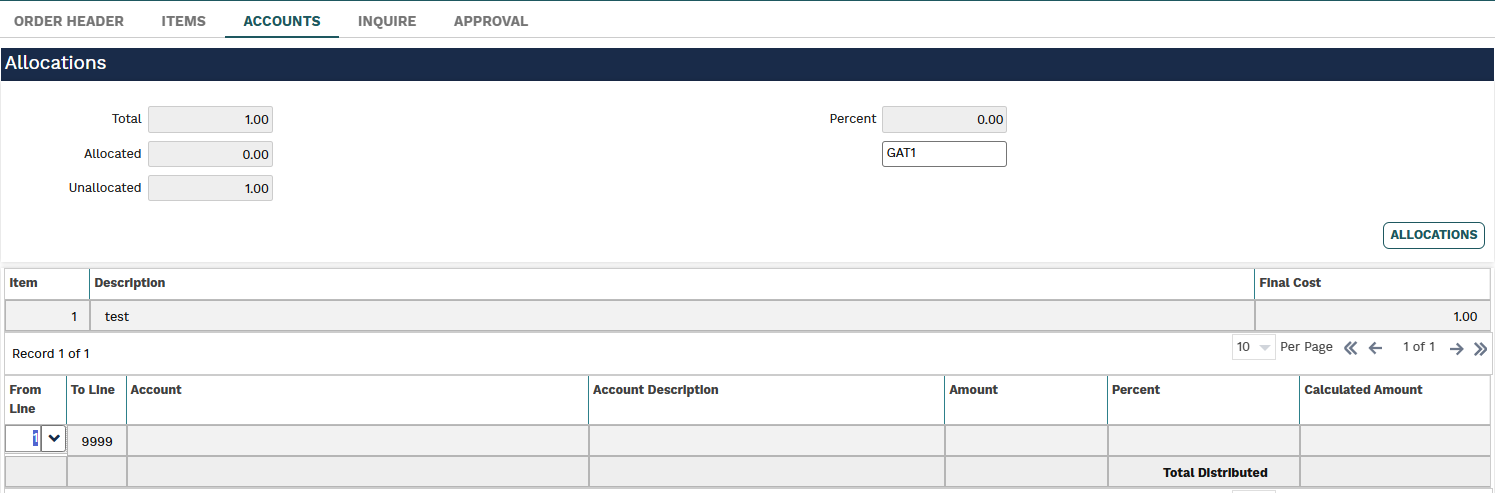
Use the drop-down arrow to select from a list of accounts.
- Using the additional lines provided, you can select multiple account numbers to split the expense across multiple accounts. You will need to break down the amount to be allocated per account number used. The total percentage must equal 100 to submit for approval.
- If you want to use a specific account number in a particular line item, you can use the From to Line fields to achieve this.
- Tab to the Amount field and enter it (if you pay everything out of one account, it will automatically appear.
- The calculated amount will automatically populate, and under the “Range,” all amounts will be allocated. You will not be able to finish a requisition if your Item Total and Account total don’t match, if you have any amount Unallocated, and if your Total Distribution doesn’t match your item Total.
- Once the accounting is complete, click on the ‘Finish’ button.
- The Requisition status will change to “Needs Approval By:…” and the next Approver in the chain will be identified by their role.
Revision:
60
Last modified:
25 March 2025