
| |
This is the Map icon. | |
This is the Delete icon. |
| |
This is the Show Camera Bag icon. | |
This is the Upload Map icon. |
| |
This is the Hide Camera Bag icon. | |
This is the Zoom In icon. |
| |
This is the Camera icon. | |
This is the Zoom Out icon. |
| |
This is the Rotate icon. |
You can make changes to your Maps at any time.
- To edit a Map, click on the Camera Group to expand it.
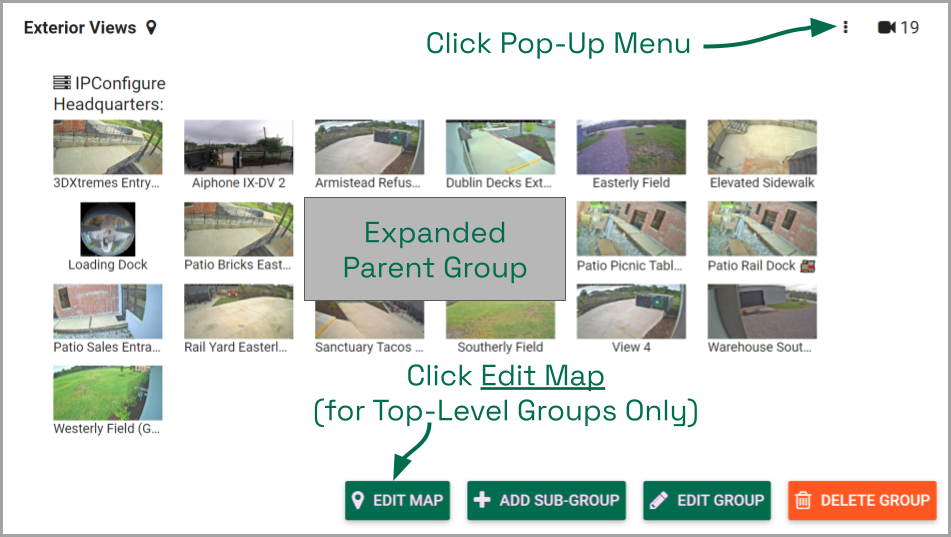
- To edit a map for a top-level group, do either of the following:
- Click the Edit Map button at the bottom of the group screen, or
- Click on the group’s pop-up menu and select Edit Map.
- To edit a map for a sub-group:
- Click on the sub-group’s pop-up menu and select Edit Map.
The Edit Map screen will appear.
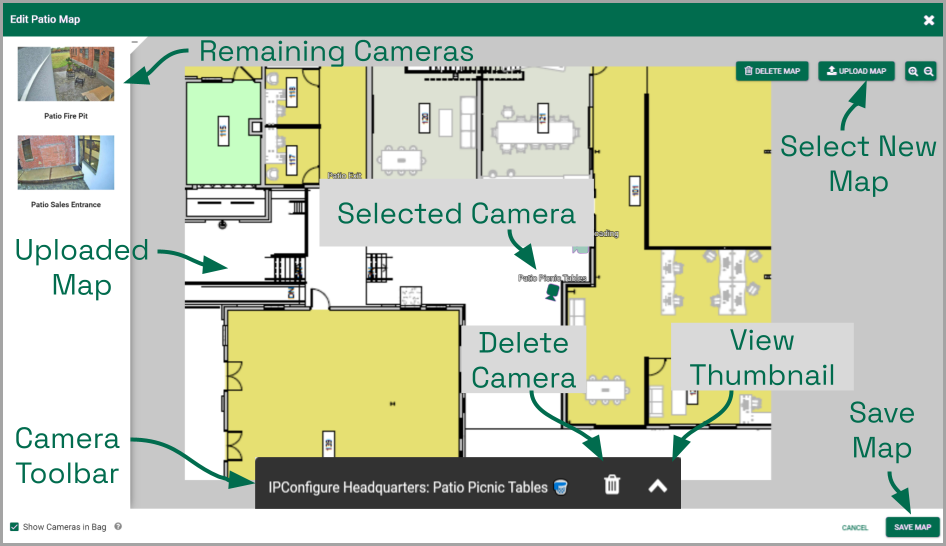
Using the Edit screen, you can:
- Add any of the group’s remaining cameras
- Double-click one of the available thumbnails, or
- Click & drag one of the thumbnails to a specific location.
- Reposition cameras
- Click & drag to move the Camera icon to another location.
- Click & drag the Rotate icon to adjust the Camera icon’s point of view.
- Delete cameras
- Click on the Camera icon.
- Then click the Delete icon on the camera toolbar (and confirm).
- Replace the Map image
- Click the Upload Map button.
- Then click the Choose File button to select a new Map image.
- This will replace the background image but keep the cameras in position.
- Change the Show Cameras setting
- Mark the box to show this group’s cameras in the main Camera Bag.
- Un-mark the box to hide the cameras in the main Camera Bag.
- Delete the entire Map
- Please refer to the next topic.
- After all of your changes are complete, click the Save Map button.
Post your comment on this topic.