
| |
This is the Add icon. |
- Click the Add User button in the top-right corner of the Alto Users list. A New User screen will open.
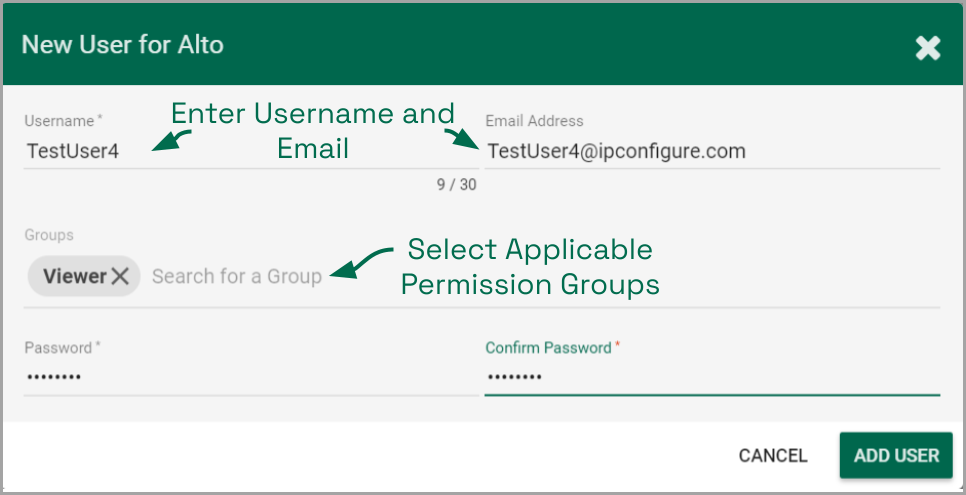
- Enter the username you would like to set for the new user in the Username field.
- Enter an email address for the new user. (The email address is not a required field, but it is important in a couple of situations. If the user will be signing in via Google authentication, the email field must match the user’s Google email address for successful sign in. If the user is going to be selected as a recipient of a Notification, they must have an email address. The system will only allow one user per email address.)
- Click in the Groups field to select all of the Permission Groups that apply to the new user. These selections will determine what the user will have access to. As soon as you select a Permission Group, another list will appear so you can make another selection (if needed). If you have not yet configured any Permission Groups, you can leave this field blank for now. (See notes below.)
- Press Esc if you don’t need to make another selection.
- To remove a Permission Group, click the X to the right of the Permission Group name.
- Enter the password for the new user into the two fields labeled Password and Confirm Password.
- Click the Add User button at the bottom of the screen to create the new Orchid Alto VMS user.
The new user will now appear in the Users list and will have immediate access to Orchid Alto VMS.
Superuser Status
Orchid Alto VMS allows the creation of a Superuser. Superuser status is reserved for users that are assigned to an administrator permission group, and can only be assigned and modified by IPConfigure Support staff.
Post your comment on this topic.