
- Open the System Menu in the top-right corner of the screen and select Camera Groups.
The Orchid Alto VMS Camera Groups screen will appear. This screen displays a list of all the current Camera Groups and gives you the ability to add, edit, and delete them.
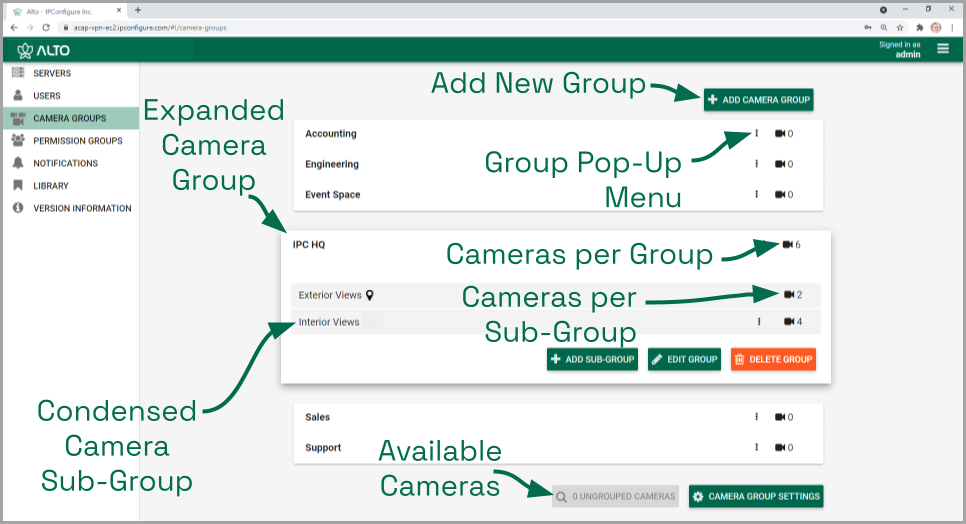
A quick look around…
- Click on any row that represents a Camera Group to expand or collapse the Camera Group details.
- For a top-level Camera Group, the number of cameras in the Camera Group includes the cameras in the top-level Camera Group, plus the number of cameras in each Sub-Group.
- To manage top-level groups, you may use the buttons or the pop-up menus.
- To manage Sub-Groups, use the pop-up menus.
- If the Map icon appears next to the group name, this means that a Map is available for this Camera Group.
The Camera Groups screen lists up to 10 Camera Groups per page (by default). If you have more than 10 Camera Groups, additional pages will be added automatically. This will also activate the page navigation tools and the search feature.

The navigation tools will appear at the top and bottom of the screen. These will allow you to move easily from page to page.
Post your comment on this topic.