
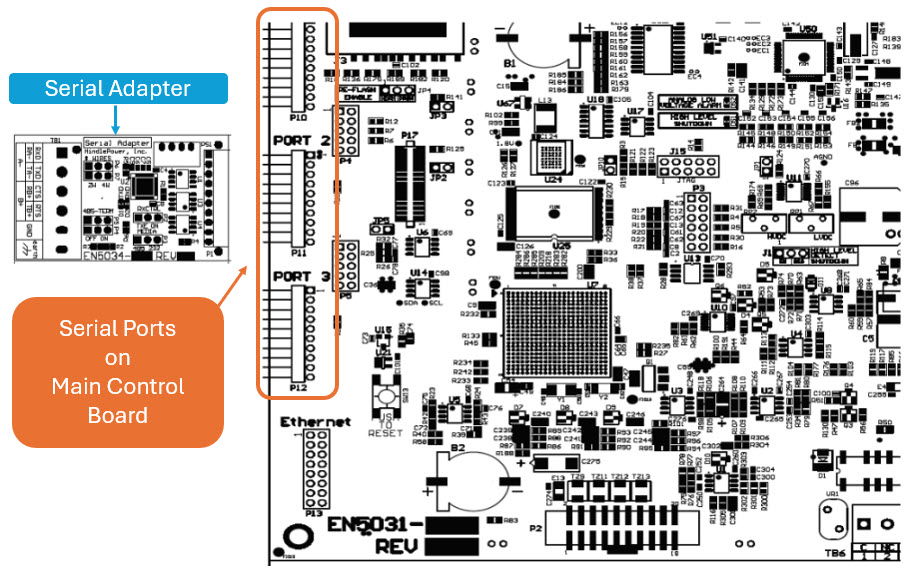
Each Serial Adapter is configured independently and can be set to connect to different network types. Serial Communications Adapters can be plugged into “PORT 1” (P10), “PORT 2” (P11), and/or “PORT 3” (P12) located along the left side of the Main Control Board. Both PORT 2 (P11) and PORT 3 (P12) will support DNP3 and Modbus protocols.
To install a Serial Communications Adapter:
- Turn off (open) both AC Input (CB1) and DC Output (CB2) Circuit Breakers.
- Wait for the ATevo dc voltage to ramp down (display will go blank and all LEDs will be off).
- Open ATevo front panel door.
- Remove ground connection from lower-left corner of the Main Control Board (A1).
- Carefully disengage the Main Control Board (A1) from the left side standoffs.
- Make sure you correctly configured settings for Serial Communications Adapter Boards (see Sections 3.1.2 through 3.1.7).
- Locate the Serial Communications Adapter connection ports (P10, P11, & P12) along the left side of Main Control Board (A1).
- Carefully slide socket (P1) of the Serial Communications Adapter onto pins of one (1) connection port (P10, P11, or P12) of the Main Control Board. For Modbus or DNP3, use P11 or P12.
- Hold the Serial Communications Adapter at an angle to clear standoffs on the front panel door.
- Once the Serial Communications Adapter socket is fully engaged on the Main Control Board header pins, line up the hole on the Serial Connection Board with the plastic standoff pin.
- Press down on the Serial Communications Adapter and the Main Control Board to lock them onto the standoffs.
- Replace the ground connection on the bottom-left side of the Main Control Board.
- Make note of which numbered port (2 or 3 for Modbus or DNP3), to which the Serial Communications Adapter is now connected.
- Close the ATevo front panel door.
- Turn on (close) the AC Input Circuit Breaker (CB1), then close the DC Output Circuit Breaker (CB2).
- The Serial Communications Adapter hardware is now installed.
- Refer to Section 4.1 to assign a protocol and configure communications parameters (baud rate, parity, etc).
Last modified:
16 April 2025