The Sygic app will calculate your route when you tap the “Get directions” button, after choosing your destination (see Choosing the destination).
Before you begin navigating, there are a few available options to customize or Preview your route.
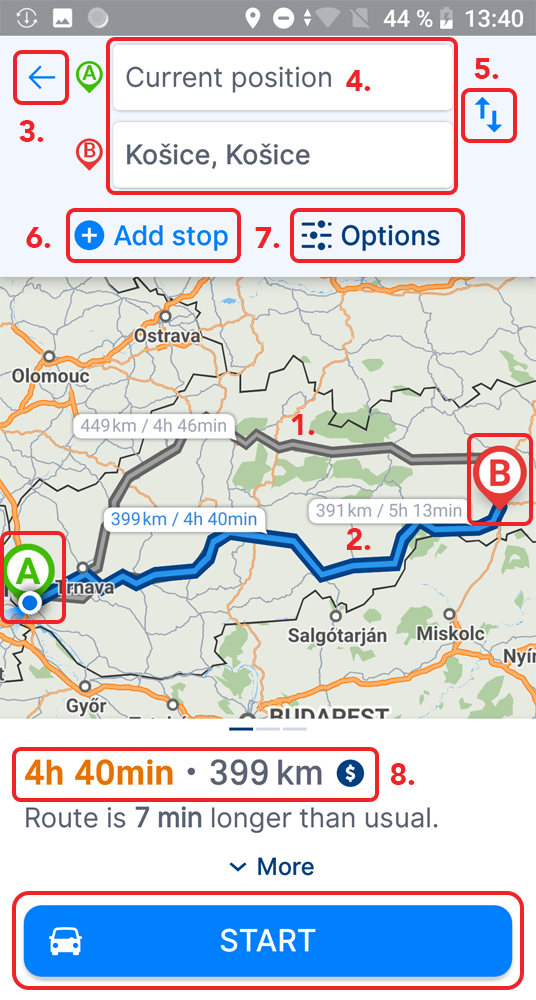
This picture shows the route selection screen. It contains several options and information:
1. On the map you can see between one and three route suggestions that have been found, with brief information about them on the bottom bar. The green “A” marker is the start of the route and red marker “B” is the destination.
2. The route recommended by the app is distinguished by a darker blue color. You can select a different route if more than one route is offered, by swiping the bottom bar to the left or by tapping on the lighter grey route lines.
3. In the top left corner, you can cancel the route selection and get back to map browsing by tapping the back arrow icon.
4. Here you can view or tap to change your starting and destination points.
5. This button will swap your starting and your destination points.
6. You can add stops/waypoints to your route (refer to Waypoints section)
7. Here you can access route options. You can select navigation mode → Vehicle or Pedestrian. You can also select to avoid highways, Toll Roads, Ferries, Unpaved roads or Congestion charges on this particular route. These options may be grayed out if they are not applicable to the current route, and can be set separately for every country your route takes you through.
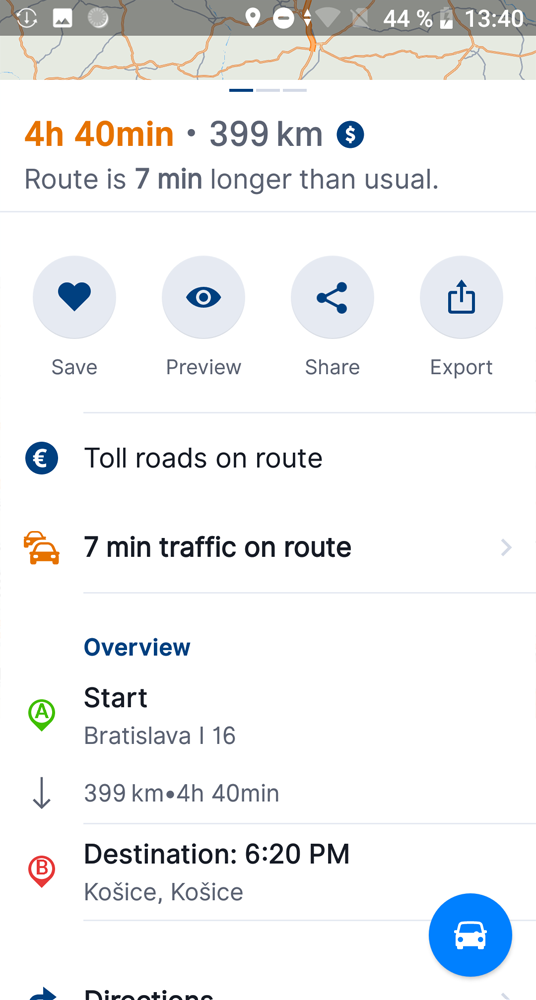
8. The bottom bar shows a little more information about the currently chosen route and a “Start” button, which will start navigating. When you pull the bottom bar up, you will see options to save the route to favorites, preview the route, share and export the route, as well as the list of turns. If your route has a starting point different to your current location, the “Start” button will be called “Preview” and it takes you automatically to a demonstration of the route, not to actual navigating.


Post your comment on this topic.