
This functionality allows users who aren’t familiar with BPMN methodology’s best practices to create flow objects right from the creation form of a new process. A live Swimlanes Map will be generated as you add flow objects, to give you a glance of what the process map would look like once created.
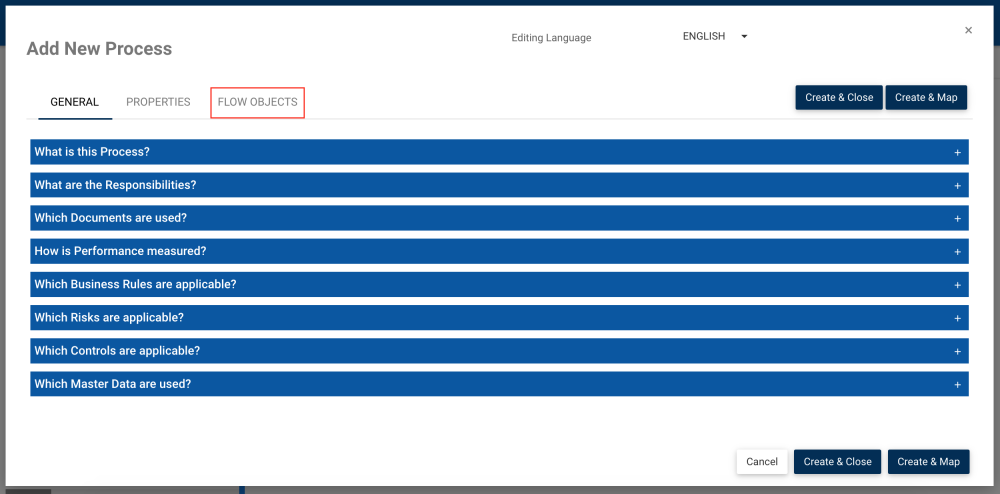
In this tab, users can define:
- the type of flow object: start event, task, gateways, sub process, or end event
- the description of the flow object
- the role responsible for that flow object
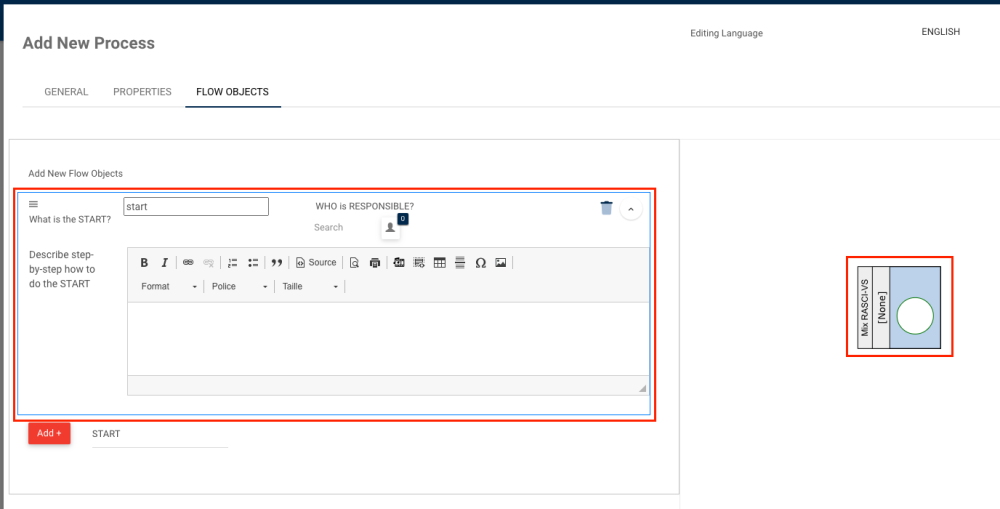
To create a process and its flow objects, please follow the steps below:
1. Create a process with the New button, from the Tree or from the Details tab
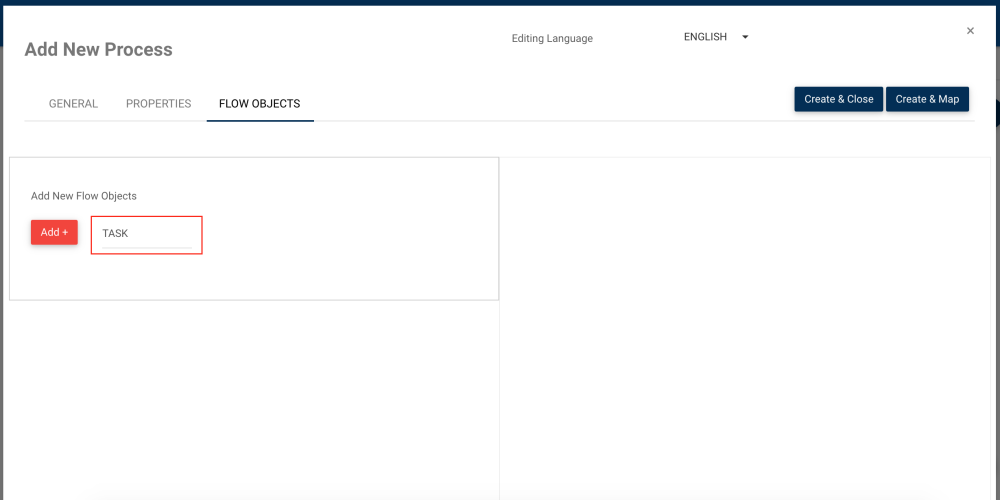
2. With the desired details entered in the GENERAL and PROPERTIES tabs, click on the FLOW OBJECTS tab.
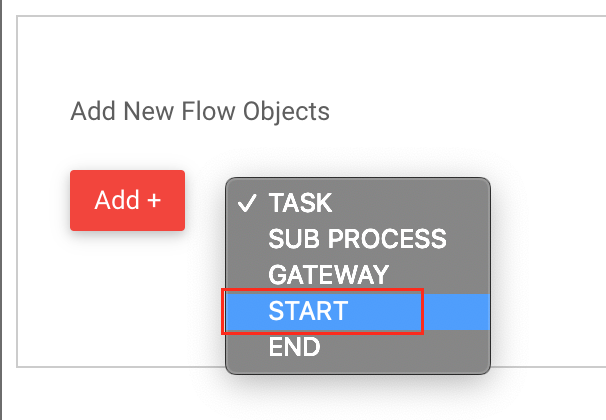
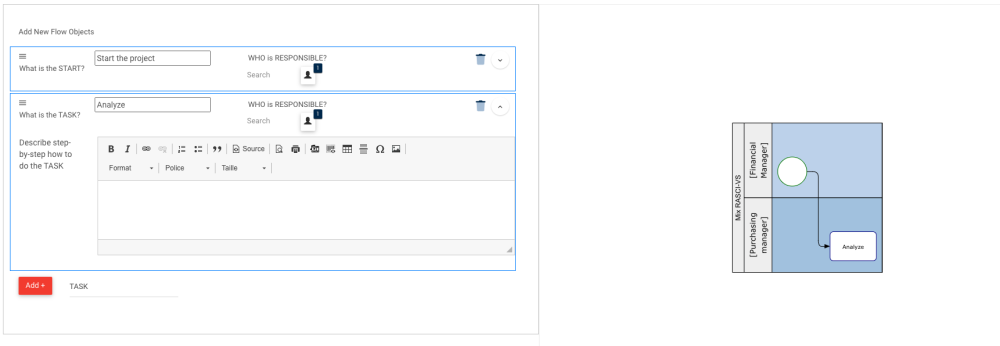
3. Here you can start adding your flow objects. To choose the event you want to start the process with, click on the TASK box to open the drop-down menu.
4. Most of the time, processes begin with a start event. This is what we will select from the drop-down menu.
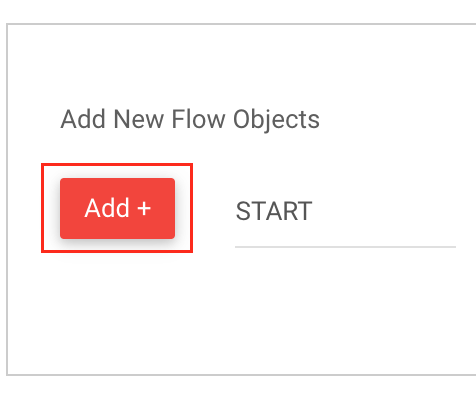
5. When selected, click on the Add+ button.
6. The flow objects will be added in the swimlanes map on the right side of the screen. You can add the flow object details in the left side of the screen.
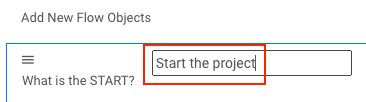
- Add the name of the flow object in the “What is the start” section:
![]()
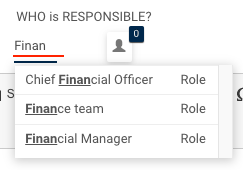
- Add the responsible role for this flow object by typing the name in the “Who is responsible” section. The drop-down will populate according to what you type. Click on the desired role to add it:
![]()
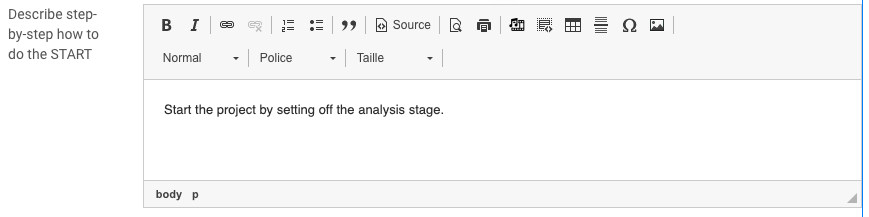
- Add the description of the object here:
![]()
- Click on the trash can icon to delete the object:
![]()
- Click on the upward arrow to collapse the start event section:
![]()
7. When the details are done for the start event, you can move on to another one by choosing the type of the next flow object and clicking on Add + like the previous steps 4 and 5.

8. The Swimlanes Map will continue du build as you add flow objects.
9. For gateways, the process is a bit different. You can type the name of the first path (1) and select the next flow object type for this path (2). Repeat the same process for the second path.
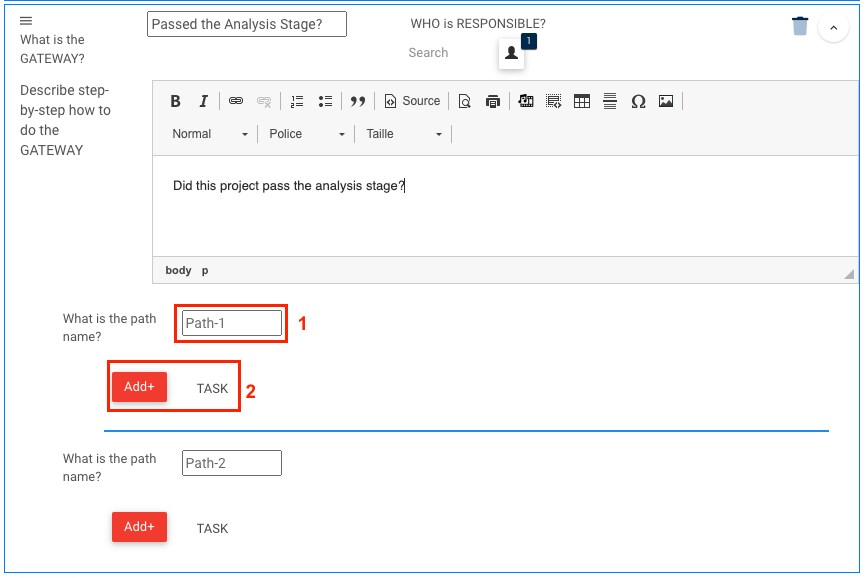
10. When your paths have been defined, this is what it should look like:

11. When your process is completed, click on the Create & Close button

12. You’ll be redirected to the graph page of the new process you created

For a live example, please consult this video:
Haben Sie noch weitere Fragen?
Visit the Support Portal