For those unfamiliar with using the file attachment field in the DBP web application, the following instructions will guide you through the process:

- To attach a file, click on the
![]() button. A pop-up window will then appear with the following functions:
button. A pop-up window will then appear with the following functions:
![]()
- Select File: This button allows users to choose files for upload.
- If selected, a file dialog will appear, enabling users to browse and choose files from their local system.
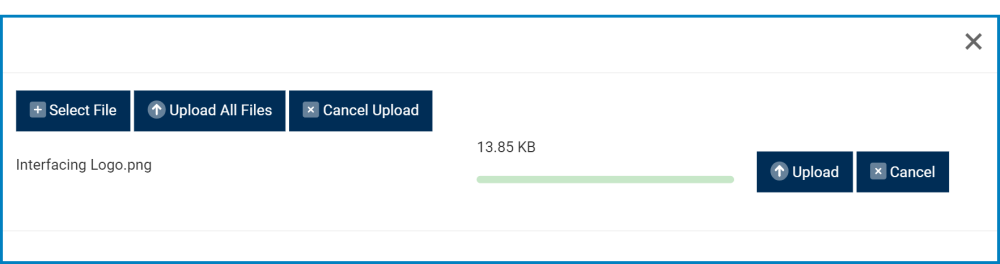
- Once a file has been selected, it will populate the form in the following fashion:
![]()
- Upload: This button allows users to upload an individual file.
- Cancel: This button allows users to cancel the upload of an individual file.
- Upload All Files: This button allows users to upload all files currently populating the form.
- Cancel Upload: This button allows users to cancel the upload of all files currently populating the form. These files will then be cleared from the page.
- Select File: This button allows users to choose files for upload.
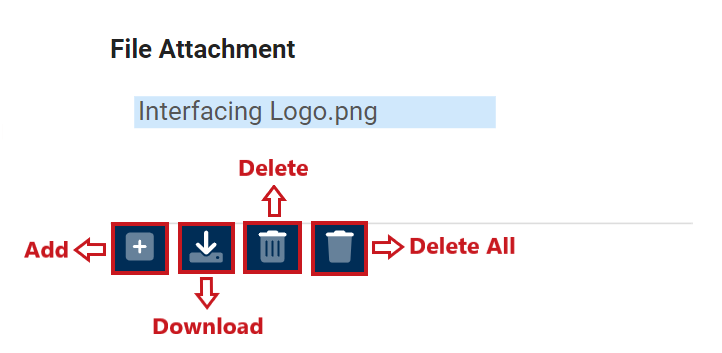
- Once all necessary files have been uploaded, users will be returned to the main form wherein the files can be found attached to the field.
- Users can then use the following set of buttons to upload new files, download existing files, deleted selected ones, or delete them all.
![]()
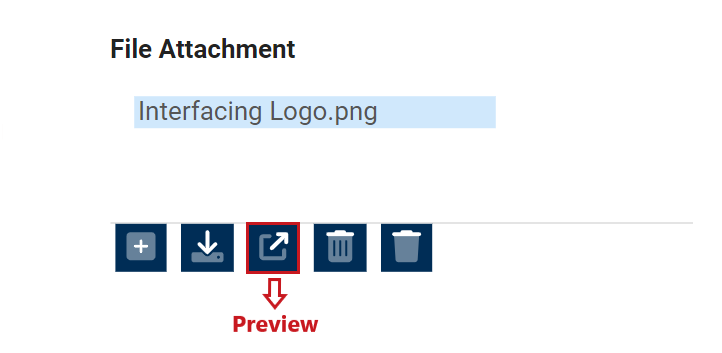
- Users can also preview selected files.
- The
![]() button will only appear once a file has been selected from the field. It will display the contents of the file in a separate tab.
button will only appear once a file has been selected from the field. It will display the contents of the file in a separate tab.
![]()
- The
- Users can then use the following set of buttons to upload new files, download existing files, deleted selected ones, or delete them all.