
Data entry activities fall into the “demo and charge entry” step where “demo” is short for demographics (the set of identifying information for the patient, responsible party, and insurers) and the “charge” consists of medical codes (assigned to the case by a medical coding user) in combination with the details of the care provided (e.g. the provider name, facility, date of service, duration of care, etc.). By ensuring that the “demos” and the details of care are accurate and comprehensive for every case, data entry users play a key role in reducing denials and the need for denial management as well as facilitating export/import operations with downstream billing systems.
Below is a view of the Data Entry View.
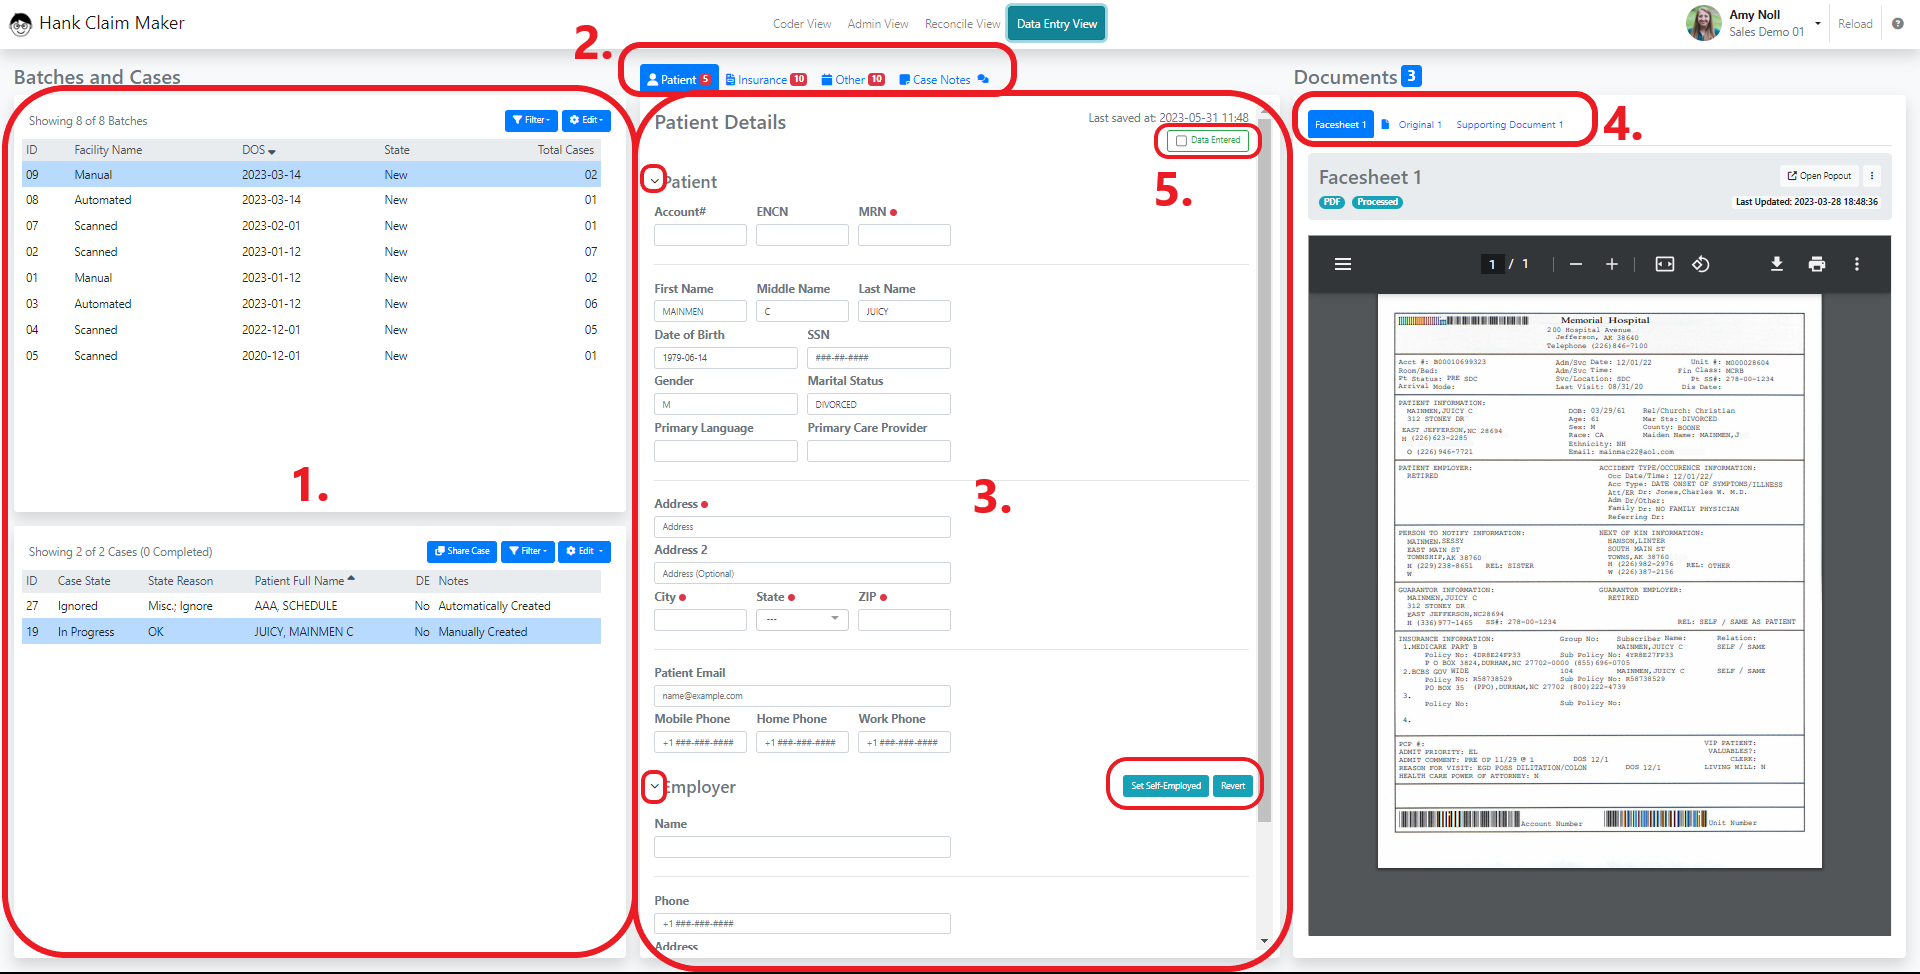
- Batch and Case Selection Panes – as described in Basic Layout above. Note the controls on the upper right of each pane outlined in red. The funnel control can be used to filter each display by facility name, batch state, dates, names, etc. The edit control can be used to update the state of the selected batch.
- Details Tab Selector – The data entry form is organized into three logical sections (Patient Details, Insurance Details, and Other Details) accessible by clicking the desired title. Additional information regarding the elements contained on each tab are included later in this Job Aid.
- Data Entry Controls – Displays editable fields for the currently selected case. Note that the caret controls next to the section titles (circled in red) can be used to expand and collapse the fields for each title. Also note the button controls on the right. These controls expose special operations as appropriate, e.g., extending array type data elements (e.g. adding another insurer) and copying the patient’s information into the equivalent fields in another section (e.g. Guarantor/Responsible Party).
- Document Display Controls – Used to control the presentation of the documents for the selected case. The “Open Popout” control creates a child window with an expanded view of the Documents Pane which also updates automatically as new cases are selected. Click on a document title (e.g. “Op Note”) to display it. Clicking the … dots menu will show document options for Toggle Size, Split, View PDF and Attach. The “Toggle Size” button changes the font size of “text” type documents. The “View PDF” button can be used to view the original source PDF.
- Data Entered Checkbox – Used to indicate that data entry operations have been concluded for the selected case. Prevents further updates in the data entry view until unchecked.
Copyright © 2025 hank.ai
—
Powered by 