
The Waveform section has many functions.
The most basic one is clicking on it to move the playhead around.
If you click and wipe a purple range across it and release the mouse button it will zoom the waveform.
Then you can grab this section with the DnD Bar and drag it to your DAW or use any other function in BaseHead like Spot to Track using (S)
You can un-zoom one level of zoom by pressing (Z) or zoom all the way out by pressing (A)
If you hold SHIFT and click and wipe it will not zoom in but instead will create a temporary Yellow Range like the below image.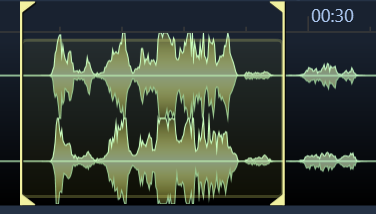
When this yellow range is visible you can can either drag it out of BH by clicking in the top part of the WF between the yellow markers and drag.
OR you can use this range to set a permanent Playback Region inside the file by Pressing (M)
OR you can do Destructive Editing and delete it by pressing (DEL) or (CTRL+T) to trim the audio file when the yellow range is shown.
—-MARKERS—
four different types of settable markers can be set in BaseHead currently.
Here are the differences…
Skip Silence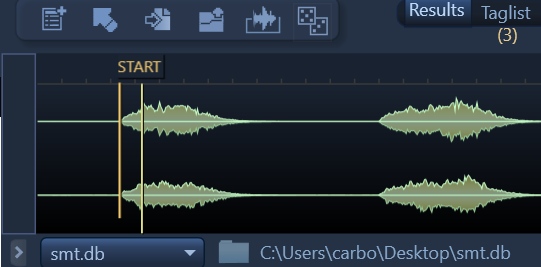
These are orange markers with ‘Start’ and ‘End’ labels on them.
When these are visible and turned ON the playhead will skip over audio that is low in volume getting to what you want to hear faster.
These can be turned ON/OFF from the Waveform Settings menu located at the top right of the WF.
Region and Loop Markers (Non-Lite Only)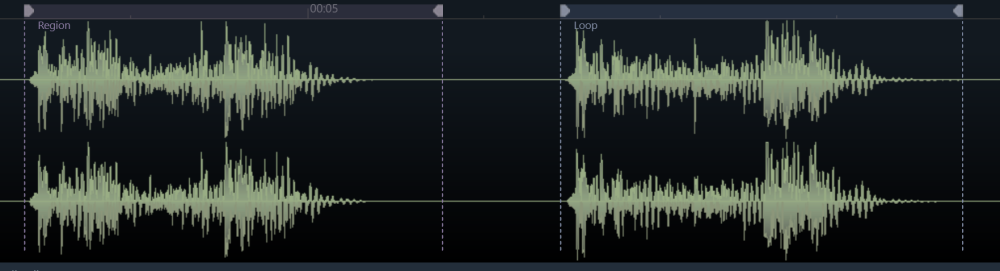
these are new Purple and Blue Markers that write into the CUE Chunk
See the Maker Panel for more Info!
Sync Points (Ultra Only)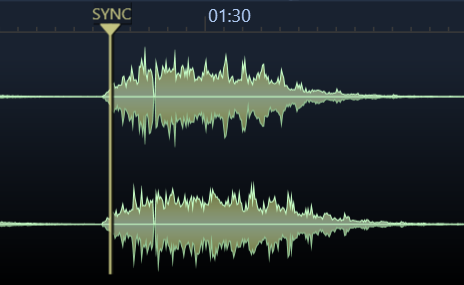
these are yellow and are for Nuendo/Cubase and ProTools users only.(ProTools supported added in version 5.2)
You can set them and they will transfer to these DAW’s.
They can be set by holding ALT (PC) or Command (Mac) and clicking on the WaveForm.
They can be removed by also ALT+Clicking them.
(NOTE: This information is written permanently into the file’s iXML chunk)
Example Use: set a SyncPoint at a peak of a car by so the next time you drag that car by out of BH the video will be synced to the the peak of the car by and soon as it hits the Nuendo timeline.
ProTools users can take advantage of this feature also now, using the “S” command, but Nuendo/Cubase users can also use this feature via Drag and Drop.
Trigger Marker (Ultra Only)
holding Shift and clicking on the waveform will create a temporary green Trigger Marker that can be used to re-trigger the file from over and over.
This will be part of a much larger future feature to be announced soon.
NOTE: You can click and drag these markers to move them around (besides skip silence). To remove one just hold ALT and click on the Triangle at the top of the marker.
—Waveform Actions—
If you right click the Waveform you get a whole another set of Actions that can be done.
Rebuild Waveform – (F5)
delete and rebuild the current selected record’s waveform cache file.
Build All Waveforms
this feature will walk all the files currently shown and draw the overviews to reading them will be faster the 2nd time around.
This process can take a while, so it’s best to do it over night if you have a big library…..8)
Make sure you set your ‘Max records returned’ on the Options page to ALL so all records get displayed for walking.
(Note: The waveform files are stored in a folder named _wfCache next to the files unless you choose a local drive to cache to)
Add Marker/Region (M)
Sets an CUE Marker OR if a Yellow Range is selected a CUE Region
Remove Playback Region (Ctrl+M)
removes old style aXML Markers from the file
(Watch the below to see these commands in action)
(version 4.x video)
Sum to Mono (Shift+M)
Sums Channels to Mono=
Reverse File (Ctrl+R)
Physically reverses the current file and creates a temp file to play with.
The WF will turn purple indicating this.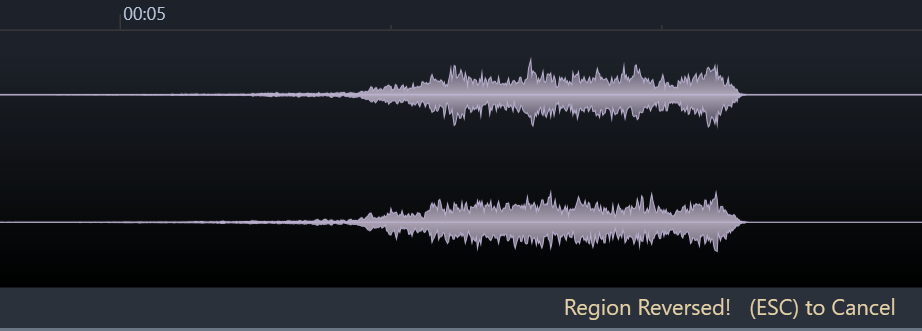
Delete Selected Region (DEL)
destructively removes region that is selected with the YELLOW region when holding the SHIFT key
Trim File Destructively (Ctrl+T)
destructively removes the head and tail around the selected YELLOW region
NOTE: For all destructive actions you must hold shift and wipe a yellow range first across the Waveform.
Save Edited File (Ctrl/Command+S)
overwrites the original file with the newly edited one Destructively!
This can’t be undone!!
Watch this quick video to see it in action!
(version 4.x video)
—-Waveform Options Menu—
to turn ON/OFF settings for the Waveform click the little gear icon near the top right of the WF.
Disable Waveform Zoom
when checked ON prevents BH from zooming on mouse button up and instead places temp yellow region marker brackets instead.
Disable Markers
when checked ON, set Playback Regions will be ignored during playback and not be displayed also.
Use Waveform Caching
when checked ON, a waveform overview .wf file will be written to the hard drive in a sub folder of the selected file directory named _wfCache
Cached waveforms will load way faster then drawing each time for long files so it’s highly suggested to leave this setting ON
We recommend building waveforms for all your files to make BH run faster when you get some free time.
Cache Locally
when checked ON, it creates the waveform caches on the drive of your choice instead of writing them to a sub-directory of where the files are located.
This is helpful and most used for when file are on slow network servers OR when a network SFX server’s write access is disabled.
For PC you can choose the location by drive drive letter.
For Mac they are created in ~/Application Support/BaseHead/_localWFCache on your system drive.
Auto Gain Waveform
when ON will Normalize the WF visually so it always looks healthy.
Higher Resolution Drawing
When ON double the pointCount is used.
Skip Silence
when checked ON the playhead will jump to the first part of a file where sound is found and skip over dead air.
Need more help with this?
Having Issues? Click to Troubleshoot or Create a Support Ticket.