
The Organization User management menu provides CSP Admin functionalities for Viewing, Creating & Managing Organization Users.
Viewing Organization Users
In the Organization Users page all the Organization Users such as Organization Admin / Organization User created by CSP Admin within CemTore are displayed in a list.
To view the Organization Users list, click Organization Users under Security in the Navigator. Then select from the dropdown box Organization the Organisation wanted in order to access all its users.
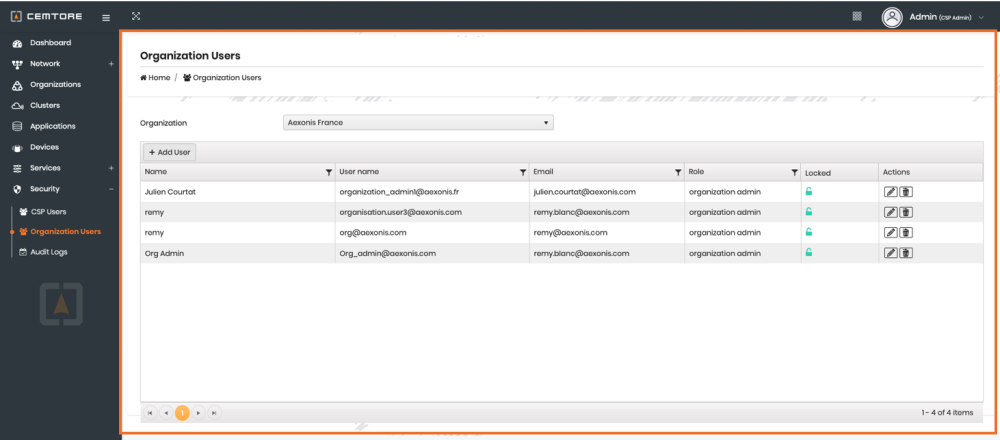
The following information is shown for each Organisation User:
User Name
Organisation User name
Organisation User email
Organisation User Role
Organisation User Locked
Organisation User Actions (Edit/Delete)
Add & Manage Organisation User
The Organisation User management menu allow CSP Admin to Add, Edit and Delete Organisation User, see bellow.
1. How to Add an Organisation User
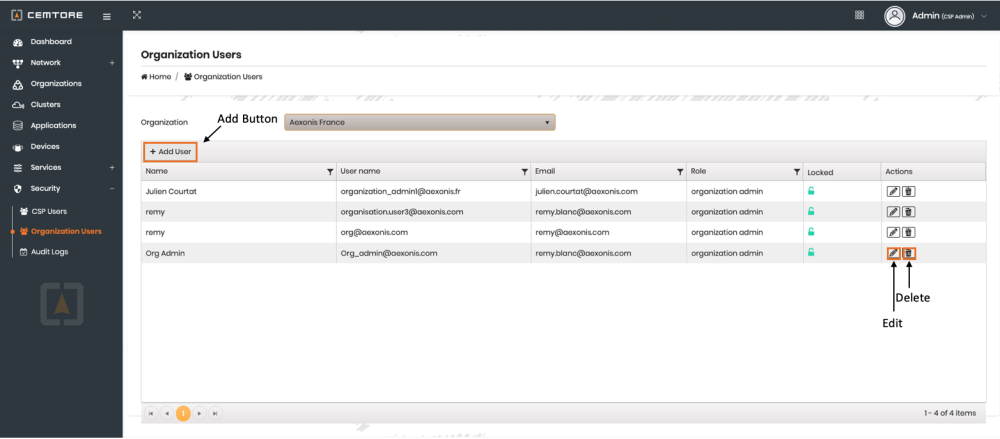
To Add an Organisation User, click the + Add User button on the left of the page.
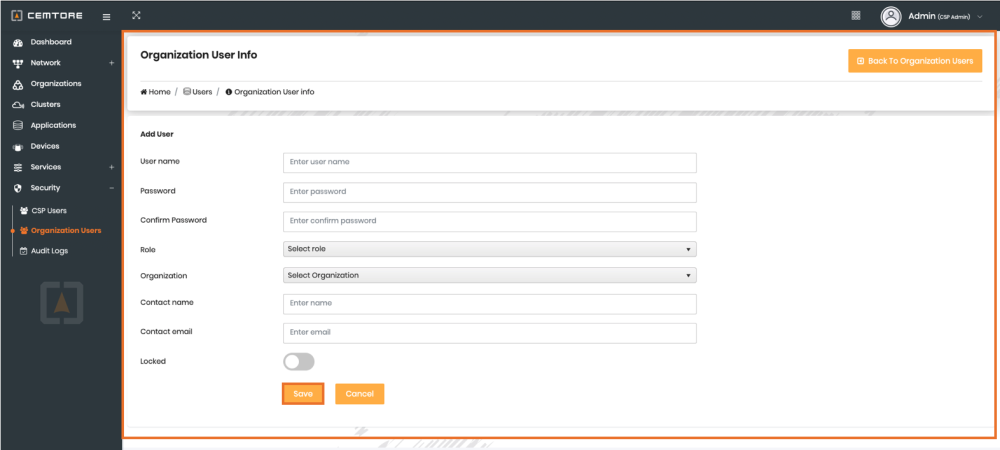
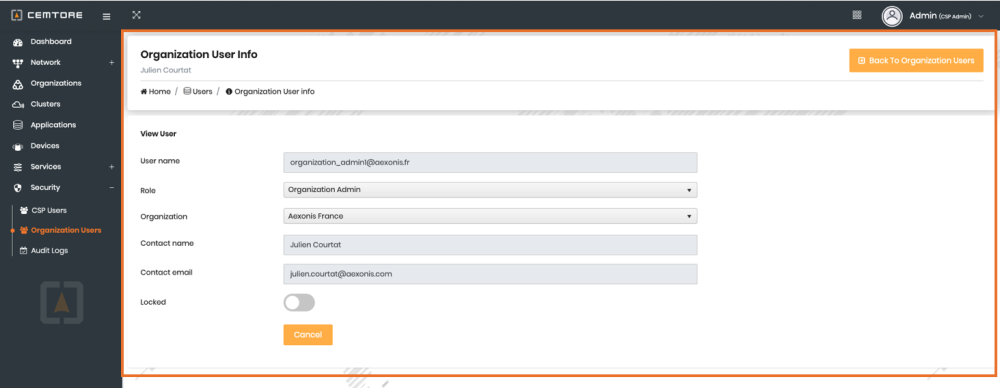
At the left of the Organisation User Info window, provide the following information:
| Field | Description |
|---|---|
| User Name | Serves as a user ID to identify the user at the system. Note that the username should has to be written as an email address format and cannot be changed once the user has been created. This field is mandatory. |
| Password | Serves as a Login Password. The password should contain at least an uppercase, a lowercase, a number and a special character. This field is mandatory. |
| Confirm Password | Serves as a Login Password. This field is mandatory. |
| Role | Serves to defined hierarchies and permissions to the user. This field is mandatory. |
| Organization | Serves to defined hierarchies under which organization the user will be created. This field is mandatory. |
| Contact Name | Contact First and Last name. This field is mandatory. |
| Contact Email | A valid email address. This is required to enable the user to reset the password. This field is mandatory. |
| Locked | Serves to defined access permissions. e.g If locked, user will be logged out and future access will be denied until unlocked again. |
Click Save to add the Organization User

2. How to Manage Organization Users
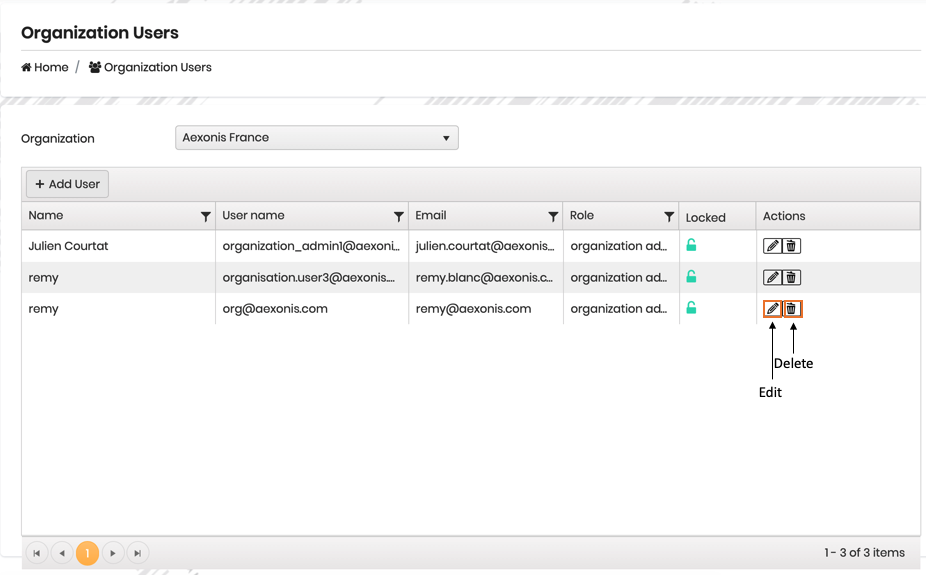
To Edit a User
- Click the Pen icon at the right of the respective row. Only the fields Contact name, Contact email & Locked can be changed. For details on the fields, see How to add an Organization User above.
- Click Save to apply your settings.
To Delete a User
Click the Bin icon at the right of the respective row and then to the confirmation message “Are you sure to delete the User?” click Yes.
Post your comment on this topic.