

The Clusters management menu accessible through the Navigator by clicking the Clusters menu under Application provides CSP functionalities for Viewing, Creating & Managing Clusters remotely.
For further information on clusters, click Clusters.
Viewing Clusters
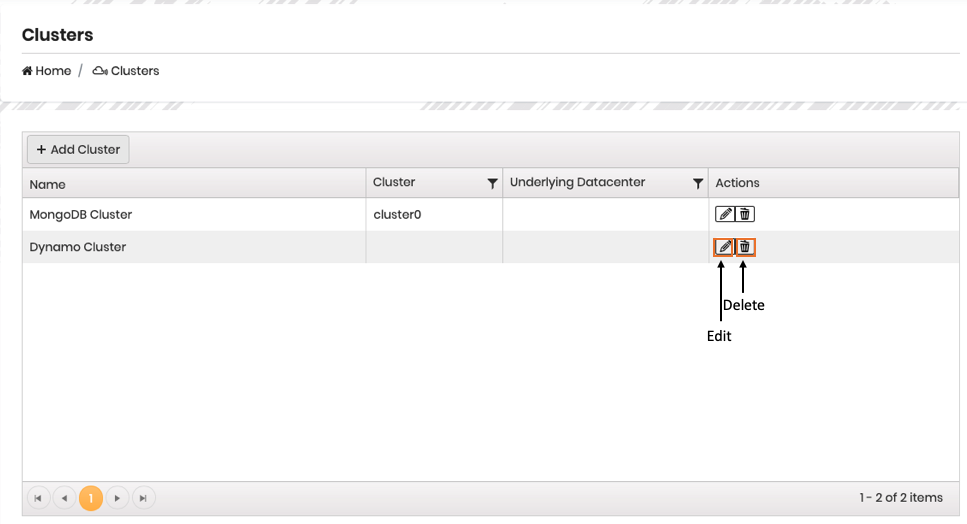
In the Clusters page all Clusters created by the CSP Admin role within CemTore are displayed in a list.
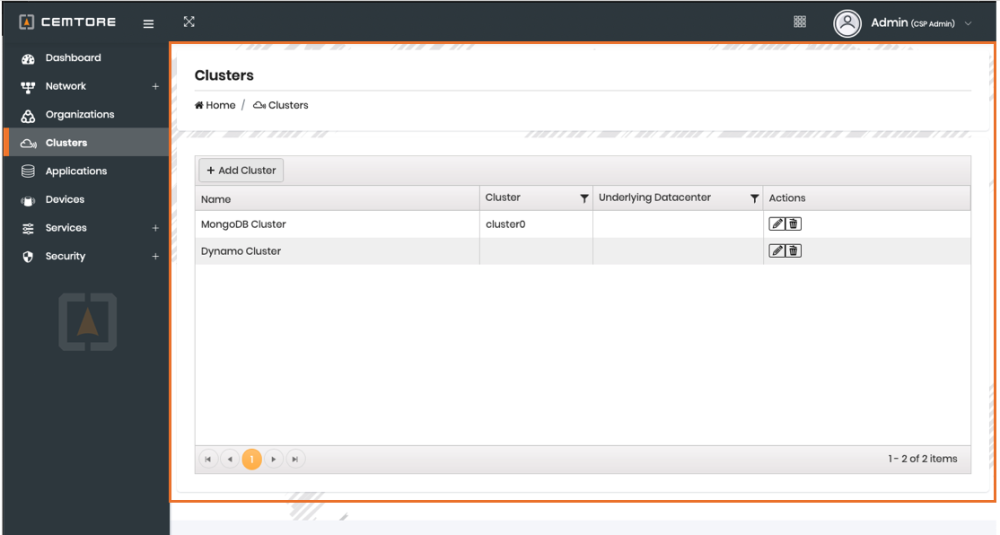
For each Cluster, the following information is provided:
| Column | Description |
|---|---|
| Cluster Name | Serves as an Id reference for the Cluster |
| Cluster | Provides information on the Cluster |
| Underlying Datacenter | Provides information on datacenter underlying the Cluster |
| Actions | Edit / Delete |

Add & Manage Clusters
The Clusters management menu allow CSP Admin to Add, Edit and Delete Clusters.
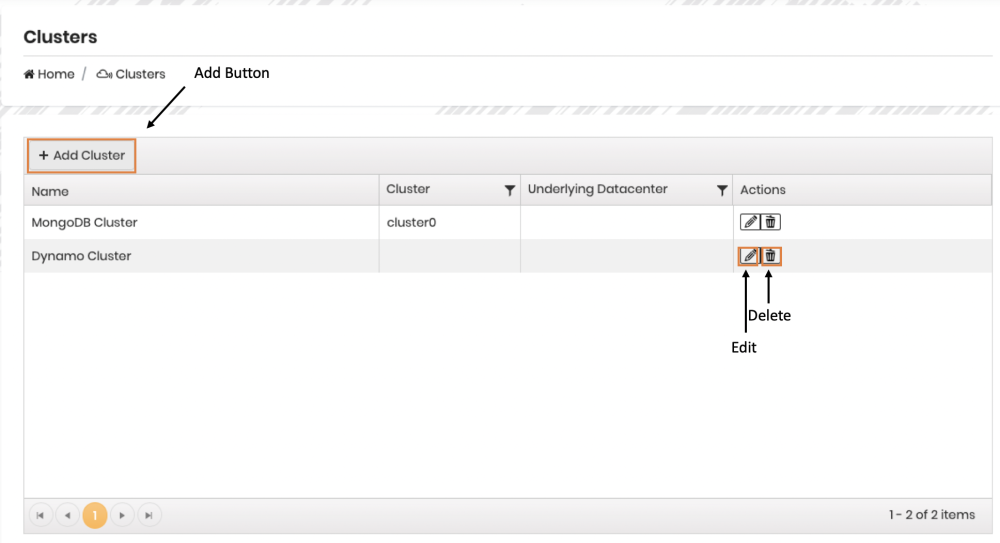
1. How to Add a Cluster
To add a Cluster, click the + Add Cluster button on the left of the page.
1.1 How to Add a MongoDB Cluster (Basic)
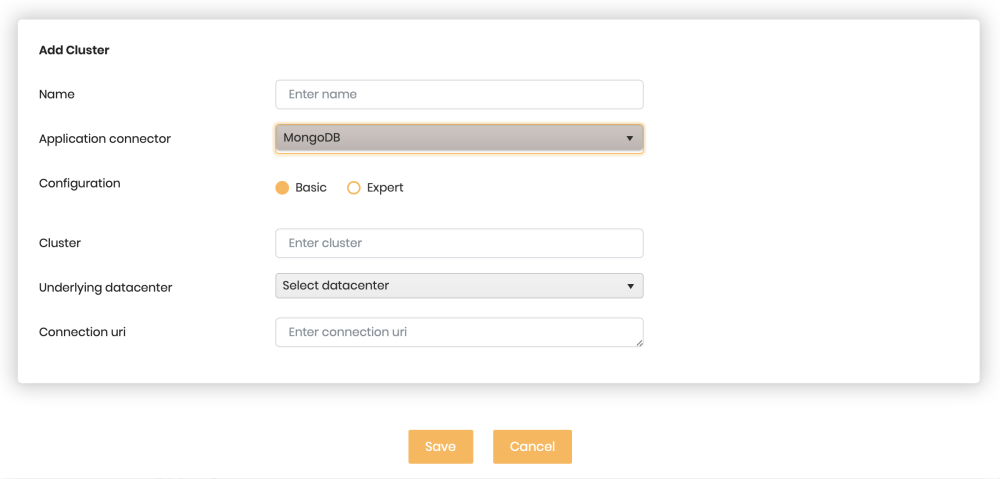
At the left of the Cluster window provide the following information:
| Field | Description |
|---|---|
| Cluster Name | Serves as an Application ID to identify the application in the system. For better MongoDB Project Segregation, we recommend the Cluster Name to be as follow: Project Name / Cluster Name. This field is mandatory. |
| Application Connector | Select from the dropdown box MongoDB. This field is mandatory. |
| Configuration | Select Basic |
| Cluster | This field is mandatory. |
| Underlying Datacenter | Select from the dropdown box (AWS/Azure/Google Drive) . This field is mandatory. |
| Connection uri | From MongoDB Atlas Account Click Cluster / Connect / Connect your Application / C++ / 3.1x or later and copy the link. For More information |
Click Save to add the Mongo Cluster.

A Confirmation Message will appear on the screen, confirming the creation of the new Cluster.
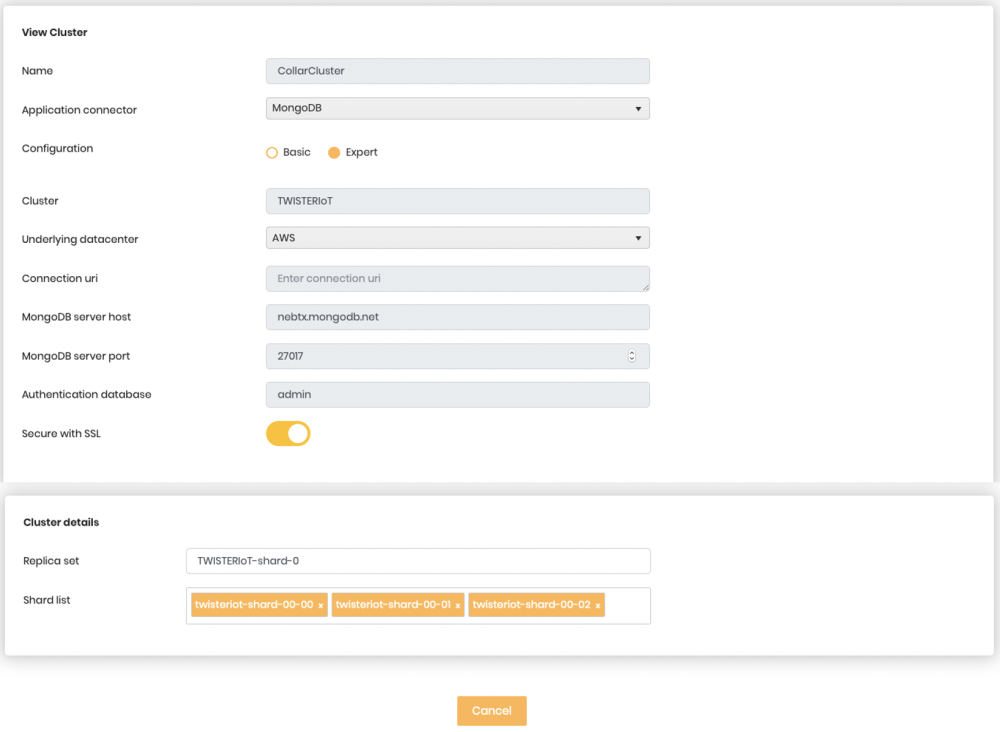
1.2 How to Add a MongoDB Cluster (Expert)
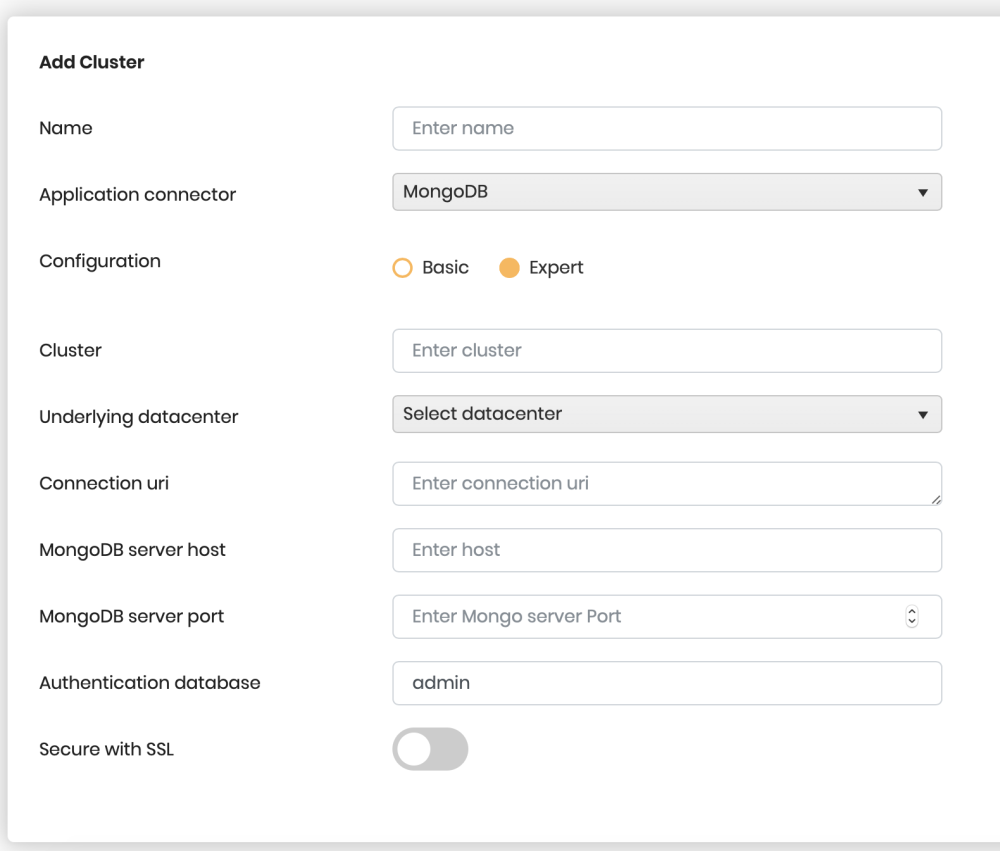
At the left of the Cluster window provide the following information:
| Field | Description |
|---|---|
| Cluster Name | Serves as an Application ID to identify the application in the system. For better MongoDB Project Segregation, we recommend the Cluster Name to be as follow: Project Name / Cluster Name. This field is mandatory. |
| Application Connector | Select from the dropdown box MongoDB. This field is mandatory. |
| Configuration | Select Expert |
| Cluster | This field is mandatory. |
| Underlying Datacenter | Select from the dropdown box (AWS/Azure/Google Drive) . This field is mandatory. |
| MongoDB host | Specific MongoDB Host for this cluster. This field is mandatory. |
| MongoDB server port | Specific MongoDB Port for this cluster. This field is mandatory. |
| Authentication database | Specific MongoDB Authentication. This field is mandatory. |
| Secure with SSL | Select in order to secure the application with a Secure Socket Layer. |
| Cluster Details | Select in order to add “Replica Set”:https://docs.mongodb.com/manual/tutorial/deploy-replica-set/ & Shard list to the cluster |
| Cluster Details/Replica Set | “Link Bellow”:https://docs.mongodb.com/manual/tutorial/deploy-replica-set/ |
| Cluster Details/Shard List | “ Link Bellow”:https://docs.mongodb.com/manual/sharding/ |
Click Save to add the MongoDB Cluster.
A Confirmation Message will appear on the screen, confirming the creation of the new Cluster.
1.2 How to Add an AWS DynamoDB Cluster
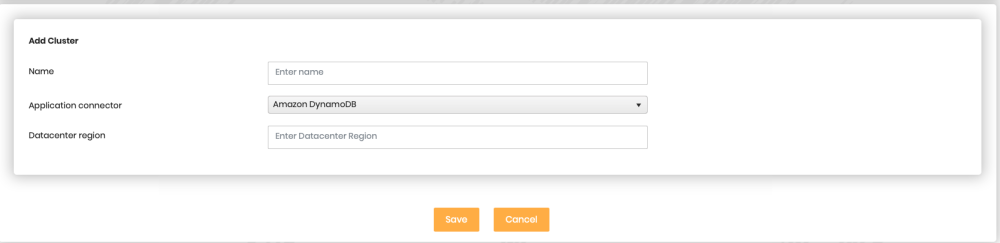
At the left of the Cluster window provide the following information:
| Field | Description |
|---|---|
| Cluster Name | Serves as an Application ID to identify the application in the system. This field is mandatory. |
| Application Connector | Select from the dropdown box AWS DynamoDB. This field is mandatory. |
| Datacenter Region | This field is mandatory. |
Click Save to add the AW DynamoDB Cluster.
A Confirmation Message will appear on the screen, confirming the creation of the new Cluster.
2. How to Manage Cluster
To Edit a Cluster
- Click the Pen icon at the right of the respective row. All fields but “Application Connector” and Cluster can be changed. For details on the fields, see How to add a Cluster above.
- Click Save to apply your settings.
To Delete a Cluster
Click the Bin icon at the right of the respective row and then to the confirmation message “Are you sure to delete the SaaS?” “Note that, Device Data associated to this application will NOT be removed.” click Yes.
Post your comment on this topic.