
Besides the pre-sets, you can also use your own pictures while playing the YetiBrain Games. Please note that creating new categories and adding your own images might take a bit of time initially, however, once they are created they will be saved in the app. Furthermore, more than one minigame can share the images, that you add only once in YetiBrain Games.
Sourcing your own picture
Use a picture via USB or a cloud service
If you have a selection of pictures, like photographs or symbols that you want to use in the YetiBrain Games, an easy way to retain them is to save them on a USB stick or even easier in a folder within a cloud service, such as Google Drive, that is installed on your device. That way you don’t need to search them online and download them one by one on the Yetitablet.
USB drive
- Gather your own pictures from a computer, the internet, or camera and save them on a USB drive.
- Insert the USB drive to the Yetitablet.
Cloud service
Cloud services are for example Google Drive or Dropbox, among many others. If you synch your Cloud service account on the Yetitablet you can create a folder with your own images and photos from your computer and utilize them to play in the YetiBrain Games.
- Search for pictures you want to use in the YetiBrain Games via and save them in your Cloud. You can also do that on your desktop computer or phone.
- Make sure the Cloud is also installed on your Yetitablet and synched.
- We recommend to keep the pictures organized in one or multiple folders.
Use a screenshot
If you want to use screenshots in the YetiBrain Games, please follow the steps below.
- Go to the website or app that you want to create a screenshot of
- Create a screenshot by tapping on the
![]() camera icon in the navigation bar.
camera icon in the navigation bar. - You can view your screenshots by opening the Google Photo app, opening “Albums” and “Screenshots”

Search a picture from the internet
If you use a picture from the internet, please make sure you have the right to use it.
Downloading a picture from the Internet (on the Yetitablet)
- Open a search engine such as Google via your Browser e.g. Google Chrome
- Type in your search word and make sure you find an image file such as “jpg” or “png”
- Depending on the website, the process of how to download a picture can vary. Usually, start by long-pressing the image or right-click if you use a computer mouse and look for a download or sharing option.
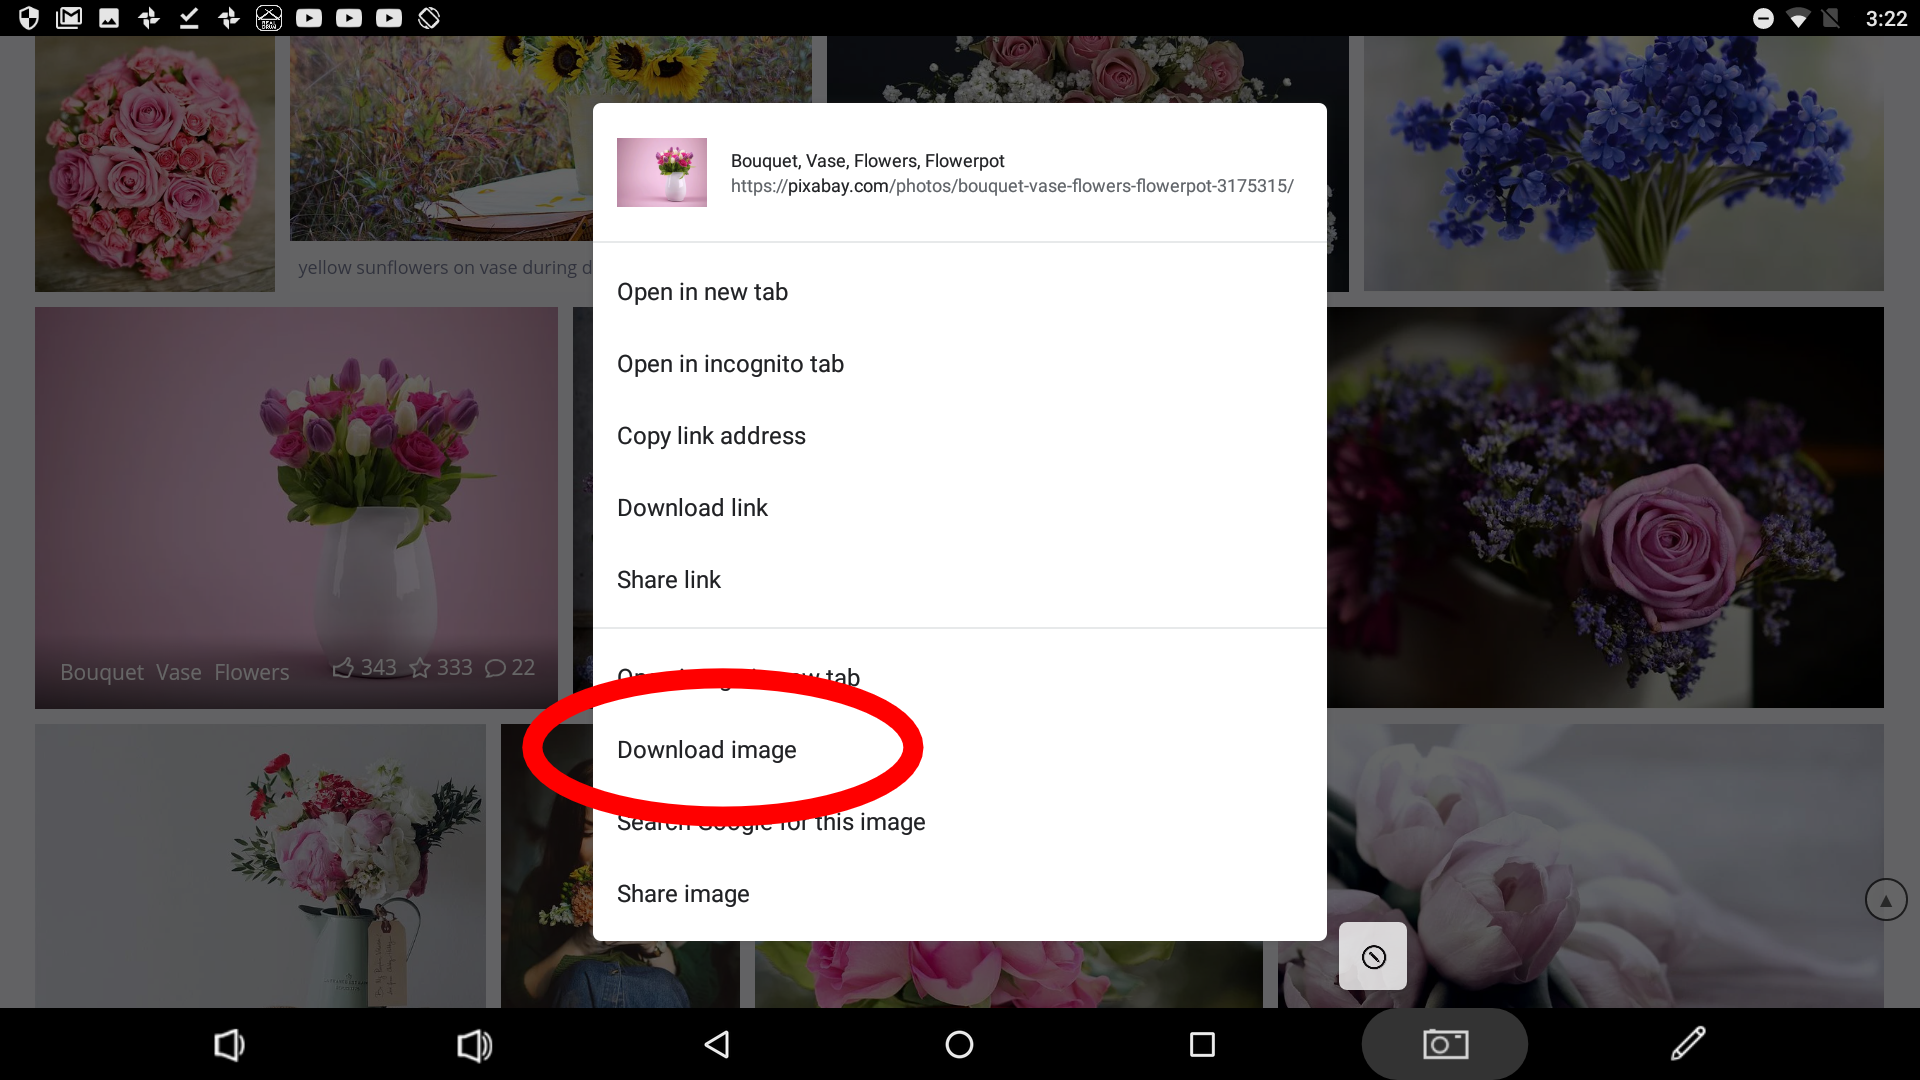
- When you stay within a Google search, click on the image to enlarge it.
- Long-press on the image and choose “Download image”
![]()
- Long-press on the image and choose “Download image”
- On a website long-pressing the image/ right-click can open up an action window like this:
![]()
- Press “Download image”
- When you stay within a Google search, click on the image to enlarge it.

Saving a picture from the Internet to a Cloud
Sometimes you can also share an image to a cloud, instead of downloading it. The difference is that the Download is locally stored on your device whereas if the image is stored on a cloud you can access it on other devices too if they are linked with the same cloud service.
- Open a search engine such as Google via your Browser e.g. Google Chrome
- Type in your search word and make sure you find an image file such as “jpg” or “png”
- Depending on the website, the process of how to share a picture to a cloud can vary. Usually, start by long-pressing the image or right-click if you use a computer mouse and look for a “Sharing to” option.
- When you stay within a Google search, click on the image to enlarge it.
- Then press long and choose “Share image”
- Name the image. and keep e.g. “.jpg” at the end
![]()
- Save
- On a website long-pressing the image/ right-click can open up an action window like this:
![]()
- Press “Share image”
- Name the image. and keep e.g. “.jpg” at the end
- Save
- When you stay within a Google search, click on the image to enlarge it.


Use your own picture while playing
Once the image or picture you want to use is stored locally on your Yetitablet or in a USB stick, you can add those pictures to the YetiBrain Games app for playing with your own pictures.
Image is locally stored
- Open up the YetiBrain Games app.
- Open up the ‘‘Match Pairs’‘ in Memory Games, ‘‘Picture Shuffle’‘ in Spatial Games, or ‘‘Scratching Game’‘ in Other Games.
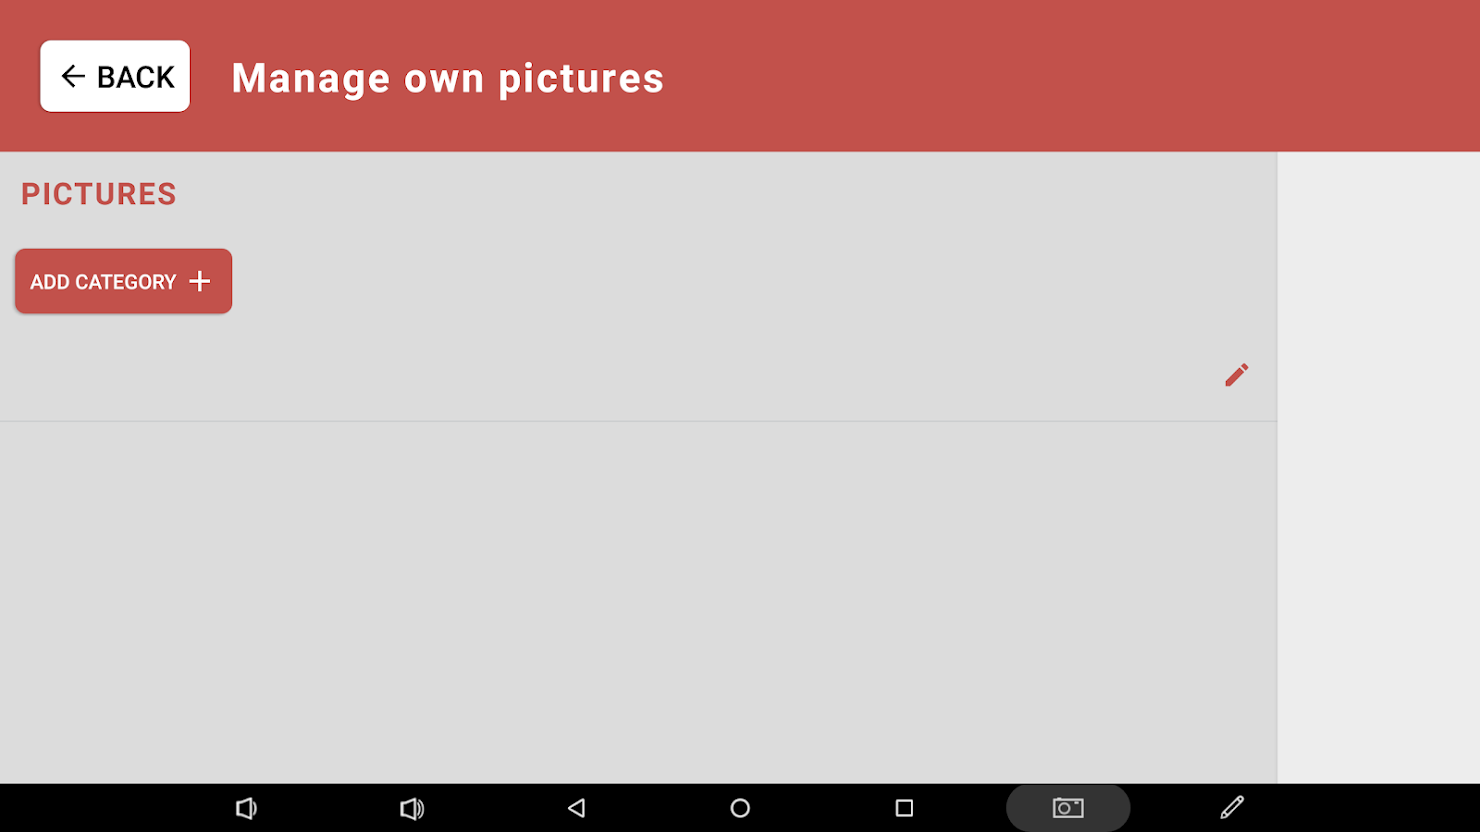
- Click on the ‘MANAGE OWN PICTURES’ in the bottom right corner.
![]()
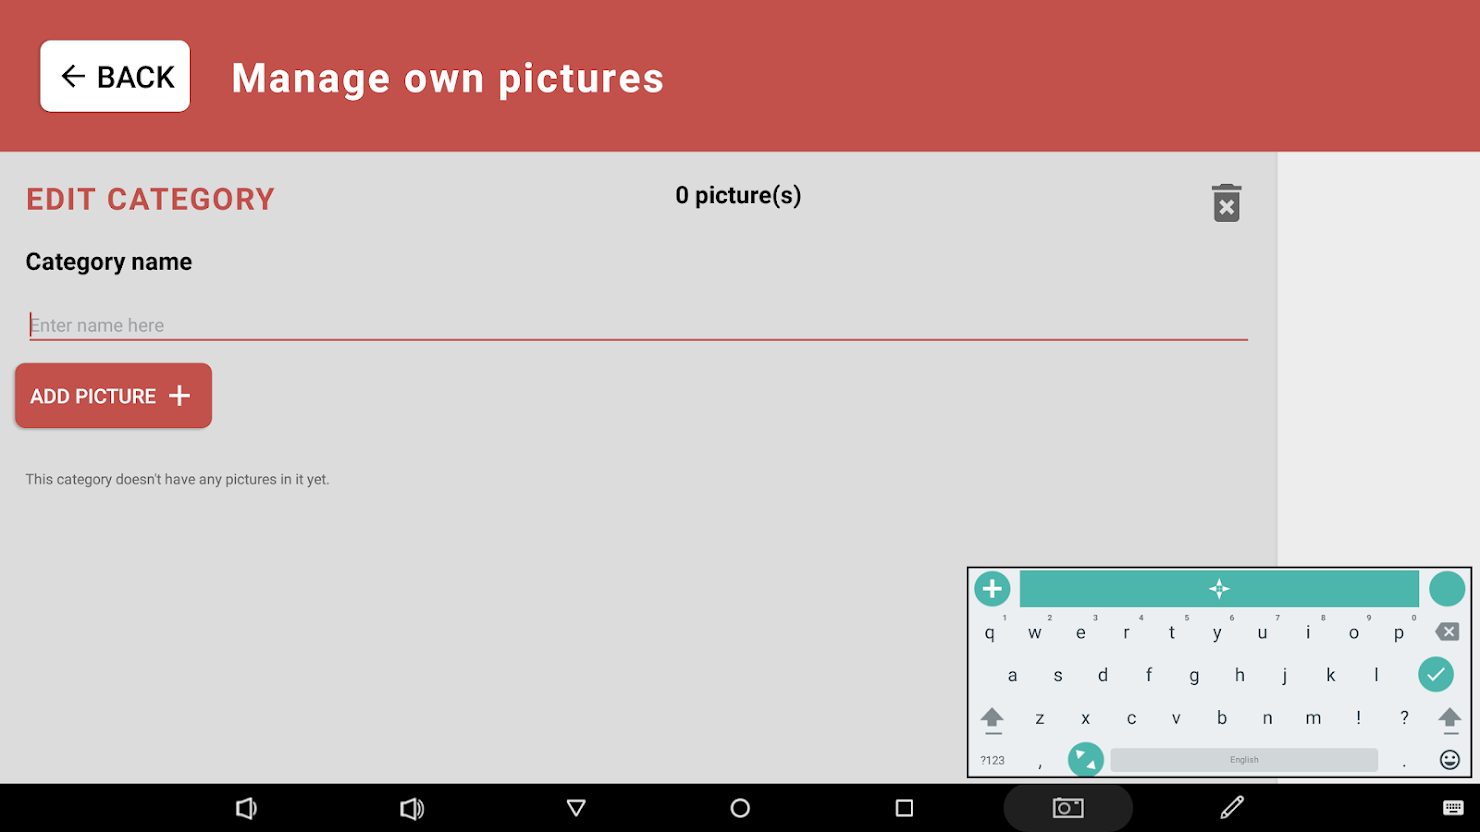
- Clicking on ‘‘ADD CATEGORY + ‘’ will open EDIT CATEGORY.
![]()
- Enter the name you want under Category name.
![]()
- You can add pictures by clicking on ‘‘ADD PICTURE +’‘.
- If your image/screenshot appears in the “Recent” folder, then opens up usually automatically, then simply tap on your image.
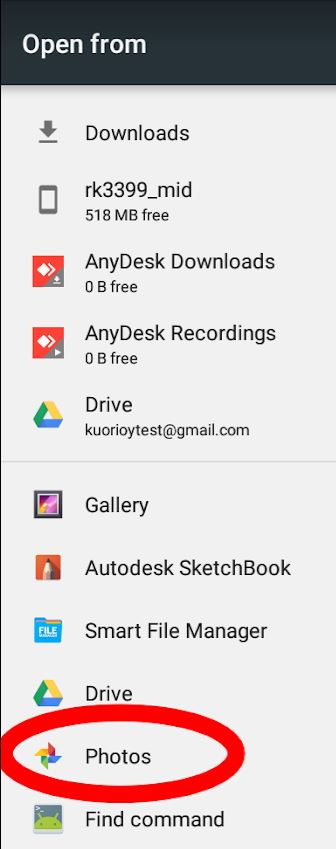
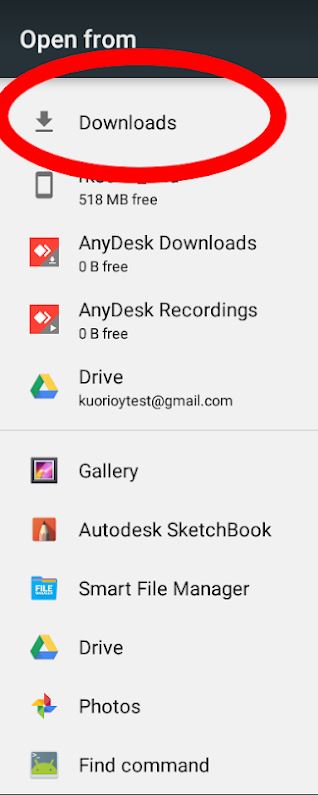
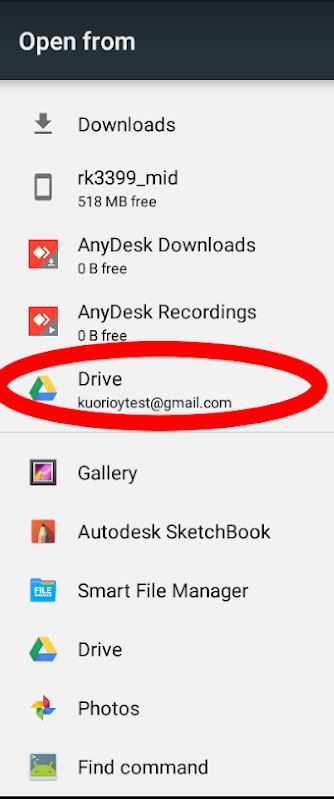
- If your image does not appear in the “Recent” documents its location can vary based on how you saved it. Please tap on the ‘‘Three bars icon’‘ in the top left corner to open up the menu.
![]()

| File | Where to find? | How to access it? | Photo |
|---|---|---|---|
| Screenshots | Google photos |
|
  |
| Downloads | Downloads |
|
 |
| Shared to a Cloud such as Google Drive | Google Drive |
|
  |
- The picture is saved automatically. Press ‘BACK’ in the top left corner, you can start to play the games by using your own pictures.
Image from a USB drive
Once the USB drive that has your own images is connected to the Yetitablet via a USB port, you can use those images to create new categories for playing in YetiBrain Games:
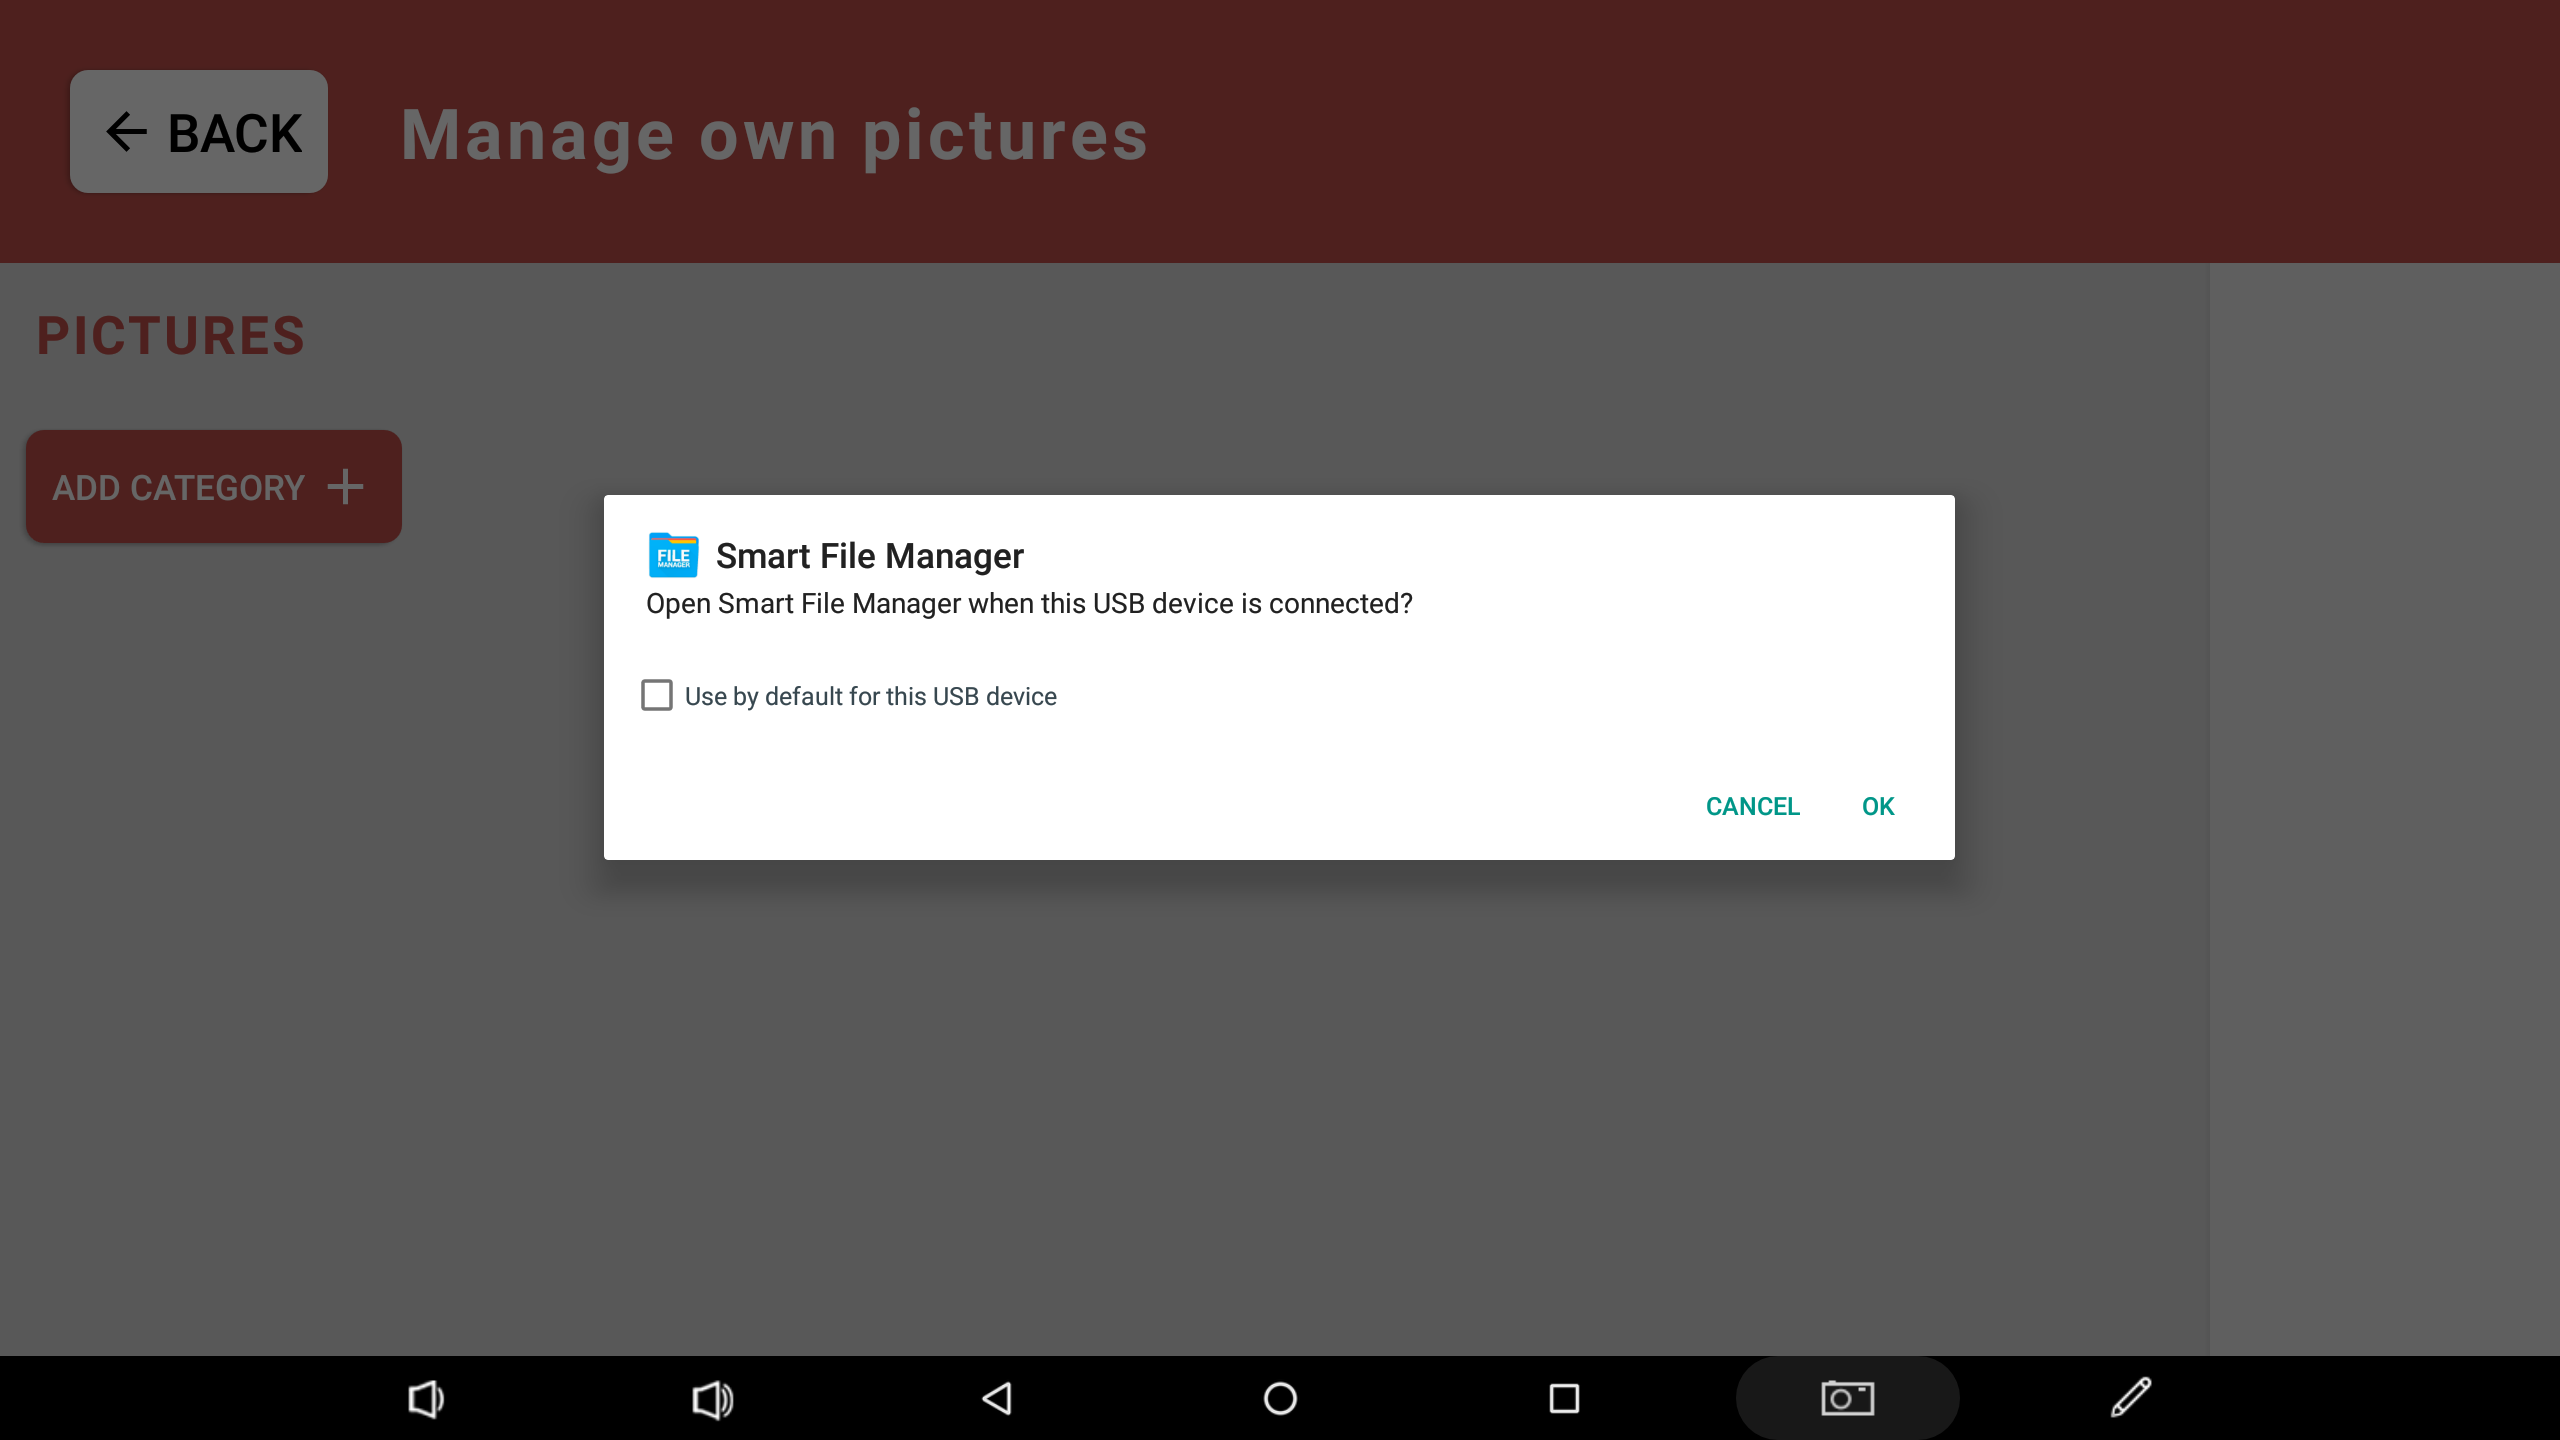
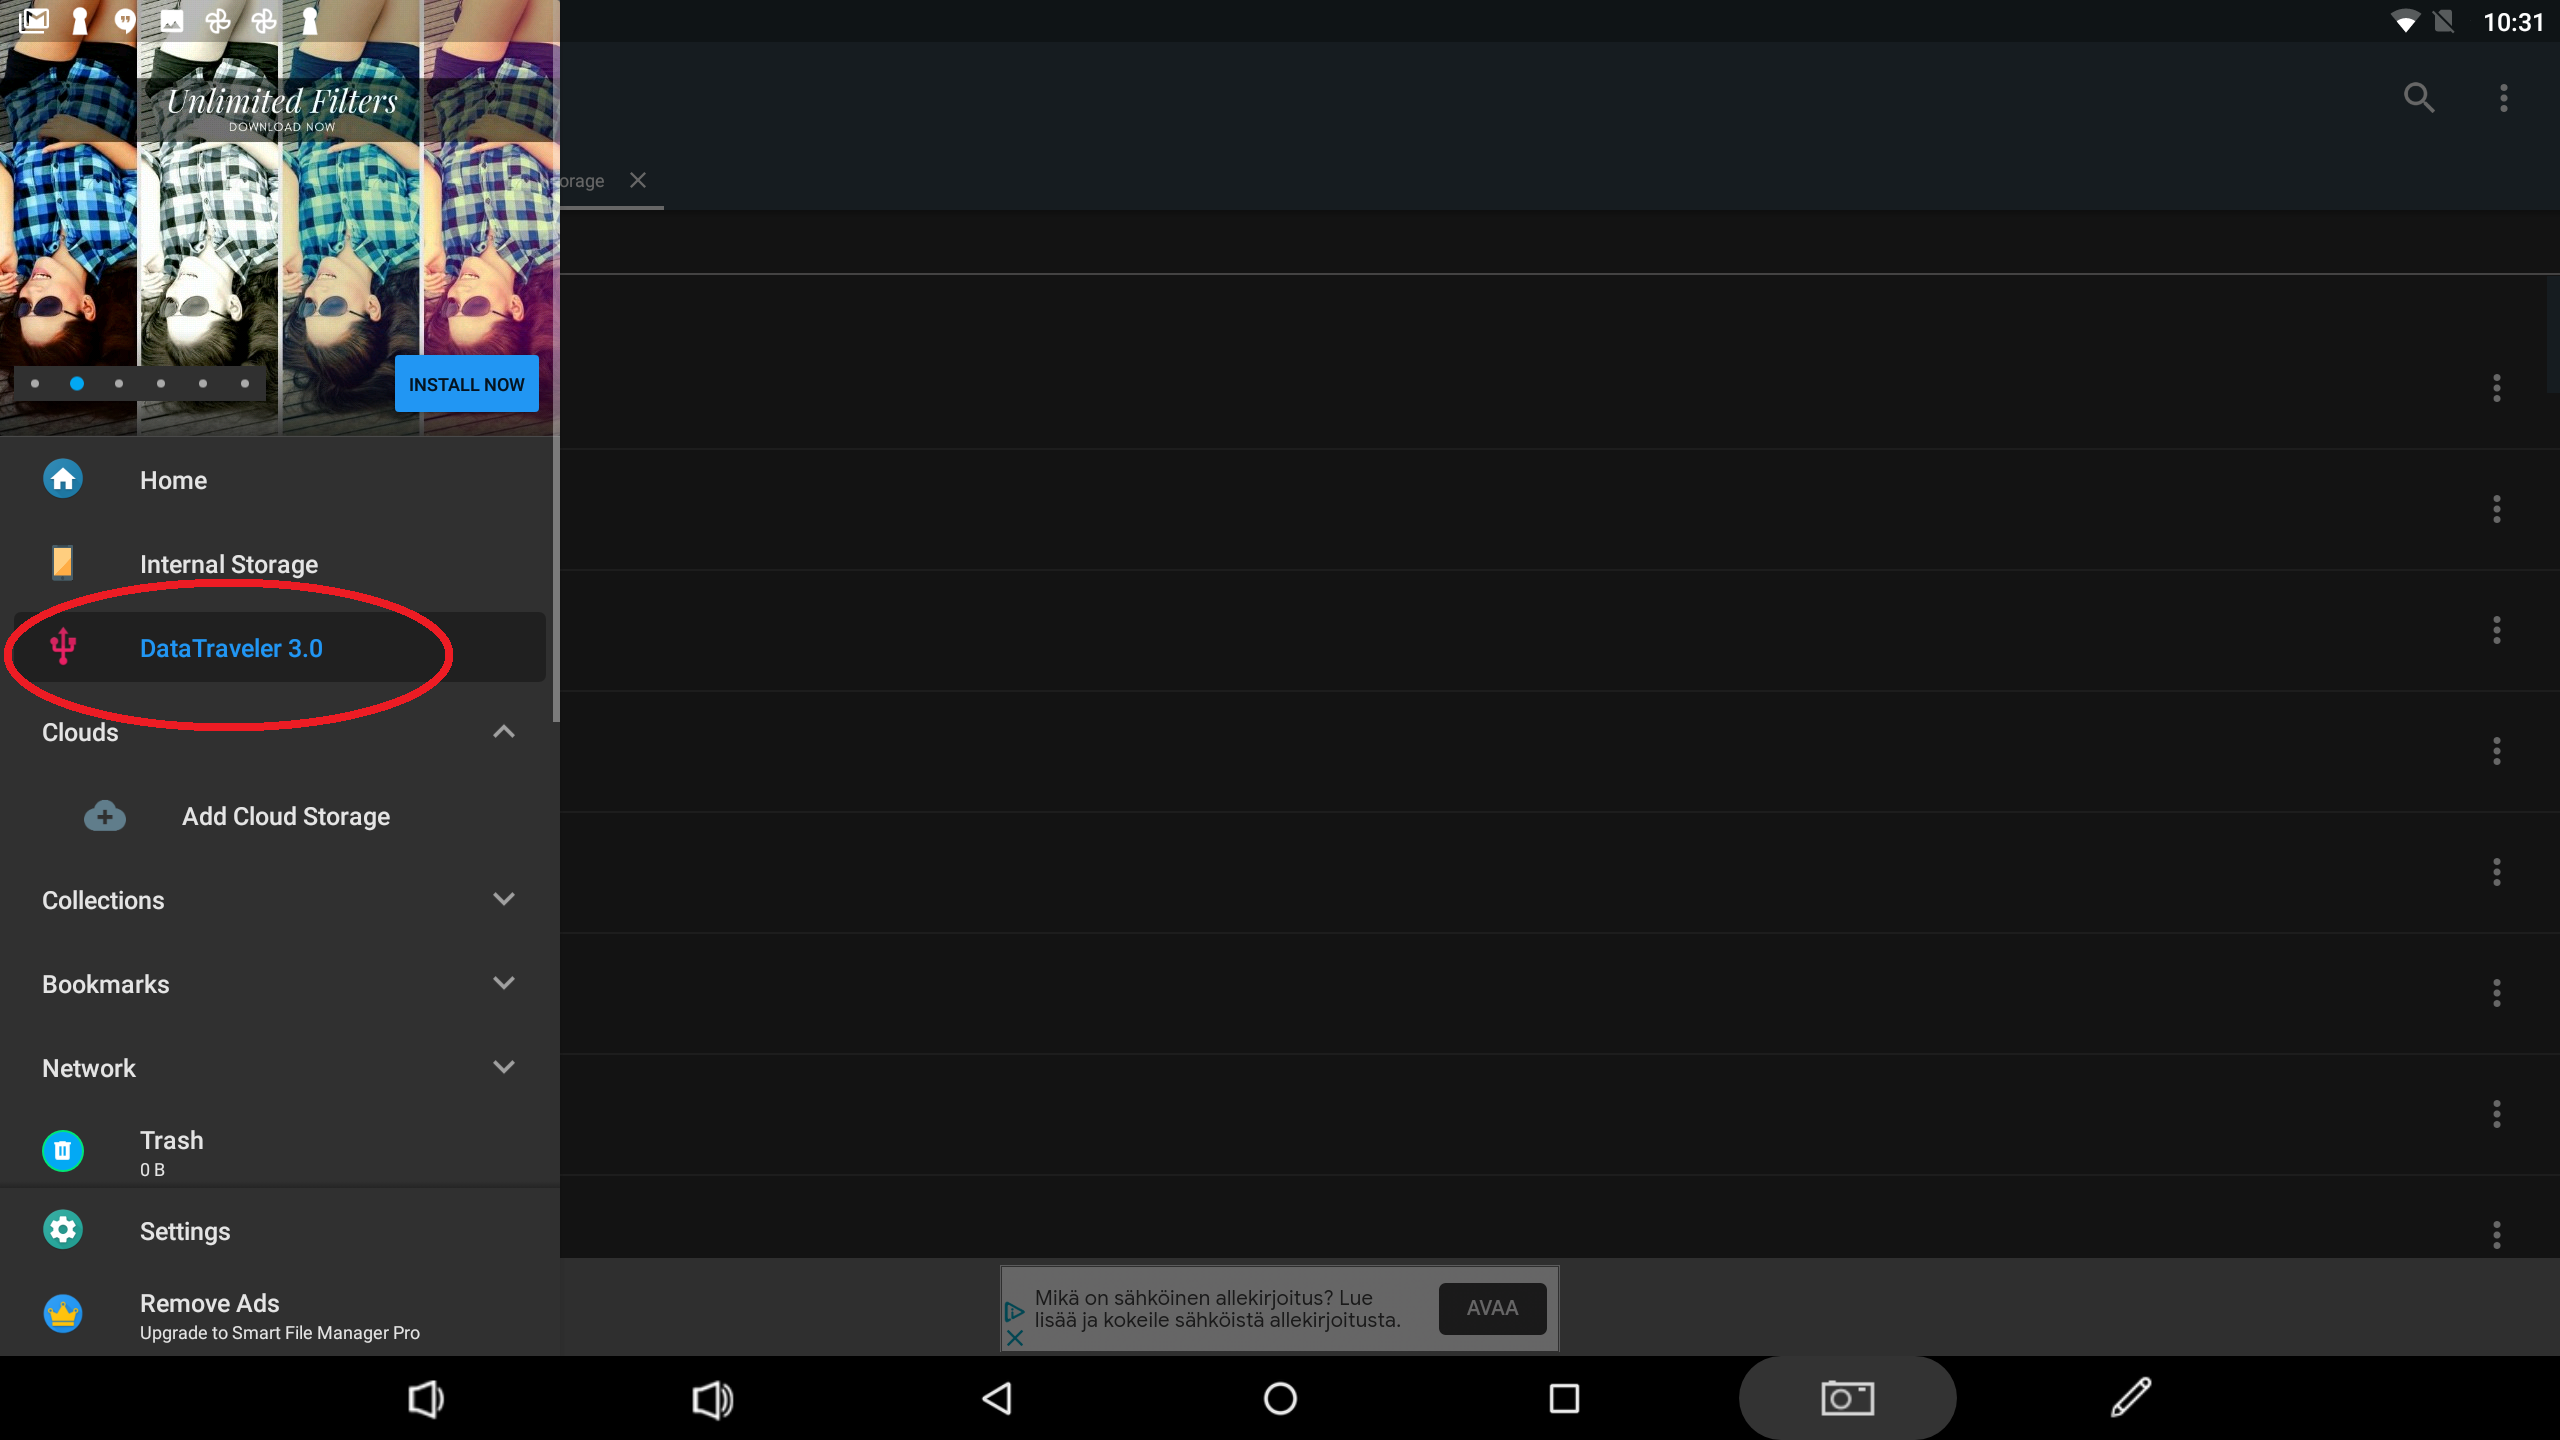
- Download a file manager app such as “Smart File Manager” (Please note that the following steps are based on this specific app (“Smart File Manager”) and can vary for other file managers)
![]() .
. - Insert your USB port to Yetitablet.
- Open up the YetiBrain Games app and choose the minigames ‘‘Match Pairs’‘, ‘‘Picture Shuffle’‘, or ‘‘Scratching Game’‘.
- Open the ‘‘MANAGE OWN PICTURES’‘ in the bottom right corner.

- Tap on ‘‘OK’‘ in the popup dialog box.
- Click on the ‘‘ADD CATEGORY +’‘ and enter the name you want under Category name.

- Click on the ‘‘ADD PICTURE +’‘.
- Tap on the ‘‘Three bars icon’‘ in the top left corner to open up the menu.

- Choose your file manager app such as “Smart File Manager”.

- Tap on the ‘‘Three bars icon’‘ again in the top left corner to open up the menu.
- Click on your USB drive.
- Open up the folder with your pictures.
- Select an image by tapping on it.
- The picture is saved automatically. Press ‘BACK’ in the top left corner, you can start to play the games by using your own pictures.
Deleting pictures
- If you want to delete one picture, you can click
![]() to delete it immediately.
to delete it immediately. - If you want to delete the whole category, you can click
![]() to delete them all by pressing on ‘OK’ in the popup dialog box.
to delete them all by pressing on ‘OK’ in the popup dialog box.
 |
 |
Comparte tu opinión sobre este tema.