
- The “Grid” control is used on many pages.
- The “Grid” displays information in tabular format.
- Each “Grid” has a number of “Columns” and each “Column” has a label.
- Each “Grid” also has a ‘Save Grid Layout’ option that allows the user to choose the columns that should be displayed on the page.

- Click on any of the “Columns” to apply sorting to the data displayed on the “Grid”.
- Place the “mouse” on any of the “Columns” and click on the right key. This will bring up a list of other functions available for the “Grid”.
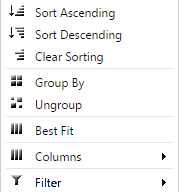
- Click on the “Columns” to add/remove columns to/from the “Grid”.
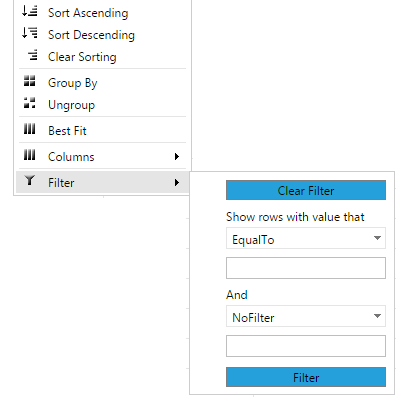
- Click on the “Filter” to apply filter to the data displayed on the “Grid”.
- Click on the Group by and the data will be grouped by the column selected.
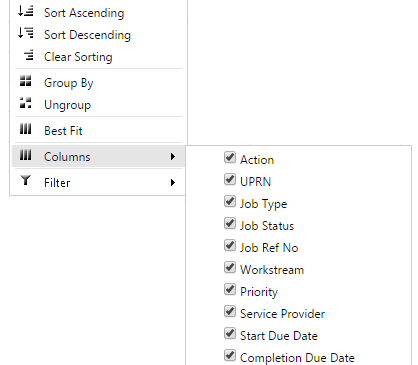
Choosing columns to be displayed on the Grid.

To be able to add or remove columns on the grid follow the steps below:
1. Right click on any grid’s header. List of options appear.
2. Hover mouse over ‘Columns’.
3. Tick the column(s) that you would like to be visible on the grid.
4. Click on ‘Save grid layout’ button to save the setting.
The grid should display all your selected columns.
By ticking column(s) can be made visible or by un-ticking can be made invisible.
Post your comment on this topic.