
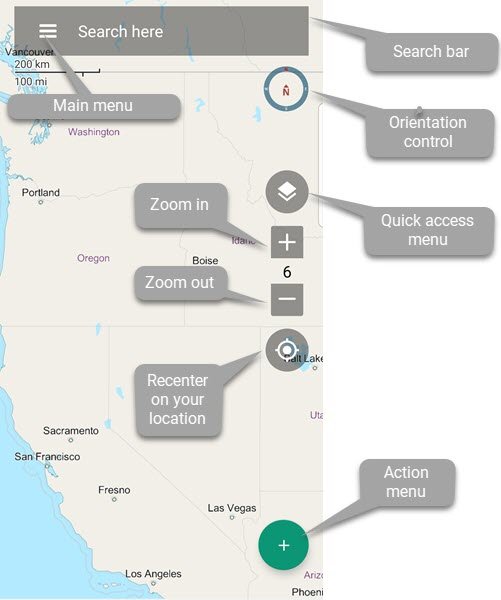
This screen is where you will be able to access most of the BackCountry Navigator XE’s main functions.
First Things First – Prepare For Your Adventure
1. Create a Trip.
2 Create Waypoints
- Do you need to create Waypoints toward your destination?
You should get in the habit of creating a Waypoint from your starting location (so you know how to get back and how far you’ve traveled).
If you know your destination you can create a Waypoint for your destination. - Do you need to create or import a Track toward your destination?
If you want to follow a specific route you should manually create a Track by drawing it on the Main Screen. Add Waypoints along the Track to help you keep track of your progress.
You can also import a Track from the Trips screen here. - Do you need to Import Waypoints or Tracks?
You can download and import a Track or Waypoint into BCNXE from the Trips screen here. BCNXE accepts .GPX, .KML, and .KMZ formats which are the most commonly used.
3. Select a map to suit your needs.
- You can select a different type of map from the Maps page here
- Pin a Favorite Map here so it’s easier to select next time you need it.
* Click here for a brief explanation about maps.
4. Start the Adventure
Go back to the Main Screen, tap the Action Menu and then tap Record a Track.
Need more help with this?
Helpdesk for BackCountry Navigator XE
Copyright © 2025 crittermap
—
Powered by 