
Tap Draw  to open the Drawing menu and add polygons, lines, and waypoints to your Trip.
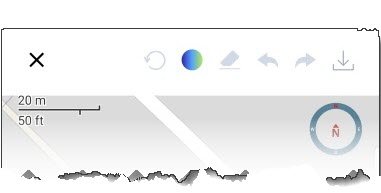
 Close the draw window
![]() Clear the screen
Clear the screen Select the color for your graphic object.
 Undo and redo
 Save object
The small button at the bottom of the screen gives you an option of what to draw: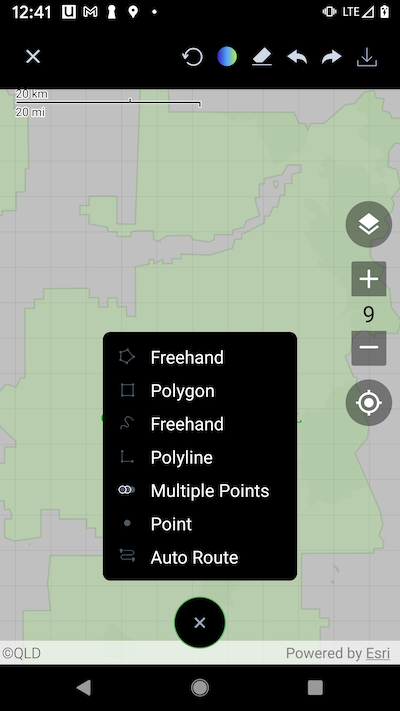
Auto Route
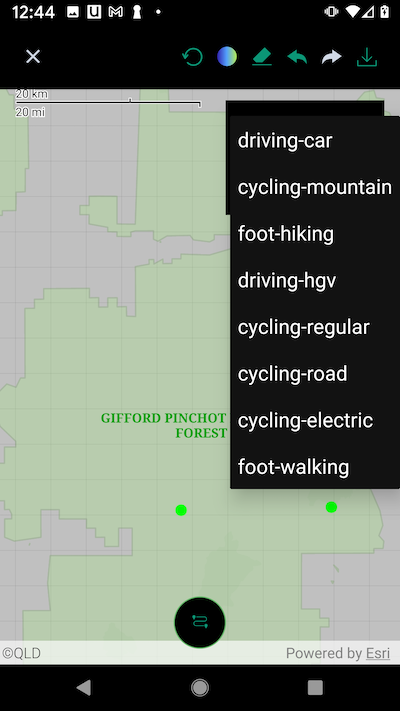
Auto Route is a popular feature that may create lines for you automatically.
- After choosing this item, select two or more points on the screen.
- Choose a profile, ie hiking-foot, and push the done button.
![]()
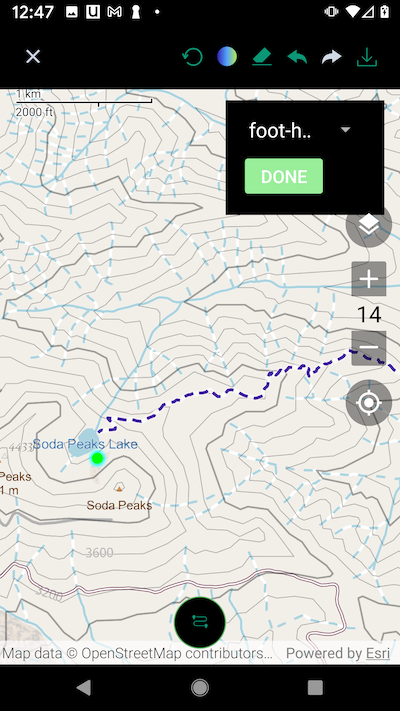
- It will trace a path using OpenstreetMap road and/or trail data.
![]()
- Be sure and Tap
![]() to save the path to your Trip.
to save the path to your Trip.
Freehand Polygon (ie boundary, shape)
- Tap the screen where you would like the polygon to start.
- Drag your finger to create the boundaries for your polygon.
- Tap the screen again to finish the polygon.
- Tap
![]() to save the polygon to your Trip.
to save the polygon to your Trip.
Polygon (ie boundary, shape)
- Tap the screen where you want to place the first vertex for your polygon.
- Continue tapping the screen where you want each additional vertices to be placed.
- Tap
![]() to save the polygon to your Trip.
to save the polygon to your Trip.
To delete a vertex on the polygon, tap the vertex and then tap Remove Vertex.
Freehand Polyline (ie Path)
- Tap the screen where you would like the line to start.
- Drag your finger to draw the line.
- Tap the screen again to finish the line.
- Tap
![]() to save the polygon to your Trip.
to save the polygon to your Trip.
Polyline (ie path)
- Tap the screen where you want to place the first vertex for your polyline.
- Continue tapping the screen where you want each additional vertices to be placed.
- Tap
![]() to save the polygon to your Trip.
to save the polygon to your Trip.
To delete a vertex on the polyline, tap the vertex and then tap Remove Vertex.
Multiple Points
- Tap the screen where you want to place points.
- Tap
![]() to save the polygon to your Trip.
to save the polygon to your Trip.
Point
- Tap the screen to place a single point. Tap it again to move the point.
- Tap
![]() to save the polygon to your Trip.
to save the polygon to your Trip.
Need more help with this?
Helpdesk for BackCountry Navigator XE
Copyright © 2025 crittermap
—
Powered by 