
This page is where you organize your Trips, Waypoints, and Routes.
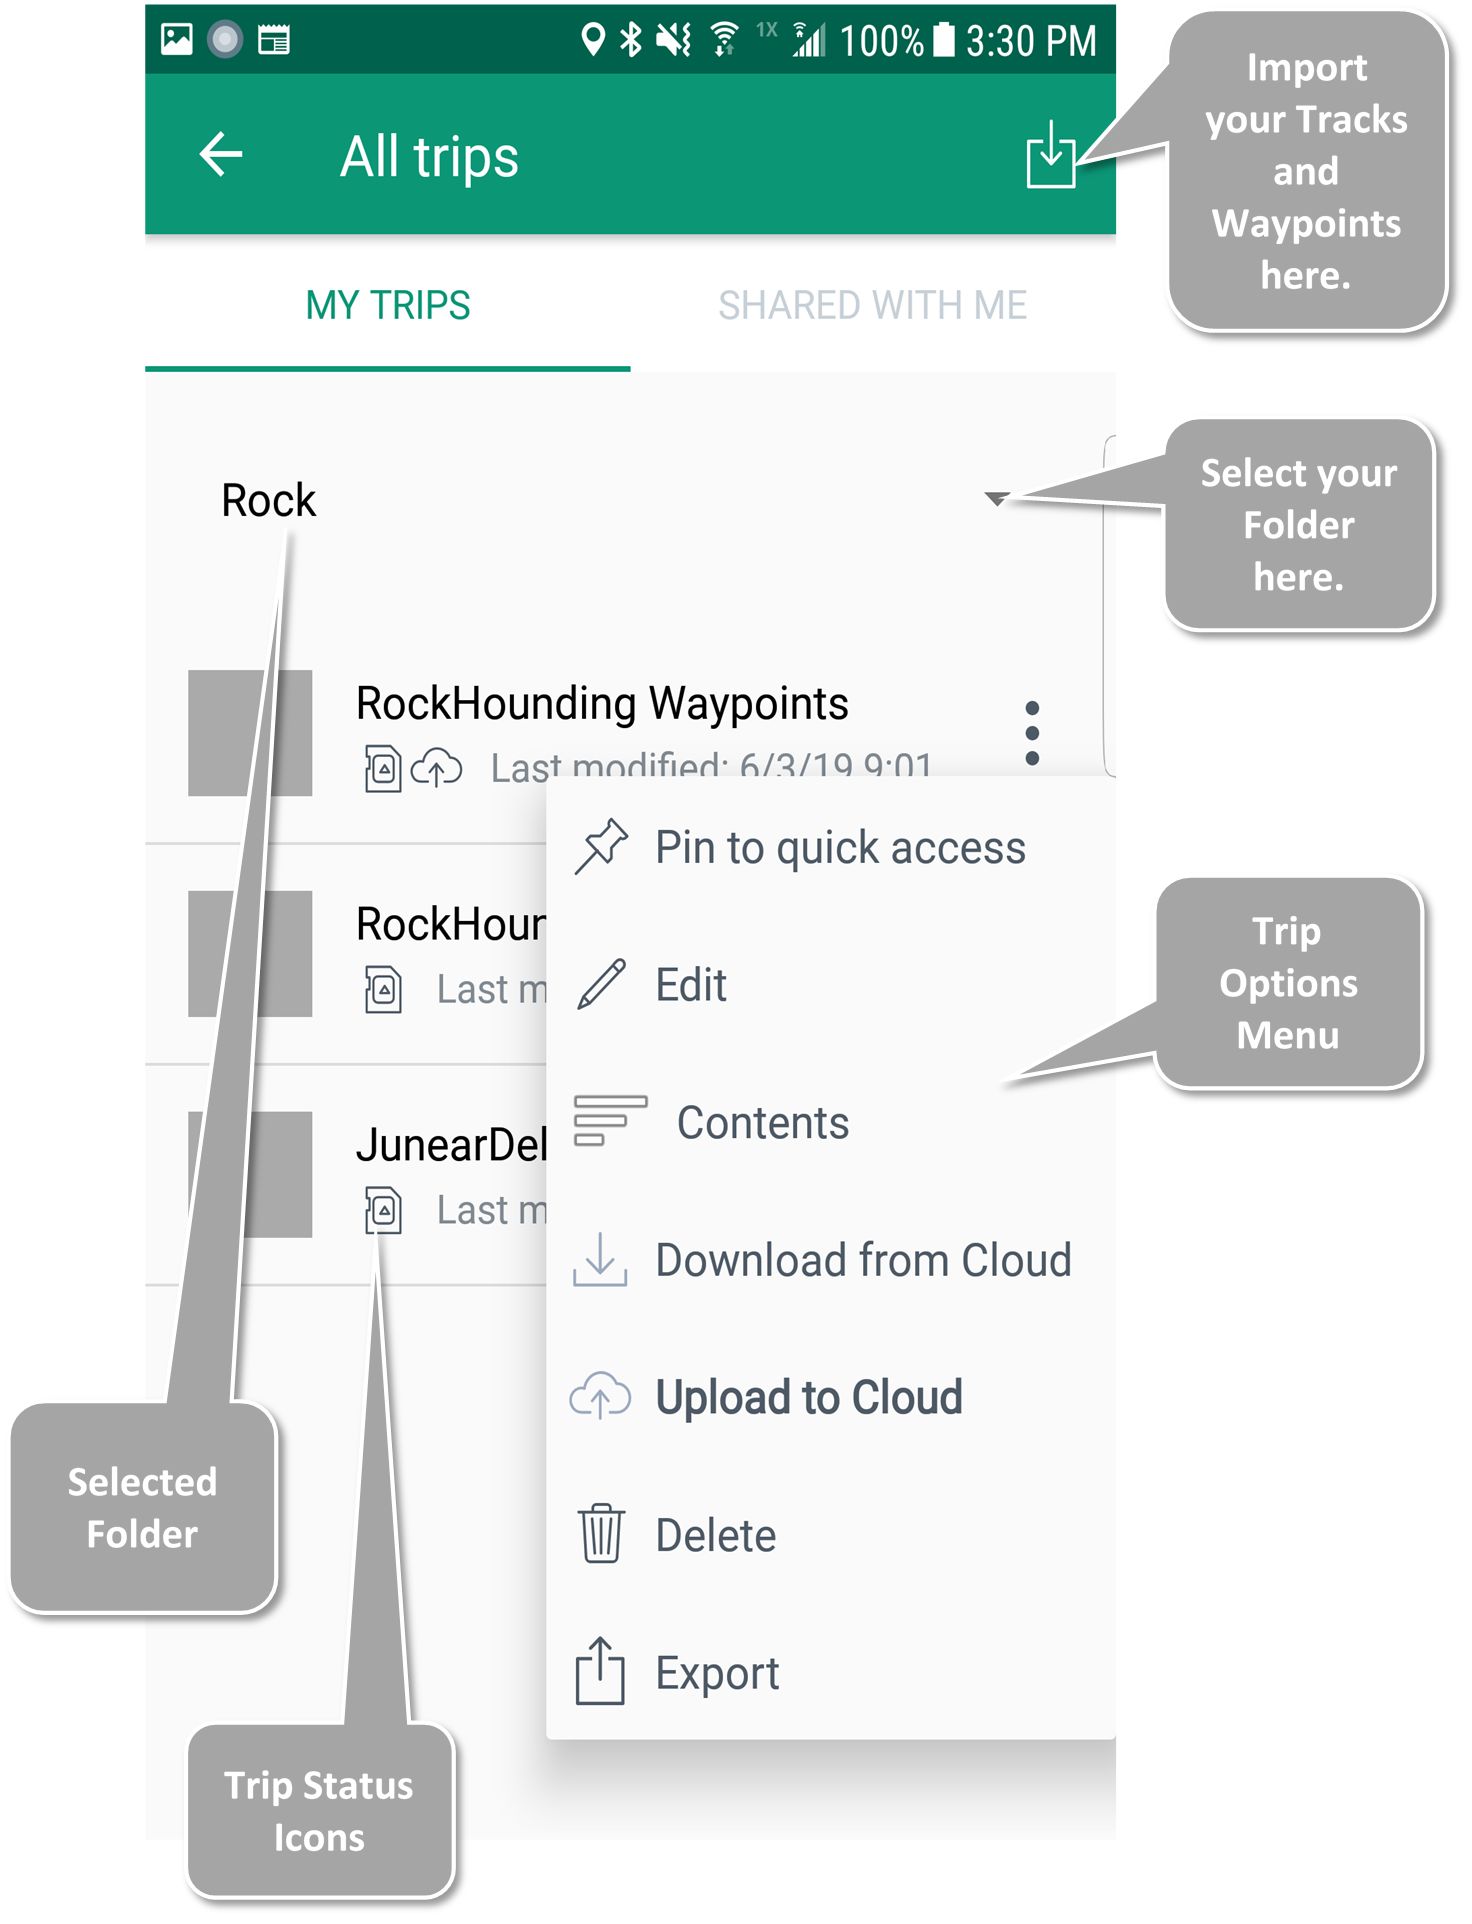
Trip Screen
When you first open the Trip Screen you will see all the trips associated with your account.
- A Trip is a collection of waypoints, tracks, and polygons for a specific geographic area.
—- Create Trips when you create a new waypoint, drawing, or track on the Main Screen
—- Manage Trips with the Trip Options
- Import Routes and Waypoints with the top right icon ![]() .
.
Trip Status Icons
Below the name of each trip you will see Trip Status Icons.
- Trip Status Icons indicate the status of that trip; where it is stored:
— The cloud icon ![]() means the trip is online in BackCountry Navigator XE and can be downloaded.
means the trip is online in BackCountry Navigator XE and can be downloaded.
— The memory card icon ![]() means that the trip is stored locally on your cell phone.
means that the trip is stored locally on your cell phone.
—— You can have a Trip stored both in the cloud AND locally on your cell phone.
— The circular arrow icon means that a Trip on your phone needs to be synced to the version in the cloud.
— The download arrow icon ![]() means that a Trip in the cloud needs to be downloaded to sync with the version on your phone.
means that a Trip in the cloud needs to be downloaded to sync with the version on your phone.
— The upload arrow ![]() icon means that the Trip was created locally and should be uploaded to the cloud for safe keeping.
icon means that the Trip was created locally and should be uploaded to the cloud for safe keeping.
Folders
- Trips can be organized into Folders on this screen:
—- Create or select the Trip
—- Click the “Folder Options” menu of the Trip
—- Click “Edit”
—- Click the down arrow in “Create in Folder”
Trip Options Menu
Trip Options menu gives you the ability to manage your trips.
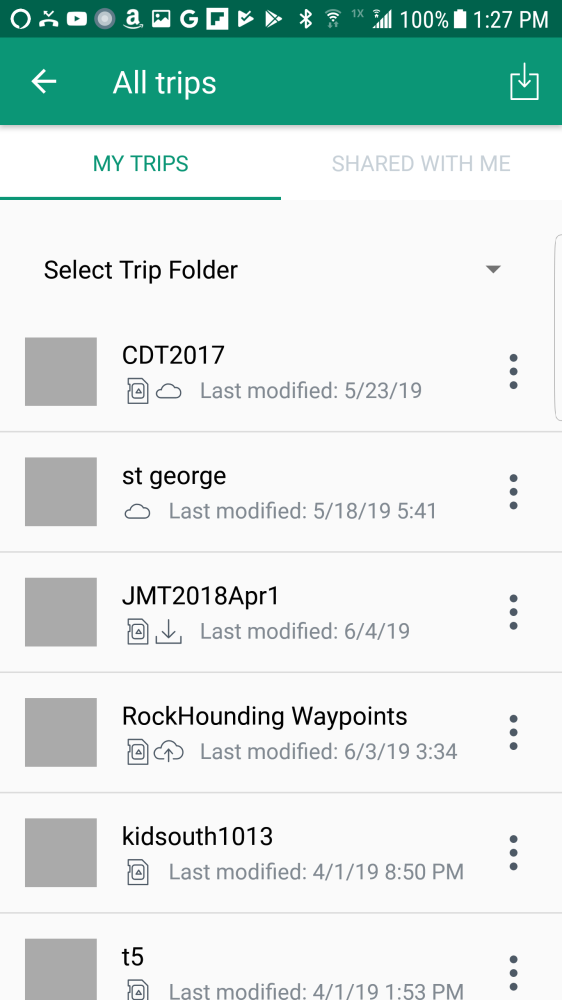
Examples:
In the example below:
- CDT2017 is a trip that exists both on local storage and in the cloud.
- st george is only on the cloud, but can be downloaded.
- JMT2018Apr1 is available locally, but there might be a newer version on the cloud.
- Rockhounding Waypoints has been modified locally, and may need to be uploaded to the cloud.
- kidsouth1013 and t5 are only available locally.
Need more help with this?
Helpdesk for BackCountry Navigator XE