
A Trip is a collection of Waypoints, Tracks, and Routes for a specific geographic area.
The Trips page on the main menu where you organize your Trips
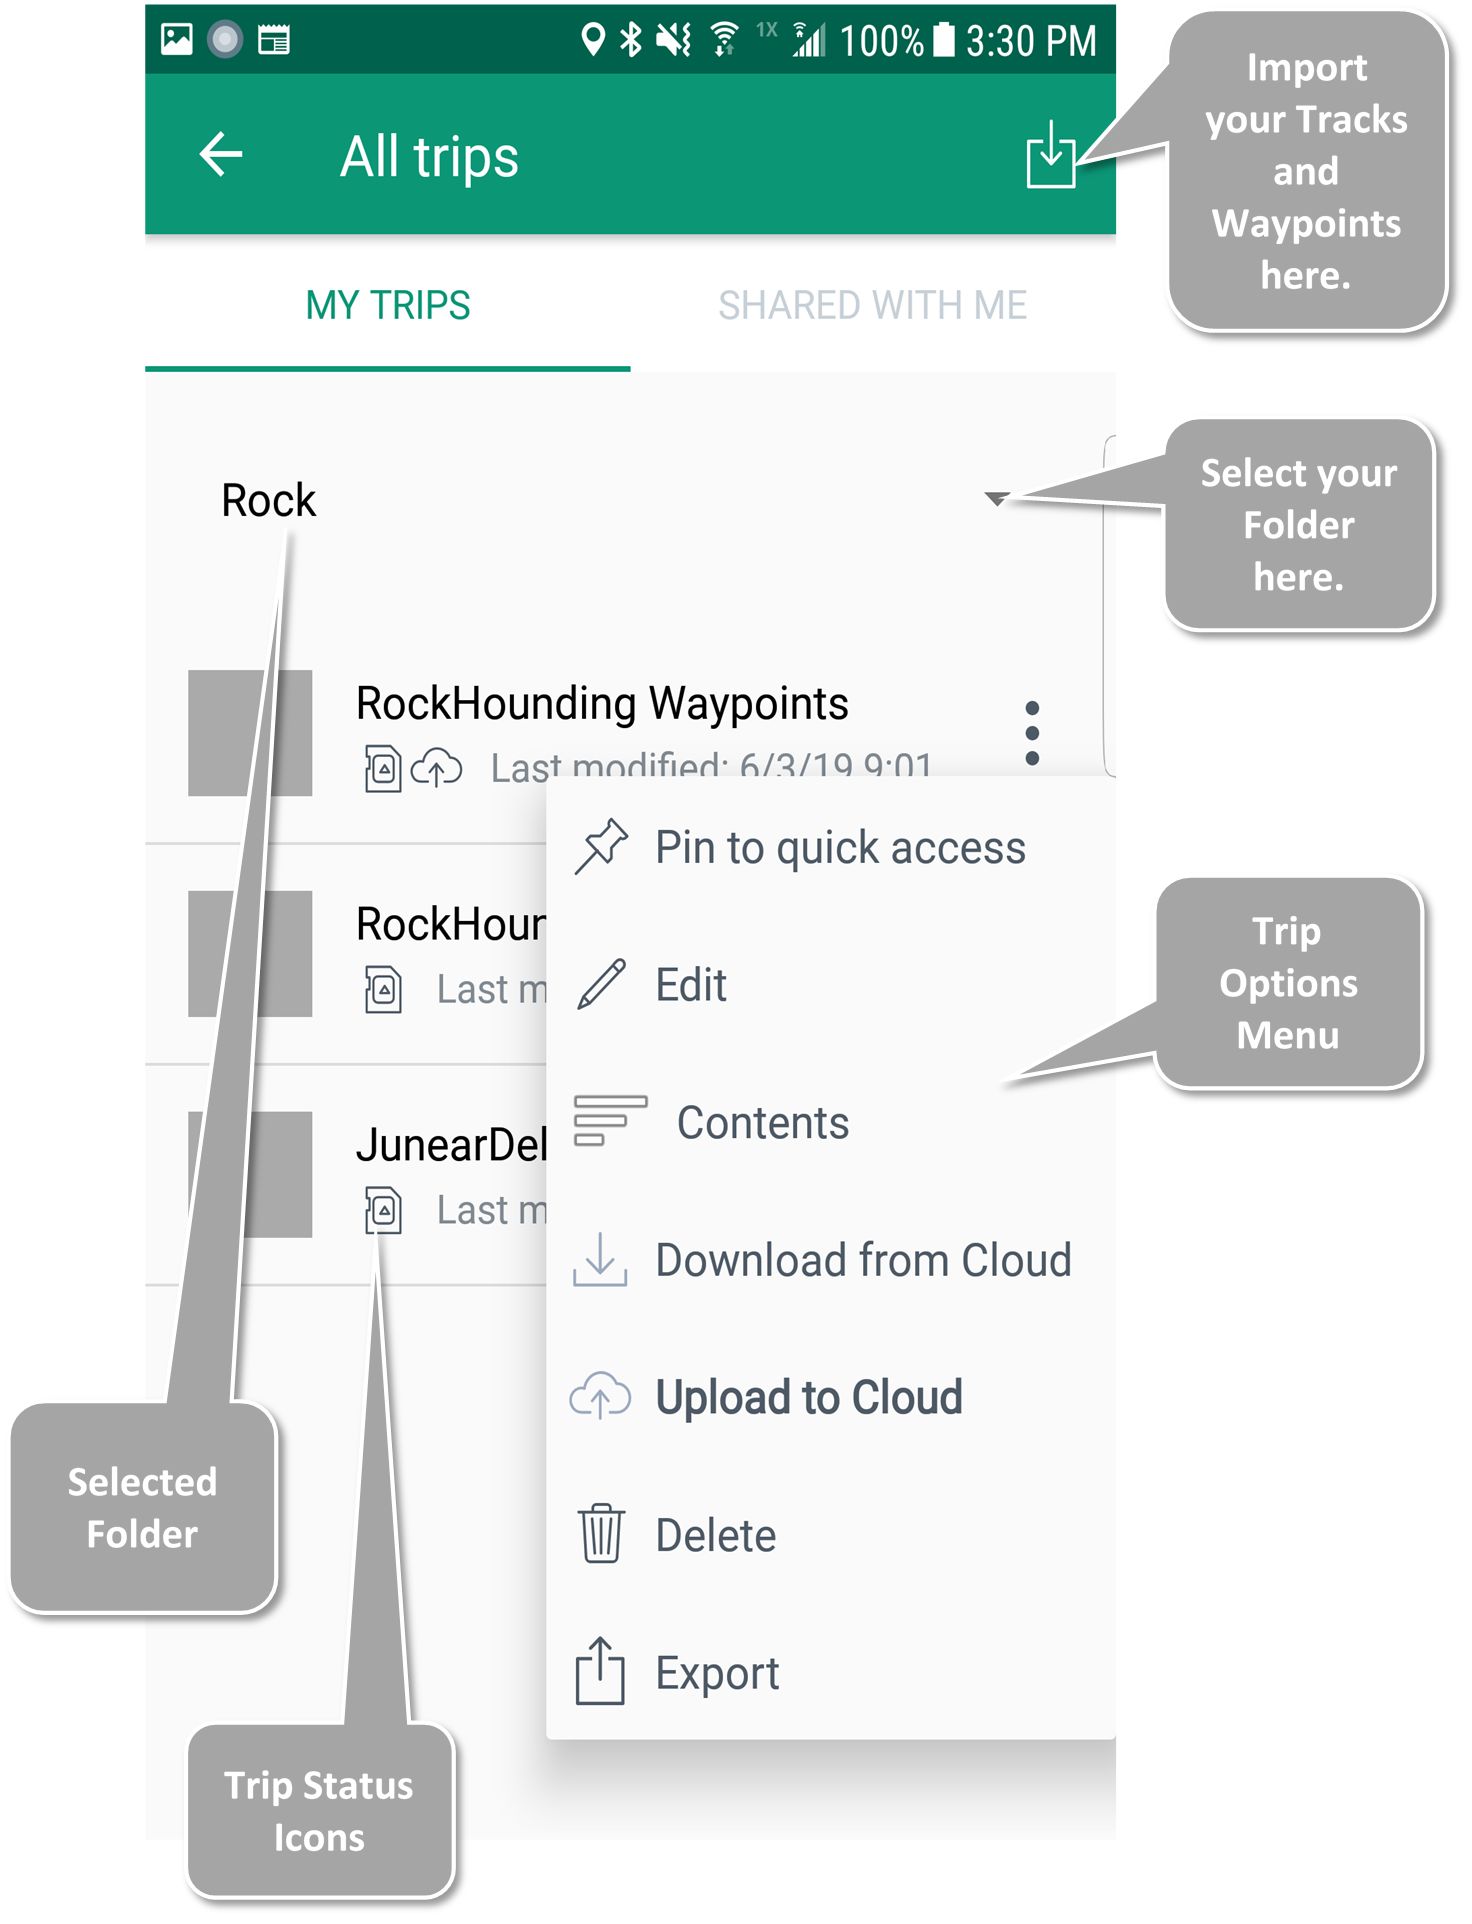
Trip Screen
- When you first open the Trip Screen you will see all the trips associated with your account.
—- Create Trips automatically when you create a new waypoint, track, or Route on the Main Screen
—- Manage Trips with the Trip Options menu
- Import Routes and Waypoints with the top right icon.
More About the Trip Options Menu
— Trip Options
Trip Status Icons
Below the name of each trip you will see Trip Status Icons.
- Trip Status Icons show you where the Trip is stored:
— The cloud icon means the trip is online in BackCountry Navigator XE and can be downloaded.
— The memory card icon means that the trip is stored locally on your cell phone.
—— You can have a Trip stored both in the cloud AND locally on your cell phone.
— The circular arrow icon means that a Trip on your phone needs to be synced to the version in the cloud.
— The download arrow icon means that a Trip in the cloud needs to be downloaded to sync with the version on your phone.
Folders
- Trips can be organized into Folders on this screen:
—— Create or select the Trip
—— Click the “Right Menu” of the Trip
—— Click “Edit”
—— Click the down arrow in “Create in Folder”
Examples:
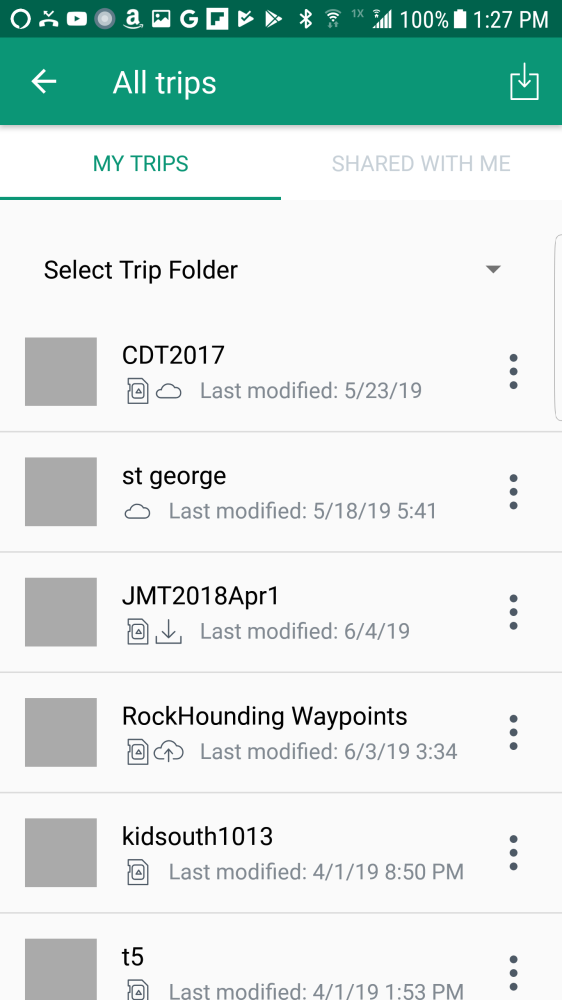
In the example above:
- CDT2017 is a trip that exists both on local storage and in the cloud.
- st george is only on the cloud, but can be downloaded.
- JMT2018Apr1 is available locally, but there might be a newer version on the cloud.
- Rockhounding Waypoints has been modified locally, and may need to be uploaded to the cloud.
- kidsouth1013 and t5 are only available locally.
Need more help with this?
Helpdesk for BackCountry Navigator XE