
The following toolchain is available for use with mock objects:
- GCC 6.0 or later
- Visual Studio 2015 or later
Creating and Using mock objects
- Open [Test Editor] by double-clicking a test you want to create a mock object for.
- In the Test Info Tab, expand the test structure tree and select the object to create a mock object. Select [Use mock] at the constructor in the Test Info Edit area on the right.
![]()
- Selecting [Use mock], the class code of the mock object is generated in the Class Factory View.

- Click the created mock object in the Test Info Tab.
![]()
- [Show mocking reference]: You can see the description about specifications of mock objects.
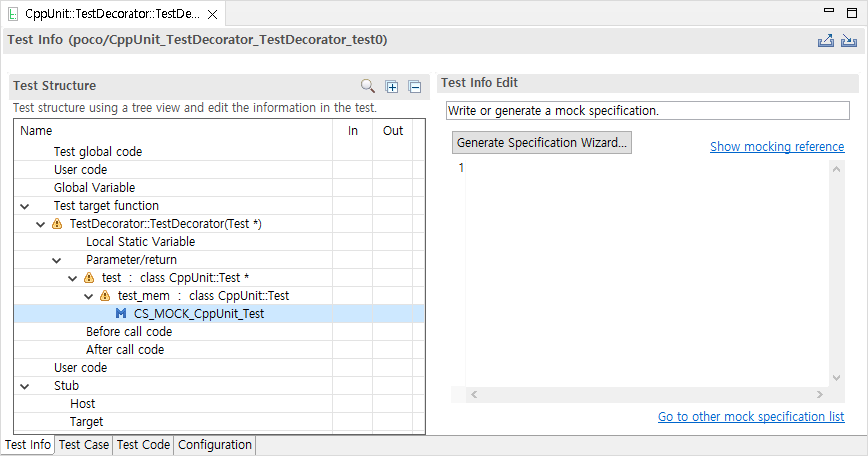
- You can generate mock specification in the wizard, by clicking [Generate Specification Wizard…] button in the Test Info Edit area.
![]()

For details, refer to the Using Mock Objects in C++ Tests page of User Guides.
Check the result of mock objects.
- Click the Run button in the Test View.
- If a mock object does not match the specifications, the test fails and displays the message [Mock Failed] next to the testcase.
![]()
- You can check the failure information in [Test Editor] > [Test Case Tab].
- Expand [▶ Mock failure] and check why the mock object failed.
![]()
- Expand [▶ Mock failure] and check why the mock object failed.


Need more help with this?
Don’t hesitate to contact us here.
Copyright © 2025 Suresofttech
—
Powered by 