
The test information created in the project can be exported at once. Before a project is not analyzed or if there is no test information (Unit/Integration Test, Stub) created, the export cannot be carried out.
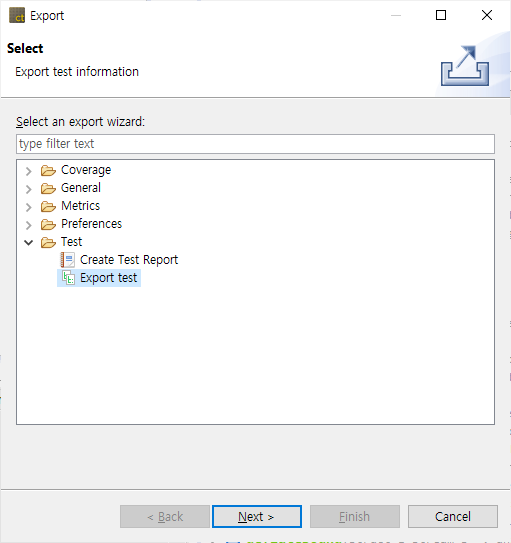
- Select [Test] > [Export Test] in the Export Wizard and click [Next].
![]()
- Select the project that tests are exported and click [Next].
![]()

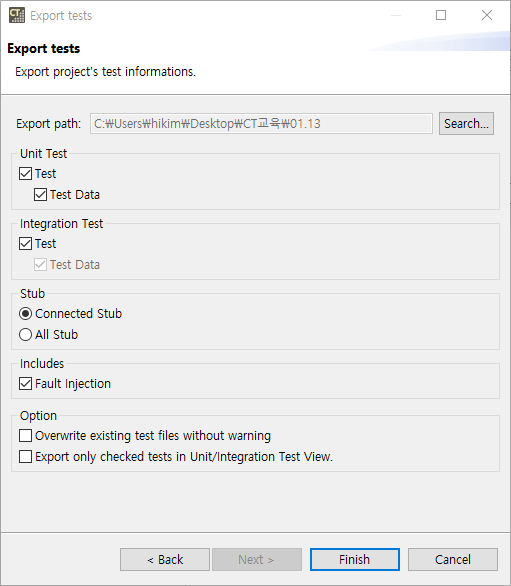
- Select the export path, the unit test items, the integration test items, the stub items, the fault injection and the options, and click [Finish].
![]()
- In [Export path], enter the path to export the test.
- In [Unit Test] group, check whether to export [Test] and [Test Data] respectively.
- In [Integration Test] group, check whether to export [Test].
- When exporting the integration test, it is exported with the test data in a set.
- In [Stub] group, select the stub to be exported among [Connected stubs] and [All stubs].
- Connected stubs: The stubs connected with the test to be exported. If the stubs have no link with the test or the test to be exported is not selected, it does not export that stubs.
- All Stub: It exports all the stubs created in the project.
- In [Includes] group, select whether to export with fault injections.
- In [Option] group, choose whether to overwrite the existing test file when they exist, and whether to export only the tests checked in the Unit/Integration Test view.
- Click [Open Folder] button in the message “Test has been exported successfully.” to check the test exported in the folder where it is saved, or click [Confirm] to finish the export.
![]()

Need more help with this?
Don’t hesitate to contact us here.
Copyright © 2025 Suresofttech
—
Powered by 