Completing Our Example
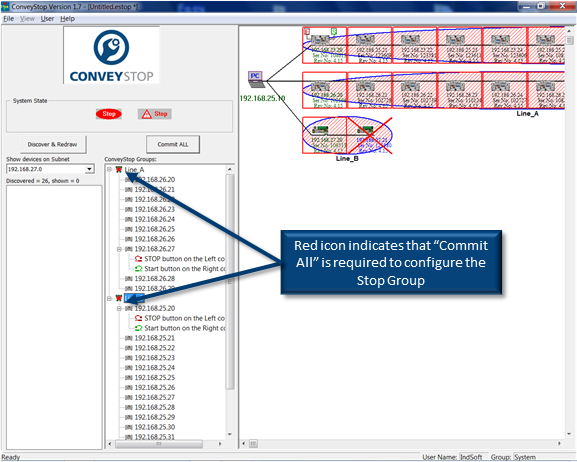
By repeating the same procedures, we want to add a 2nd Stop Group consisting of the remaining unused devices from the Discover window. We want to rename this Stop Group as “Line_B”. We then want a STOP Button on node 1 at I.P. Address 192.168.25.20 connected to the Left Control Port and a START Button on the same node connected to the Right Control Port. When this is complete it should look like as shown:
Commit All Button
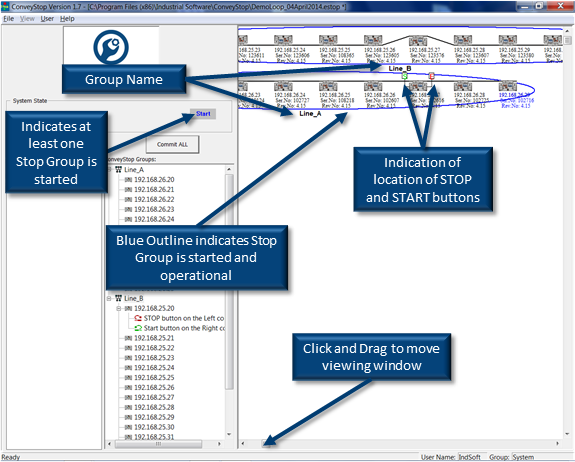
The process is not complete because we have only configured ConveyStop within the software; we still need to Commit the functionality to the physical ConveyLinx modules. Clicking the “Commit All” button sends the current configuration of Stop Groups, buttons, etc. to the actual devices. When complete, ConveyStop screen displays the status of the connected devices. Shown below is what the screen should look like for our example when both Stop Groups are operational and have no stop conditions active and no stop groups awaiting Start: