
Entering a New Sale
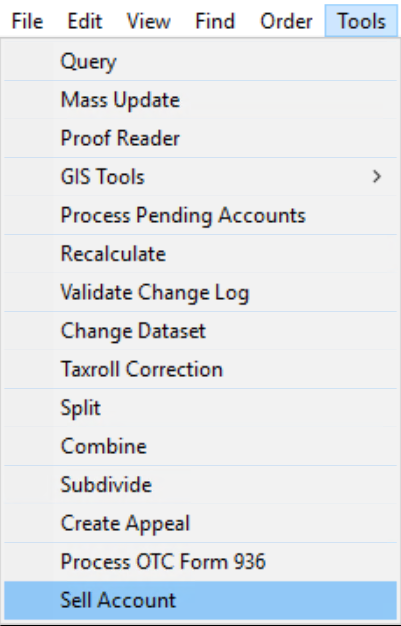
Find the account the sale is for, and go to Assessment File — Tools — Sell Account
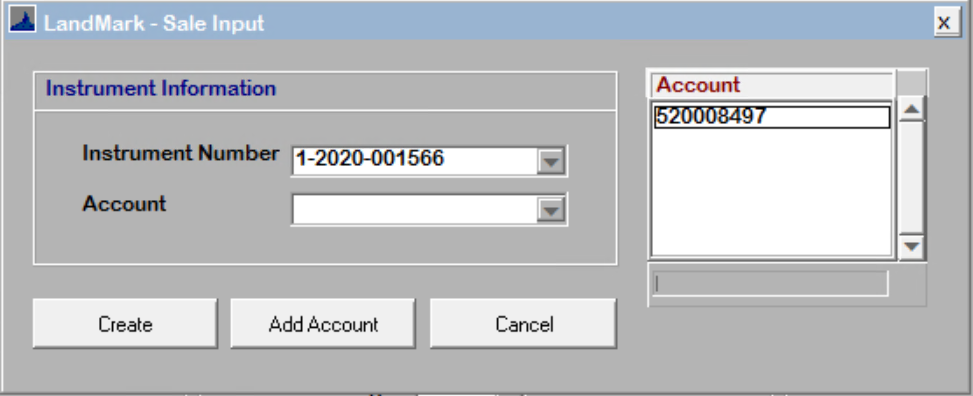
The Sale Input box will appear.
TYPE the Instrument Number in the Instrument Number field.*
OR
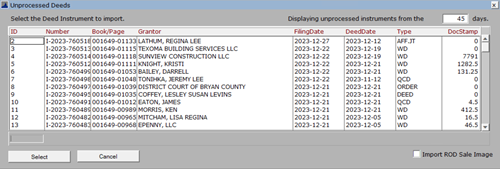
If the KellPro Deed Viewer through Registered Deeds Interface is configured, a browse window will appear listing all Unprocessed Instruments.
CLICK the drop-down box on the Instrument Number to select the Instrument Number (or Deed Number).
The Account Field should automatically populate from the account the user was on when the sale was started.
If more than one account is deeded with the sale:
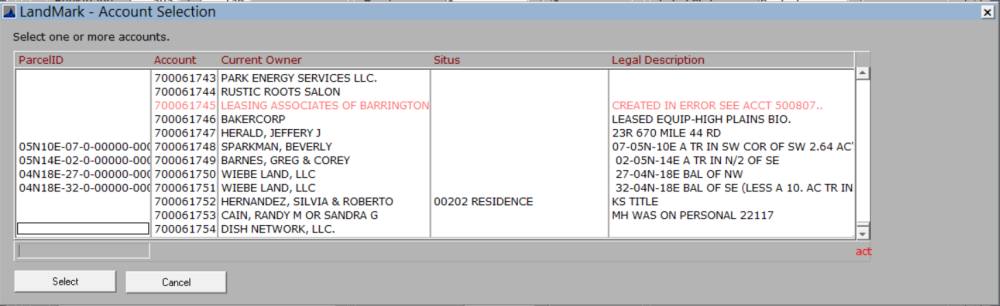
CLICK the drop-down box on the Account field
SELECT all pertaining account(s) off the list.
CLICK Add Account box.
The accounts will be listed under the Account box.
CLICK Create once all accounts are added.
A new sale record is created. The three tabs within the records are: Instrument Data, Included Parcels and Attachments.
Instrument Data Tab
The Instrument Number, Account Number, Parcel ID Number, and the Grantor fields are filled in with the current data from the Parcel File when a new sale is created.
If LandMark is linked with the KellPro system, the Book/Page, Doc Stamp, Deed Type, Sale Date, Filing Date and Sale Price will also be populated.
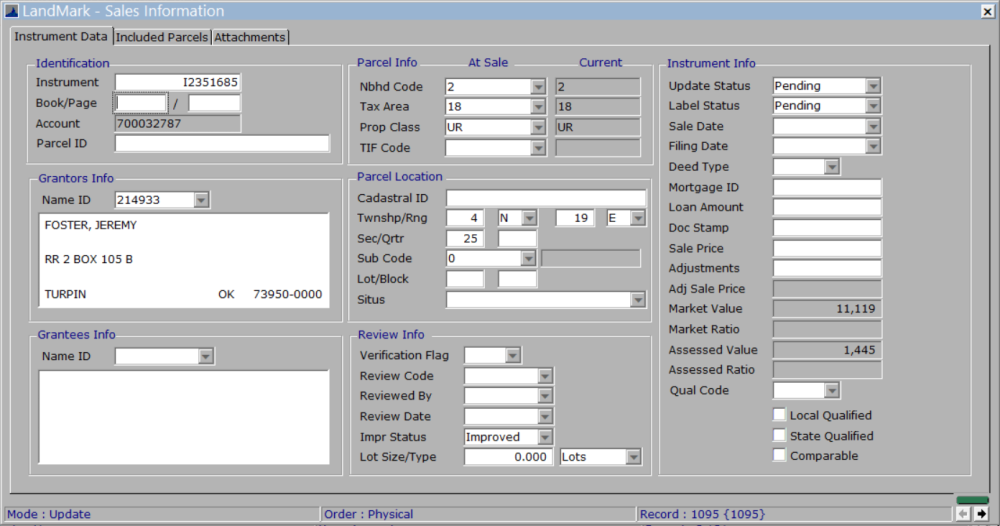
ENTER the Grantee Information by clicking on the Name ID dropdown box.
Users can either select a name off the list or create a new owner.
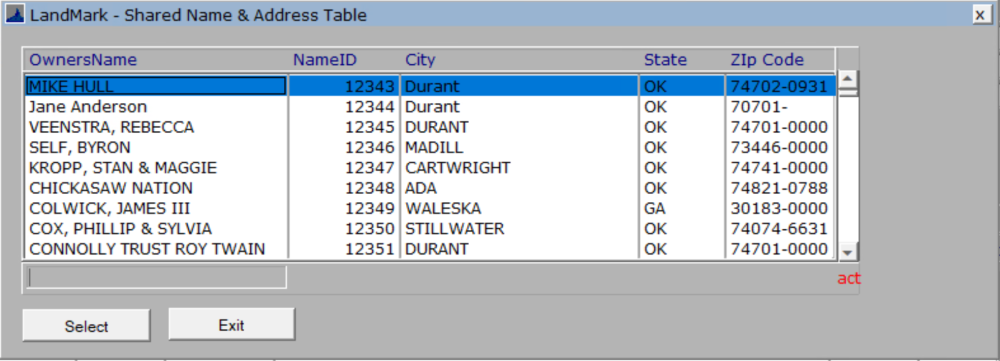
To create a new owner, SELECT the Create button.
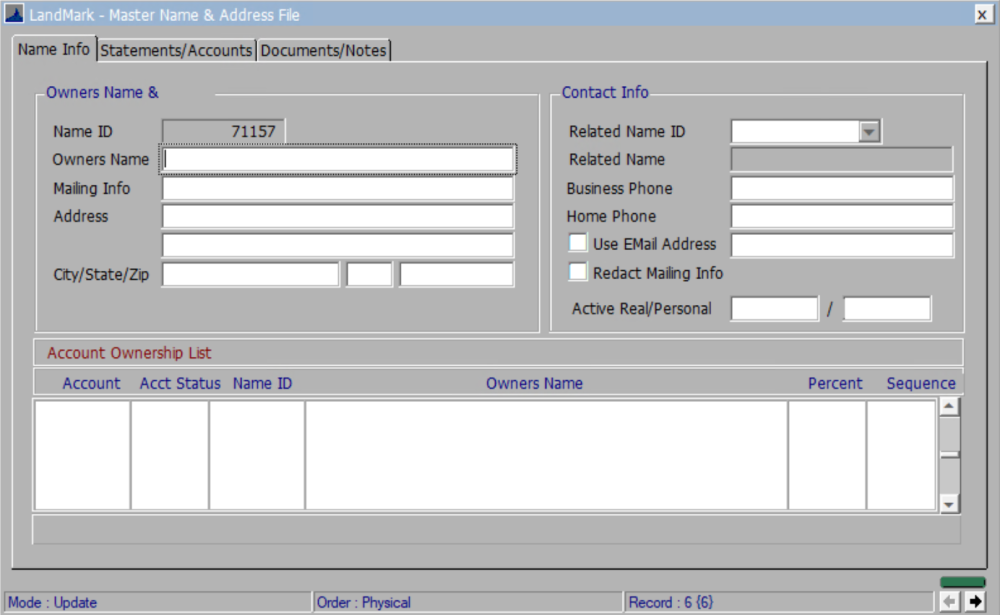
The Name & Address module will appear.
Here the new owner’s information can be added and will be assigned a new Name ID.
CLICK X to Save the changes to the new name record.
The Name & Address module will close.
Although it does not look like it, the new owner’s name is already selected in the Name & Address Table. Simply CLICK the Select to select the newly created owner.
Parcel Info and Parcel Location are automatically populated from the data in the Parcel File.
Review Info
Verification Flag: This flag indicates the status of the verification letter.
If the verification letter is printed when the sale is finished, the status will automatically update to Pending (1).
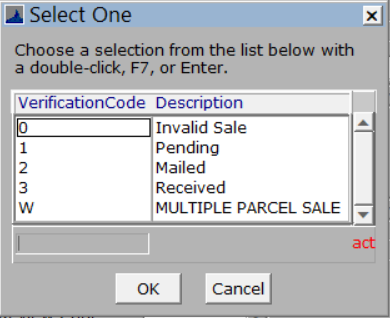
Invalid Sale (0): The sale is not a valid sale and a verification letter is not necessary to send out.
Pending (1): Pending means the verification letter has been printed.
Mailed (2): The verification letter has been mailed out.
Received (3): The verification letter has been received by the assessor’s office.
Review Code: A review code can be added to the account from here by clicking the drop-down box and selecting a review code from the list.
CLICK here to view more on the Verification Table.
Reviewed By: Once the verification letter has been returned to the assessor’s office, users can select their Appraiser Code from the list as the person who reviewed the verification letter.
Reviewed Date: Once the verification letter has been returned to the assessor’s office and has been reviewed, users can add the date the letter was reviewed.
Impr Status and Lot Size/Type are automatically populated from the data in the Parcel File. These can be edited if needed.
Instrument Info
Update Status: This status will be “Pending” until the Name Update has been completed. Once the owner’s name has been changed from the Grantor to the Grantee’s name, the Update Status will be changed to show “Complete”.
Label Status: This status will be “Pending” until a new Label has been created for this account if the user wishes to do so. Once the label has been printed, the Label Status will be set to “Complete”.
Sale Date: The date of the sale.
Filing Date: The date the sale was filed.
Please Note: If the sale date and filing date occur in different years, they WILL NOT be included in the Sales Ratio Study. If filing date is blank, then it WILL be included with the sale year.
Deed Type: Users can select a deed type from the drop-down deeds list.
To view the Deed Type Table: go to View – Deed Type Table
Here the Type Codes and the Code Descriptions can be edited.
Mortgage ID: If a Mortgage is listed on the deed, users can enter the Mortgage ID here.
Loan Amount: Users can also track the Loan Amount if they choose to.
Doc Stamp: This is the Doc Stamp listed on the Deed. LandMark will automatically populate the Sales Price (if sales price is blank).  Check out our FAQ about Doc Stamps
ENTER Doc Stamp amount
TAB to Sales Price field
The Sales Price should populate.
Sale Price: This is where the Sale price that is listed on the deed is entered. LandMark will automatically populate this field based on the Doc Stamp (if sales price is blank before adding Doc Stamp).
Important Note: If Doc Stamp amount was entered incorrectly, therefore making the Sales Price incorrect. ERASE Sales Price first, then ENTER corrected Doc Stamp amount, TAB through to Sales Price and the correct Sales Price amount should show.
Adjustments: If any adjustments such as personal property are noted in the sale verification letter, those adjustments can be entered here.
Adj Sale Price: This field is the sale price less the adjustments made to the sale.
Market Value: This is the market value listed on the account in the Parcel File.
Market Ratio: This is the ratio of the Market to Sale price.
Assessed Value: This is the assessed value of the account in the Parcel File.
Assessed Ratio: This is the ratio of the Assessed Value to the Sale price.
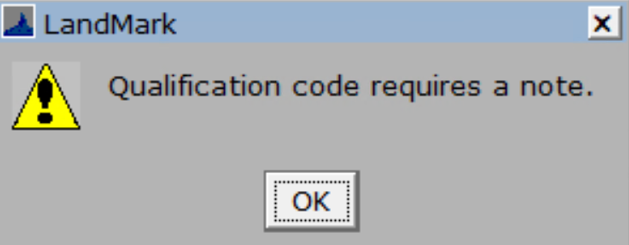
Qual Code: Users can select a qualification code for the sale from the drop-down list.
When a qualification code is selected off of the list, a check mark appears in either Local Qualified, State Qualified, or Comparable based on how the qualification code is defined in the Qualification Table.
To view the Sale Qualification table: go to View – Qualification Table from the Sale Module The Sale Qualification Table will appear. Here users can edit the codes descriptions, whether the code is qualified or not-qualified, and define which type of qualified sale the code is linked to.
If a qualification code requires a note, user will get the following message.
Included Parcels Tab
Transaction Info
Adjustment Code: Users can select different adjustment codes to track the adjustments made on the sale by clicking the drop-down box.
To view the Adjustment Table, go to View – Adjustment Reasons Here users can create new codes to track what adjustments were made and why they were made to the sale.
Adjustment Note: Users can write in notes to explain the adjustments made to the sale.
Broker Flag: If a broker’s name is listed, users can track this by checking the Broker Flag box and writing in the broker’s name.
Current Classification This information drawn from the Parcel File for the account.
Status/Static Value: If the parcel no longer represents what sold, then the value can be frozen.
Example: If the land was vacant at the time of sale and there has been a new house added to the parcel, the Impr Value can be frozen at 0.
Legal Shows the legal description of the account.
Valuation Shows the value and ratios of the parcel at the time of the sale, the prior year, the currently assessed, and the currently appraised.
Included Parcels: If more than one parcel is listed with this sale, they will be listed here.
When data entry is complete:
To Exit Enter/Update Mode with the Exit Tool: PRESS ESC key or CLICK X and OK
A Sales Options dialog box asks if you want to print Parcel Labels, Print Sale form, or Print Verification Letter.
The sales options that are selected when entering a sale will be stored in the sales files (Included Parcels tab under Exemption Options).
- Check the box for the reports to be printed.
- Value Caps and Exemptions/Freezes can also be checked to be removed at this time.
- If there was a developer’s deferment on the appraisal record, the user will also be prompted to remove that deferment that at this time.
- If another sale is needed to be entered, click on Next Sale.
- If the user is done entering the sale, click on the Finished button.

The new sale entry is complete and will now appear on the Sales/Permits tab of the Parcel File.
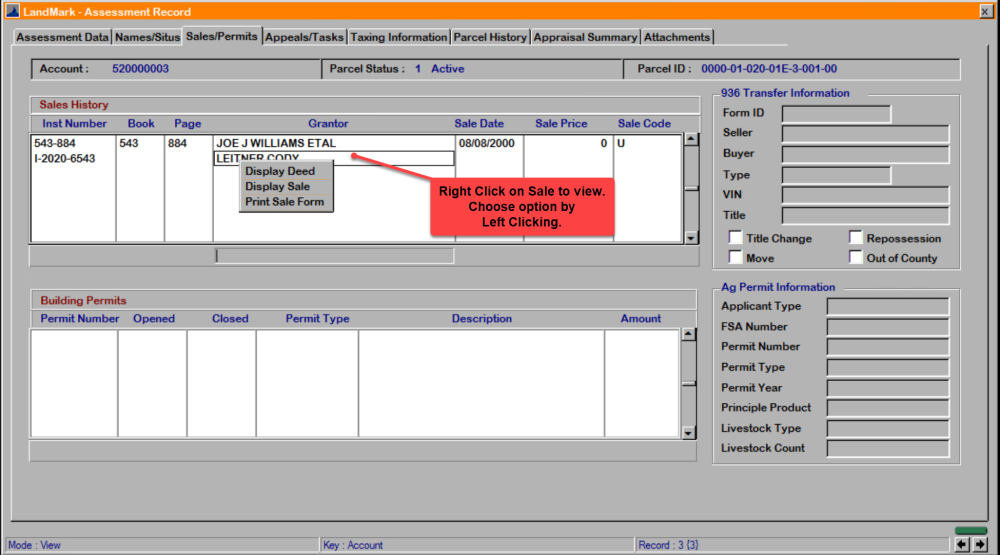
To view the sale at any point in time, right click and select Display Sale. Users can also select to print a Sale Form from here as well.
Post your comment on this topic.