
Environment Admins can import content into the EPC from an Excel spreadsheet. This feature is useful to quickly create or override EPC content coming from an older version supporting the Modeler (versions 11.2 and older) or to quickly insert new content into an EPC environment.
- 12.1.4.5.1 Import Excel – Overwrite
- 12.1.4.5.2 Troubleshooting an Excel Import
- 12.1.4.5.3 Excel Spreadsheet Format
Excel Importation
To import an Excel file, follow the steps below:
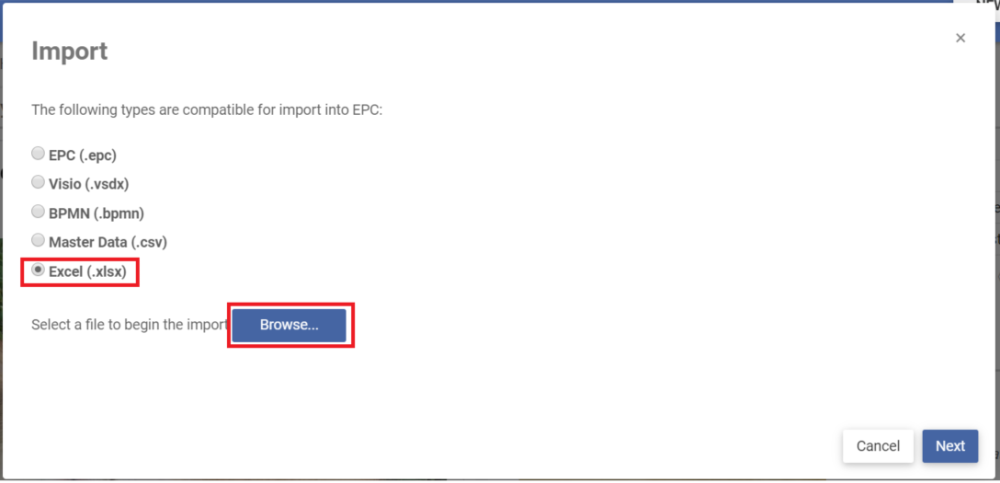
1. Within the EPC menu (located on the top right corner), click on Import

2. In the import window, select Excel (.xlsx) and upload the Excel file
3. Once you have uploaded your file, you will be prompted to select which sheets in the Excel file you wish to import. After selecting a sheet, assign a root object in the adjoining dropdown list. Indicate if you would like to overwrite content and publish upon import. Click on Next.
- Overwrite content: If selected, objects being imported and objects being overwritten will need to have an identifier defined. Imported objects will overwrite existing objects in the EPC if an identifier is matched. Refer to the section on overwriting in Excel import for more information.
- Publish upon import: If selected, all imported objects will be automatically published when the import is done.

4. Manually align the imported Excel column headers with EPC’s object/associations and attributes for each sheet you have selected in the previous section. If you wish to skip the import of a column, select “Ignore” from the EPC Attribute drop down list. Click Next when you are done.

- Excel Sheet: The name of the Excel sheet that was selected to import
- Excel Column: The column headers in the Excel sheet that was selected to import
- EPC Object/Association: The attribute that will be imported based on the content of the Excel column. Note that RASCI-VS or CRUD associations will be prefixed by [RASCI] or [CRUD]. Associations will simply be shown as an object type; [DOCUMENT], [RULE] are documents and rules associated to the object.
- Destination: You may select a destination to import your Excel sheet in. If you do not select a destination, a set will be automatically created.
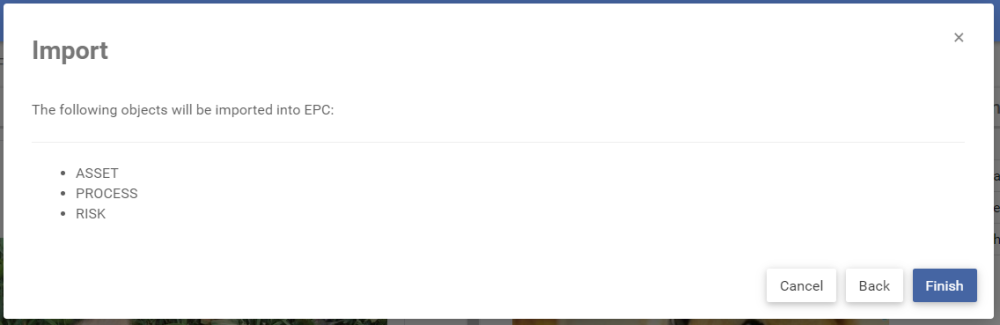
5. Review the import summary and click on Finish
6. You will receive an import notification once it is complete.

Need more help with this?
Visit the Support Portal