The Auxiliary I/O Board analog inputs are used to monitor, alarm, and/or report on the status of any external transducer or sensor. Each input can be scaled such that the value is reported in primary units (°C, Vac, etc.).
The analog inputs can also generate alarms when their reported values are below, above, or out-of-range of a configured valued. ATevo assigns each input a unique generic name that may be replaced by the user.
Unless otherwise specified, the ATevo Auxiliary I/O Board (A4) will ship from the factory with the following analog input configuration:
| Factory Default Analog Input Configuration | ||||||
|---|---|---|---|---|---|---|
| Input | Name | Units | 0V=: | 10V=: | Trigger | Action |
| |
AN1-1 | V | 0.0V | 10.0V | off | none |
| |
AN1-2 | V | 0.0V | 10.0V | off | none |
| |
AN1-3 | V | 0.0V | 10.0V | off | none |
| |
AN1-4 | V | 0.0V | 10.0V | off | none |
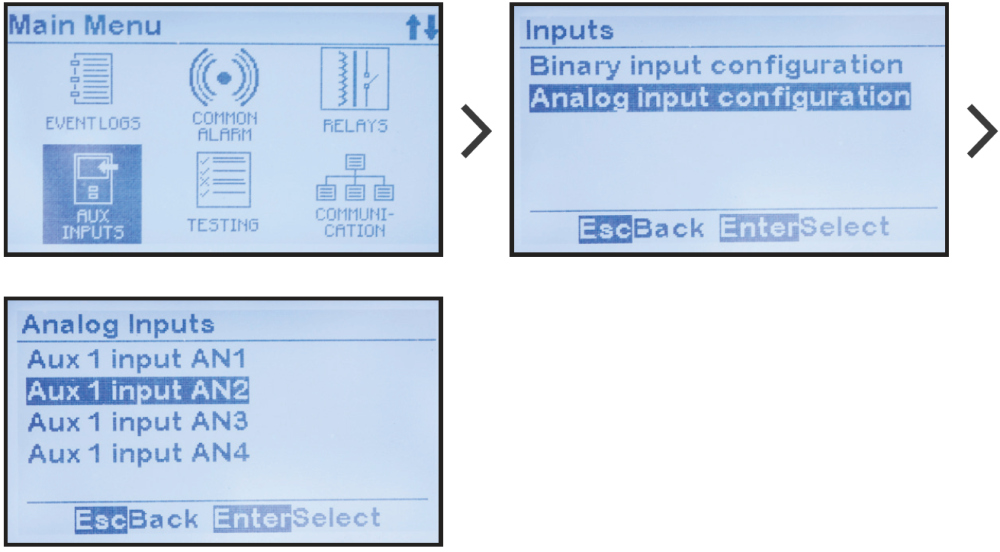
To make changes to parameters for any analog input on the Auxiliary I/O Board:
MENU > AUX INPUTS > ‘Analog Input Configuration’ > select input > select parameter as shown in toggles below.
- Analog Input Primary Unit Assignment
-
ATevo can scale analog input values such that they can be represented in primary units.
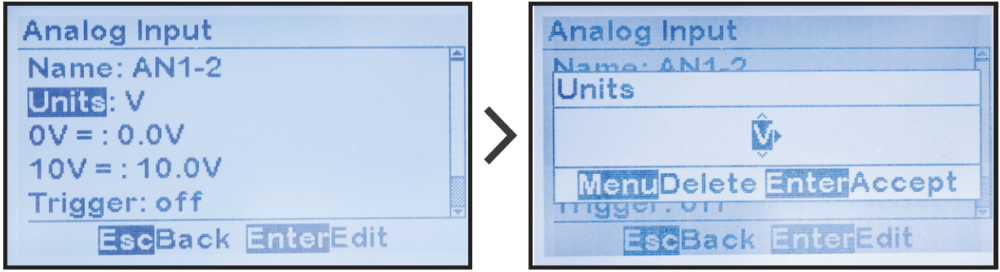
To change the name of the primary measurement unit of an analog input on the Auxiliary I/O Board (A4):
MENU > AUX INPUTS > ‘Analog Input Configuration’ > select input (as shown above) > ‘Units:’ > set desired characters![]()
- Analog Input Scaling Assignment
-
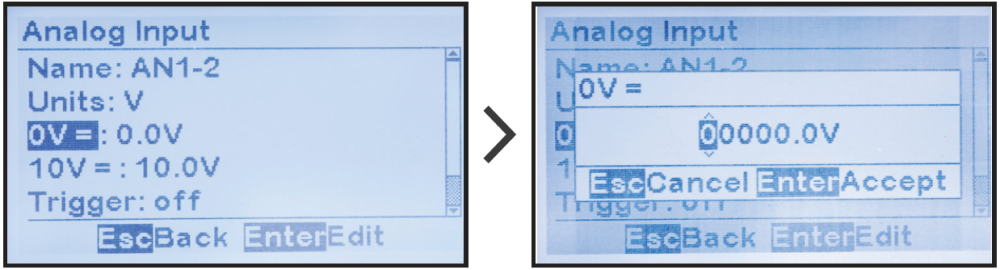
ATevo can scale the analog input values such that the measurement can be represented in primary units. To adjust the scaling, enter the primary value when the analog input is at 0 V, and the primary value when the analog input is 10.0 Vdc. ATevo will report the measurements and adjust the alarm thresholds in true primary units.
To change the low scale value:
MENU > AUX INPUTS > ‘Analog Input Configuration’ > select input (as shown above) > ‘0V=:’ > set desired digits![]()
![]()
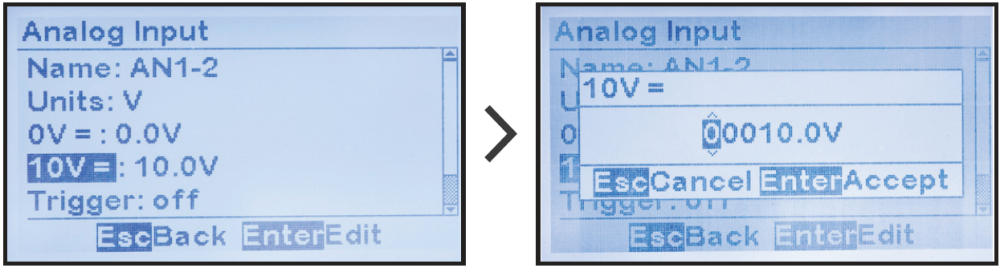
To change the high scale value assigned to the analog input:
‘10V=:’ > set desired digits![]()
![]()
- Analog Input Alarm & Trigger Assignment
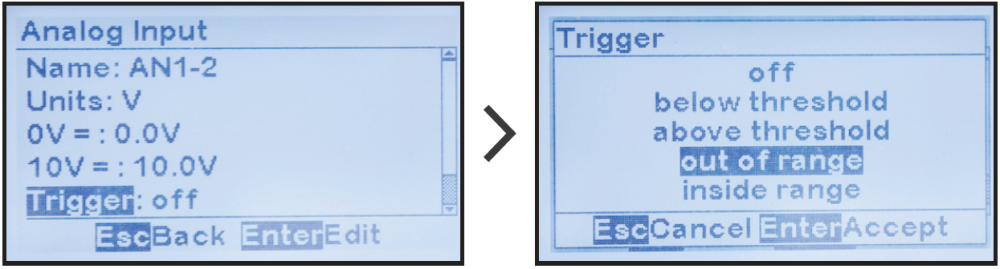
- The ATevo can generate alarms based on analog input values. There are several triggers that can be assigned to define the alarm condition. An alarm can be generated if the analog value is above a threshold, below a threshold, within a defined range, or outside a defined range. The threshold parameter(s) required will depend on the trigger type selected. Threshold parameters must be entered based on the scaling values such that the thresholds assigned are within the range of the scaling.
To assign an alarm trigger to an analog input:
MENU > AUX INPUTS > ‘Analog Input Configuration’ > select input (as shown above) > ‘Trigger:’![]()
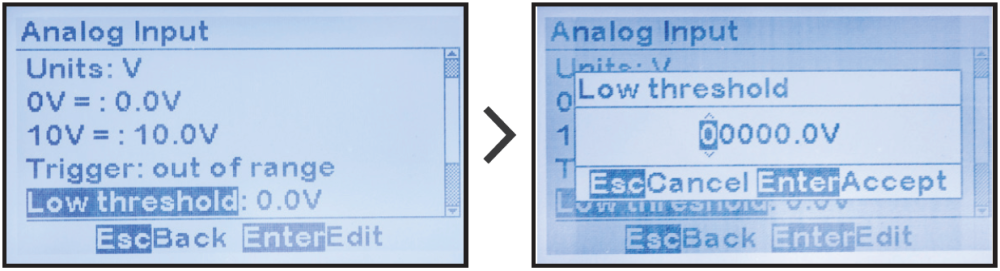
- Analog Input Alarm Threshold Assignment
- ATevo can generate alarms based on analog input value. Alarm thresholds are the set points at which an alarm occurs. Each analog input can be assigned an alarm with a trigger. Some triggers only require one threshold. The ‘above a threshold’ alarm trigger requires a ‘high threshold’ set point, the ‘below a threshold’ trigger requires a ‘low threshold set point’. Other range based triggers require both a ‘low threshold’ and a ‘high threshold’ set point to determine the range. ATevo will automatically determine which thresholds are required based on the trigger selected. Always set the trigger before adjusting the thresholds.
![]()
To adjust the low level threshold set point for a trigger for an analog input alarm:
MENU > AUX INPUTS > ‘Analog Input Configuration’ > select input (as shown above) > ‘Trigger:’ > ‘Low threshold:’ > set digits![]()
![]()
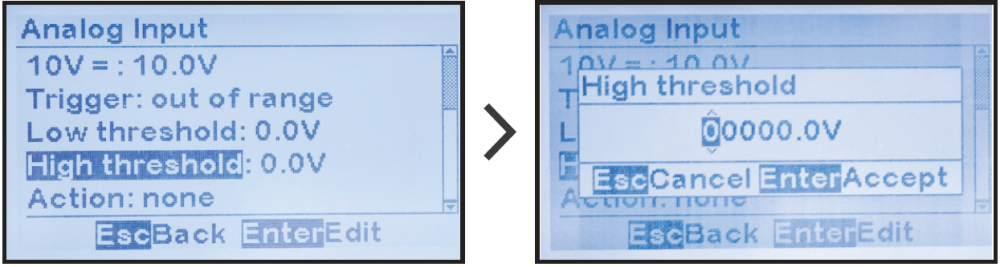
To adjust the high level threshold set point for a trigger for an analog input alarm:
MENU > AUX INPUTS > ‘Analog Input Configuration’ > select input (as shown above) > ‘Trigger:’ >’High threshold:’ > set digits.![]()
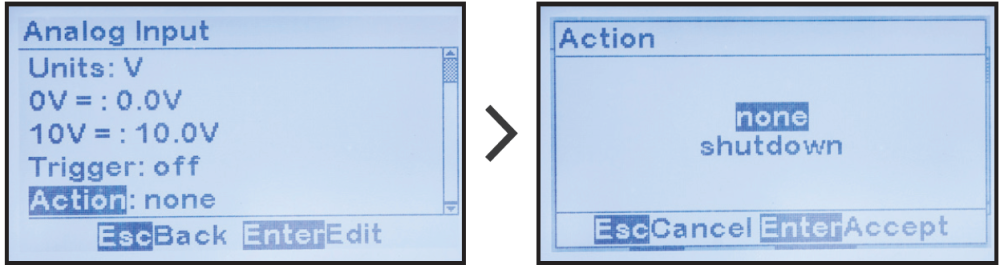
- Analog Input Action Assignment
- The Analog Input Action assignment links the analog input alarm to a charger control. Examples of a charger control include charger shutdown or float/equalize mode control. ATevo will execute the charger control when the analog input alarm is in the active state.
To assign a control to an analog input:
MENU > AUX INPUTS > ‘Analog Input Configuration’ > select input (as shown above) > ‘Action:’ > select action![]()