Clouds
This effect generates a randomized fractal pattern simulating the appearance of clouds. This is most commonly combined with other effects to produce computer-generated patterns and textures.

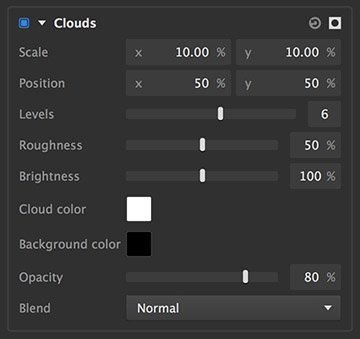
- Scale: Sets the granularity of the cloud effect, on the X and Y axes. X values run from 0 on the left to 100 on the right. Y values run from 0 at the top to 100 at the bottom.
- Position: Shifts the effect on the X and Y axes. X values run from 0 on the left to 100 on the right. Y values run from 0 at the top to 100 at the bottom.
- Levels: Sets the fineness of the effect. Higher levels create additional detail in the pattern.
- Roughness: Adjusts the visibility of the finer details, by tuning the contrast between the cloud color and background color.
- Brightness: Adjusts the brightness of the cloud color.
- Cloud color: Defines the color used for the cloud pattern. Click the swatch to open a color picker and select any color you desire.
- Background color: Defines the color used to fill in all areas around the cloud pattern. Click the swatch to open a color picker and select any color you desire.
- Opacity: Sets the opacity of the cloud effect. At 0% the clouds will not appear at all, while at 100% the layer itself will be completely obscured by clouds (assuming a normal blend mode).
- Blend: Choose the blend mode used to combine the cloud effect with the contents of the layer it has been added to. Full details of all blend mode options can be found on the Blending modes page of this manual.
Long Shadow
Generates a cast shadow based on the shape of your layer.

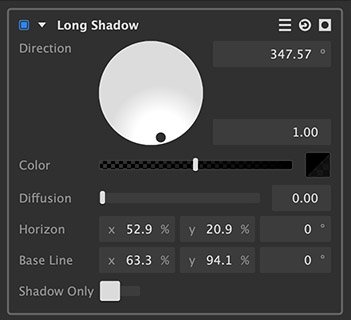
- Direction: Define the direction of the light source which is creating the shadow. The handle in the direction wheel can be dragged around the edge of the wheel to select the angle, and moved toward the center of the wheel to adjust the height of the light source. These values can also be edited directly using the readouts to the right of the wheel.
- Angle: Sets the angle of the light source in relation to the layer. 0º is directly in front of the layer, and 180º is directly behind it.
- Height: Set the height of the light source, in relation to the layer. 1.00 is right at the horizon, and 90 is directly overhead.
- Color: Choose the color of the shadow. Click the swatch to open a color picker and select any color you desire.
- Diffusion: Adjusts the penumbra, or edge softness, of the shadow The effect will become more pronounced as the shadow gets farther from the subject, just like real shadows.
- Horizon: Defines the top edge of the shadow effect.
- X: Sets the X (horizontal) position of the horizon control point.
- Y: Sets the Y (vertical) position of the horizon control point.
- Angle: Rotates the horizon line around the horizon control point.
- Baseline: Defines the bottom edge of the shadow effect.
- X: Sets the X (horizontal) position of the baseline control point.
- Y: Sets the Y (vertical) position of the baseline control point.
- Angle: Rotates the horizon line around the baseline control point.
- Shadow Only: Hides the layer and renders only the shadow effect.
Scan Lines
Creates a consistent pattern of light and dark lines. Effective for replicating the look of television or other electronic displays, or creating a pattern for graphic purposes.

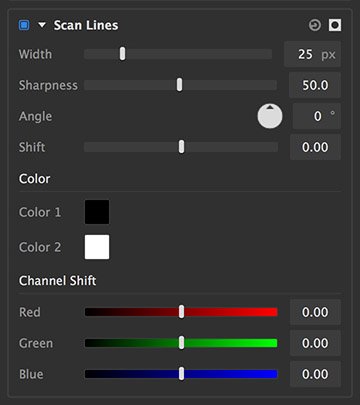
- Width: The width, in pixels, of each line in the pattern.
- Sharpness: Adjusts the sharpness of the lines. Lower settings make the lines softer, and more subtle, while higher settings create darker, hard-edged lines.
- Angle: The pattern of lines can be set to any angle you wish. Rotate the dial to define the angle, in degrees.
- Shift: Adjusts the position of the lines, perpendicular to the direction in which the lines themselves run. If important detail in your underlying image is obscured by the lines, you can use shift to fine-tune their position to better reveal the detail.
Color
- Color 1: Defines the color used for the odd-numbered lines. Click the swatch to open a color picker and select any color you desire.
- Color 2: Defines the color used for the even-numbered lines. Click the swatch to open a color picker and select any color you desire.
Channel shift
- Red: Adjusts the position of the red channel of the effect, perpendicular to the direction in which the lines run. Shifting individual color channels is a popular technique for adding digital grunge and cyber-styling.
- Green: Adjusts the position of the green channel of the effect, perpendicular to the direction in which the lines run. Shifting individual color channels is a popular technique for adding digital grunge and cyber-styling.
- Blue: Adjusts the position of the blue channel of the effect, perpendicular to the direction in which the lines run. Shifting individual color channels is a popular technique for adding digital grunge and cyber-styling.
Vignette
Subtly or dramatically darken the edges of your frame using this effect. Vignettes help to naturally draw the viewer’s eye toward the center of the frame, and your subject.

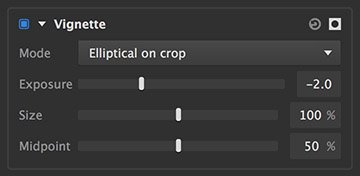
- Mode: Each mode available in this menu gives you a starting point from which to further edit the effect.
- Elliptical on crop: Creates an ellipse which just touches all four sides of the layer, as the basis for the vignette shape.
- Circular on crop: Creates a perfect circle which fits entirely within the layer, as the basis for the vignette shape. The diameter of the circle will be the distance between the two long sides of the layer.
- Circular on fill: Creates a perfect circle which fits entirely with a diameter equal to the longer dimension of the layer, as the basis for the vignette shape.
- Exposure: Your vignette can brighten or darken the underlying image. Set exposure to a negative number to darken the edges, or to a positive number to brighten the edges.
- Size: The edges of the ellipse on which the vignette is based can be shifted inward or outward from their original position.
- Midpoint: Adjusts the softness of the vignette edge.
Last modified:
11 July 2019
Need more help with this?
Don’t hesitate to contact us here.
