
Black & White
Use this effect to convert your image to black and white, or to reduce the saturation of your image. Imerge Pro’s black and white tool gives you full control over the luminosity of specific colors in your image, so you can dial in the exact results you desire.

- Amount: Adjusts the intensity of the black and white effect. A value of 100 creates a black and white image. Lowering the amount blends the original image with the black and white result, effectively lowering the saturation of the image. The higher the amount, the more desaturated the result will be.
- Conversion: Defines the method of conversion used to map the original colors to a black and white result. You can select a specific color channel of the image, the luminance of the image, an average of all color channels, or create a custom map.
Tone adjustments
The spectrum map under tonal adjustments allows you to customize the results. There are a number of control points on the spectrum curve, and you can create additional control points as well.
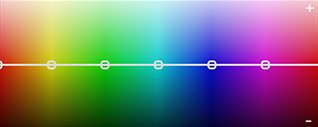
- Control points: Drag the controls points to reposition them. The horizontal position defines the specific hue that will be modified by that point. Position the point so it is in the center of the hue you want to modify. The vertical position controls the lightness of that hue in the black and white result. Raising the point will lighten that hue, and lowering the point will darken that hue. Raising the yellow/orange hue common in skin tones will lighten the skin tones in the image, for example, to draw the viewer’s eye to the human subjects.
Channel Viewer
The channel viewer lets you quickly exchange individual channels in your image into other result. They are typically used as a diagnostic tool inspecting a particular color space channel from an image.

- Channel: there are numerous options in this menu. You can choose individual RGB channels, HSV channels, HSL channels, YUV channels, or the luminance channel, and view them directly in the viewer image.
Colorize Black & White
Use this effect to apply color to any source. Most commonly this is used with a black and white source, to add color, but it can also be applied to color images. The color is applied based on the tonal range of the source image, so pure white areas remain white, pure black areas remain black, and middle grey is fully converted to the selected color.

- Type: Choose the type of colorization used.
- Solid Color: A single color of your choice is applied based on the tonal range of the source image, so pure white areas remain white, pure black areas remain black, and middle grey is fully converted to the selected color.
- Gradient Map: A color gradient is applied based on the tonal range of the source image. Pure white areas remain white, pure black areas remain black. All tonal values in between are blended with their corresponding color values in the gradient.
- Color: When the Type is set to Solid Color, a color picker appears where you can choose the color you wish to use.
- Gradient: When the Type is set to Gradient Map, a visual gradient appears. Use the gradient to define the range of colors that will be applied to the layer. Click anywhere on the gradient to specify the color for that point. A handle will be added, which can then be dragged to reposition it if needed.
- Opacity: Controls the balance of the source layer with the colorized version. 100% gives the full color value, while 0% gives the original source image color.
- Knockout Alpha: Creates transparency based on the tonal values of the source image. Completely black areas in the source will become completely transparent. Other areas will be progressively more opaque, based on their brightness.
Hue Colorize
Hue colorize adds a single hue to the image while retaining all luminance data. It is particularly effective for colorizing black and white images, but can also be used on color images, to replace the color with a single hue, or to blend the selected hue with the original colors.

- Hue: Select the target hue that will be used to colorize the image.
- Strength: Adjusts the intensity of the hue replacement. A value of 0 will have no effect, while a value of 100 will completely replace the source colors with the target hue.
- Saturation: Increases (positive values) or reduces (negative values) the saturation of the selected hue range.
- Lightness: Brightens (positive values) or darkens (negative values) the colorized image.
Invert
Allows you to invert individual channels of the image. By default all color channels are inverted, which inverts the entire image. You can also invert specific channels individually.
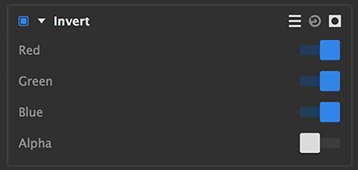
- Red: Inverts the red channel of the image, when enabled.
- Green: Inverts the green channel of the image, when enabled.
- Blue: Inverts the blue channel of the image, when enabled.
- Alpha: Inverts the alpha channel of the image, when enabled. This factors in not only any alpha channel embedded within the source image, but also the results of any masks that have been applied to the image.
Need more help with this?
Don’t hesitate to contact us here.