
When transforming a layer’s position property you can fine tune the animation using the spatial controls in the Viewer.
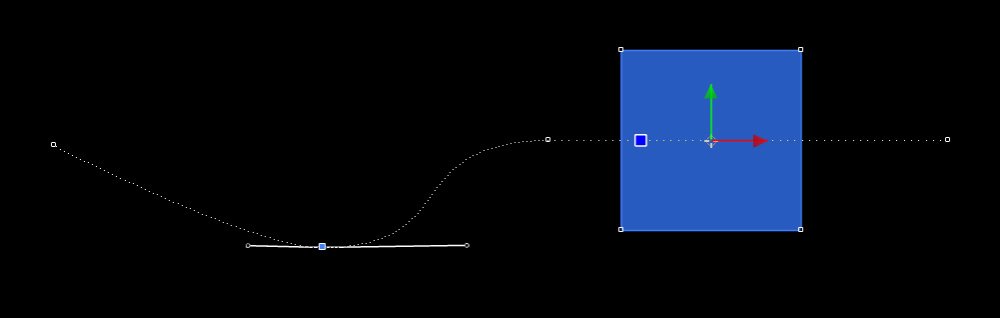
As you create keyframes for your animation they will be represented in the Viewer as small white squares. Selecting a keyframe on the timeline or in the Viewer highlights it in blue.
Right clicking on a keyframe displays both the temporal and spatial interpolation options. Information on temporal controls can be found in the chapter Animating with Keyframes.
There are three types of spatial interpolation:
- Linear: creates abrupt changes of direction without any curvature. The trajectory between each keyframe will be a straight line, with hard angles at keyframes.
- Auto Bezier: creates a smooth curve automatically at keyframes, so that the trajectory from the previous keyframe blends smoothly into the trajectory to the following keyframe. Bezier control handles are displayed on the keyframe, and adjusting these will automatically switch the interpolation to manual bezier.
- Manual Bezier allows you to define the curve of animation yourself by manipulating the bezier handles. Keyframes have two handles, which can be adjusted to change the angle of curve.
- Lock Control Points: When Lock Control Points is activated, both control points will move at the same time, ensuring that the curve going into the keyframe flows smoothly into the exit curve. If you disable Lock control points, you can then create fully arbitrary angles. In both cases, the steepness of the preceding or ensuing curve can be adjusted separately by stretching the length of each handle.
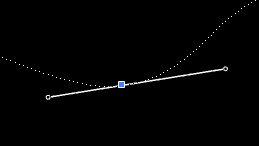
Here is an example of a locked control point keyframe:
And here is an example of an unlocked control point keyframe:

By combining spatial interpolation with the temporal controls detailed in The Value Graph you can create highly detailed animations.