
The Blurs folder contains all of the blur-related effects.
Angle Blur
Blurs the layer in a specific direction. Can be useful for an impression of fast movement.
- Angle: Rotating the Angle wheel controls the direction of the blur
- Length: Sets the strength of the blur, defined in number of pixels
- Clamp To Edge: Enabling this feature prevents the blur from expanding outside the edges of the layer it is applied to. Disabling it will allow the blur to expand outside the layer edges.
Bilateral Blur
 Bilateral Blur is available in the Edit: Beautify Pack.
Smooths images for a softer, untextured appearance, while retaining fine edge detail.
- Radius: Sets the intensity of the blur.The radius, in pixels, defines the area that will be calculated into the blur of each pixel.
- Threshold: Sets the amount of edge contrast that must be present for an edge to be retained. Higher values will result in fewer edges being held out from the blur.
- Dimension: The blur can be applied Horizontally, Vertically, or Both.
Blur
A standard, fast blur.
- Radius: Sets the intensity of the blur.The radius, in pixels, defines the area that will be calculated into the blur of each pixel.
- Iterations: The number of times the blur is calculated. More iterations give a smoother result, and a larger blur.
- Dimension: The blur can be applied Horizontally, Vertically, or Both.
- Clamp To Edge: Enabling this feature prevents the blur from expanding outside the edges of the layer it is applied to. Disabling it will allow the blur to expand outside the layer edges.
Diffuse
Creates a soft focus appearance by duplicating the footage, blurring the copy, and then blending the duplicate back onto the original footage.
- Radius: Sets the intensity of the blur.The radius, in pixels, defines the area that will be calculated into the blur of each pixel.
- Opacity: Controls the opacity of the duplicate blurred footage. Lower opacity levels will give a more subtle result.
Lens Blur
The lens blur is designed to more closely mimic the depth of field bokeh effects created by real lenses. It can be used in conjunction with a depth map to selectively blur different areas of the frame to different degrees.
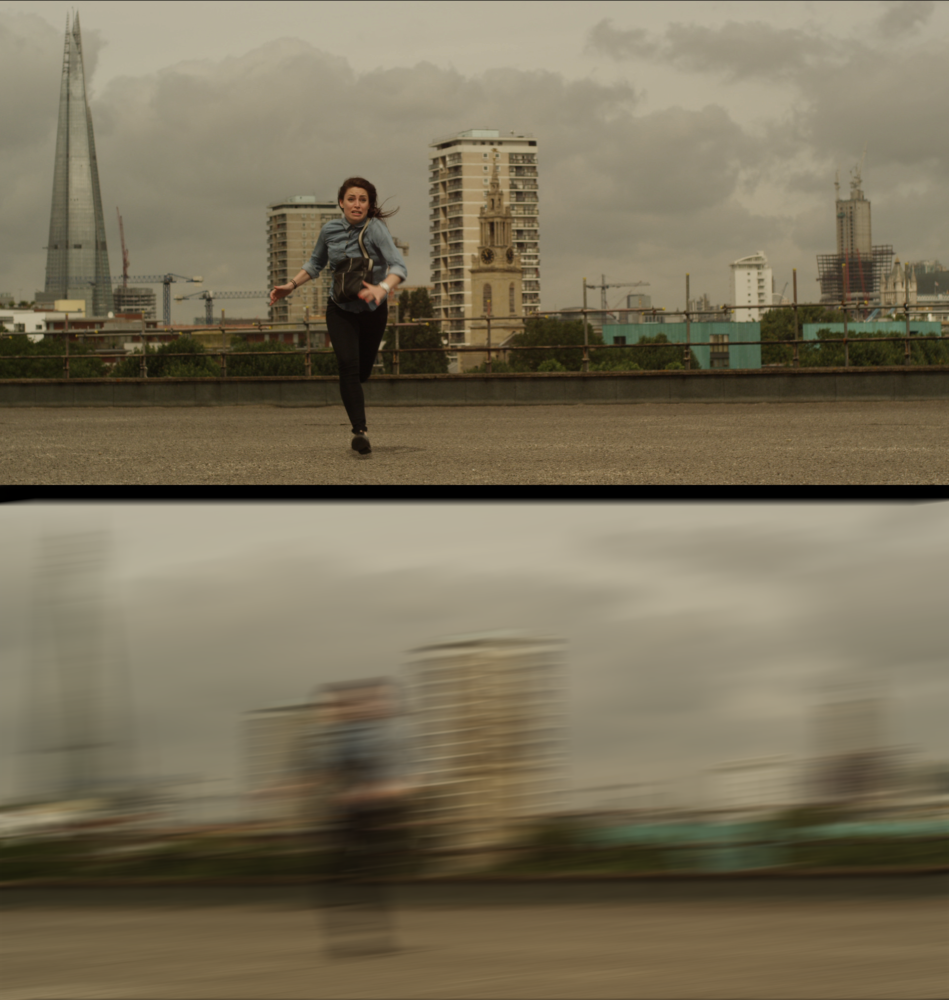
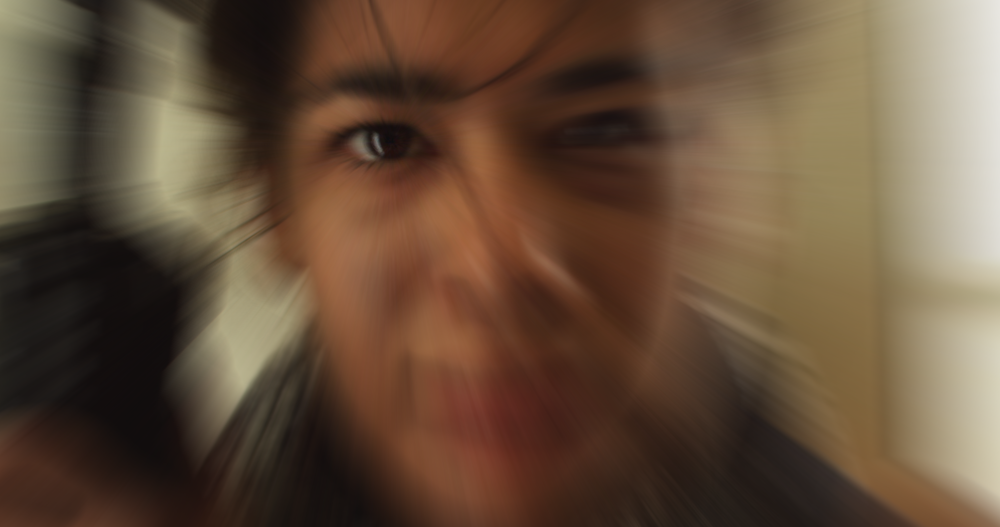
Here’s an example of lens blur in action:
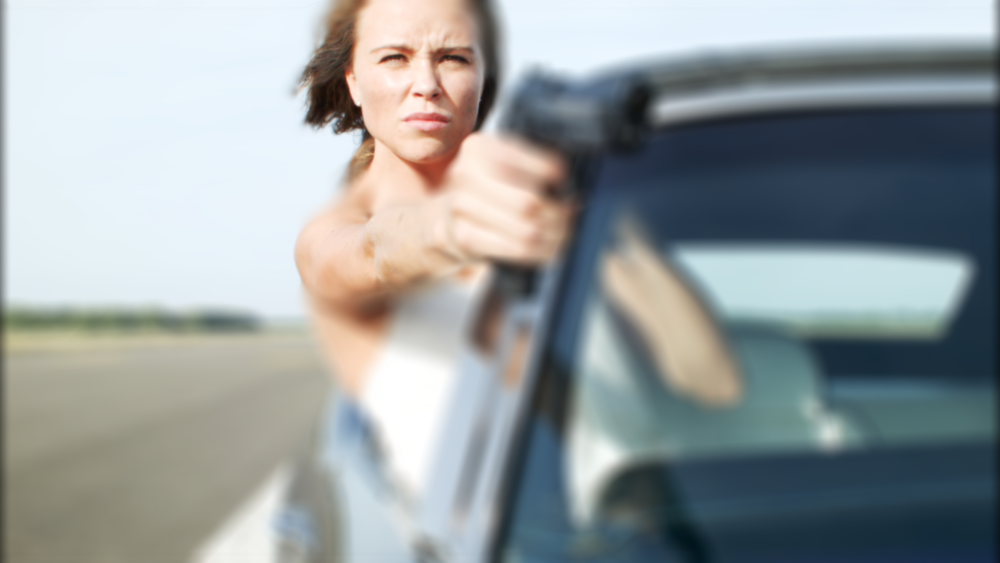
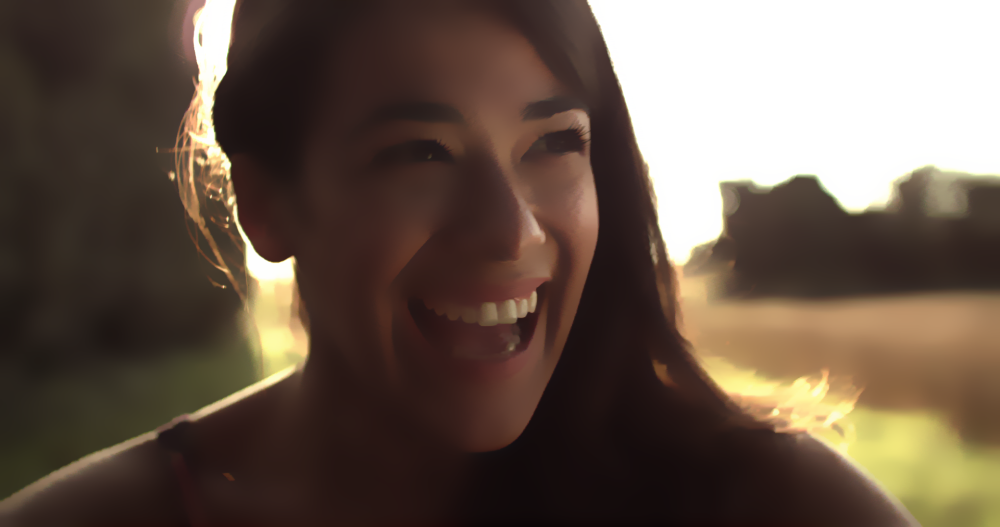
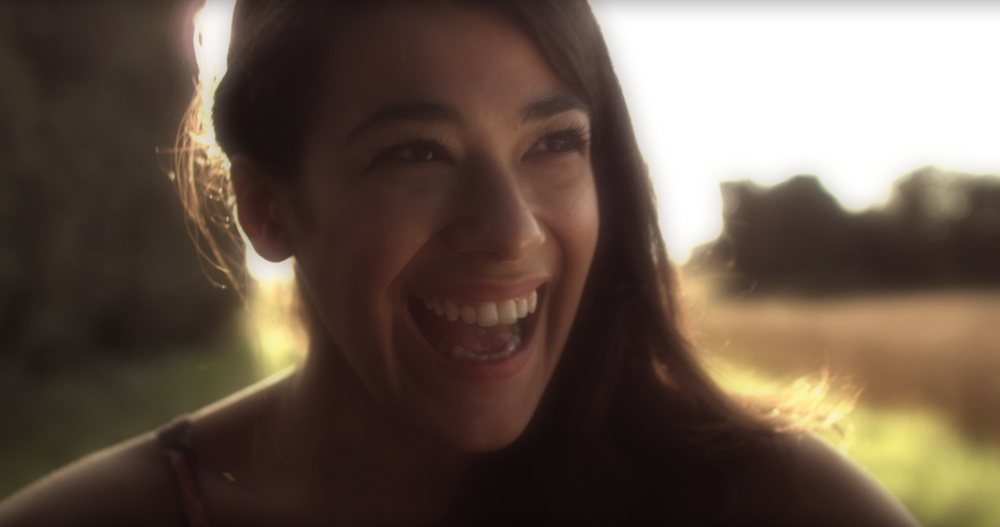
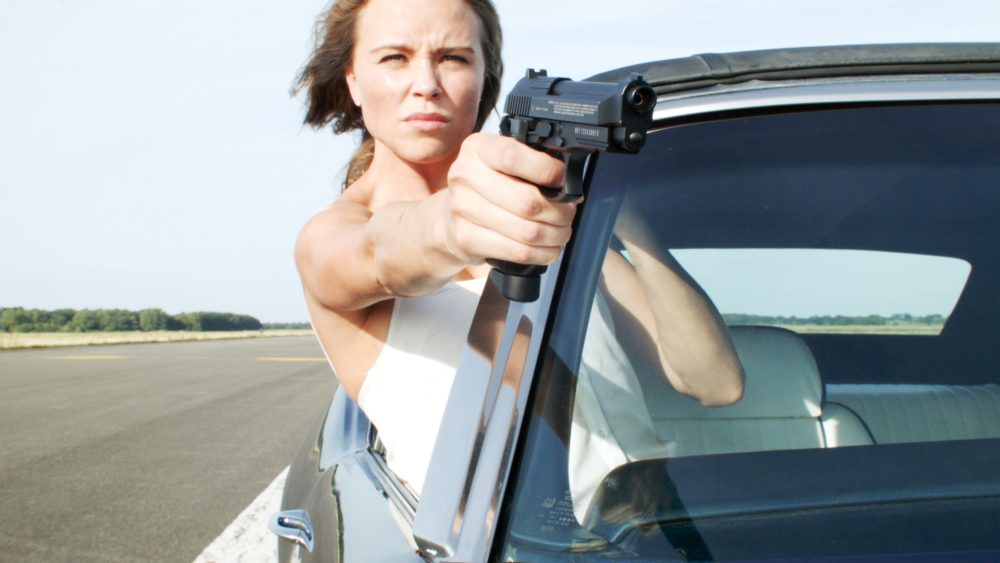
Here is the original frame:
Note how the face remains in sharp focus while the rest of the image becomes progressively more blurred. This is based upon a simple depth map created by hand inside HitFilm using some planes and masks:

The circle at the top keeps the face in focus, while the left-to-right gradient oval causes her arm to become progressively more blurred. The rest of the image, being black, is fully blurred.
Lens blur can be heavily customized.
- Source Layer: can be optionally used to apply a depth map, as shown in the example above.
- Source Channel: You can use various channels from the source layer as the depth map, such as luminance and alpha.
- Radius: adjusts the strength of the blur.
- Focal Distance: is used to rack focus based on the depth map, adjusting which point on the map is in focus. This is analogous to changing focus on your camera.
- Focal Range: defines the depth of field. A larger focal range will cause more of the frame to remain in focus, while a small focal range will cause a shallower area to remain in focus.
- Specular Threshold: Sets the luminance level above which highlights will be blown out to white, rendering as specular highlights based on the Iris settings below.
- Specular Brightness: sets the brightness of the specular highlights. Lower threshold and higher brightness will make the bokeh more obvious. The bokeh shape can be further customized in the Iris section.
- Quality: defines the visual quality of the blur. If you are trying to match your footage to other footage shot with a lower quality lens, reducing the quality may help. Reducing quality also allows the effect to render more quickly.
- Iris
The iris section can be used to switch between multiple primitive shapes. These can then be rotated and warped using the curvature, pinch and shift options to create custom shapes. The View Iris option can be useful for dialing in the shape of the iris.- Shape: Select a shape based on the number of blades you wish to be used for the iris. More blades tend to give a smoother blur and higher quality results.
- Rotation: Sets the rotation of the shape selected above.
- Curvature: Sets the curvature of each blade of the iris. A value of 0.0 creates a straight side. Negative values will curve the sides inward, while positive values curve it outward.
- Pinch: Limits the area affected by the curvature. Higher pinch levels will reduce the width of the curve, so it is pinched close to the vertices of the iris shape.
- Shift: Offsets the center of the curvature.
- Opacity Curve: Feathers the edges of the iris shape, from the outer edge and the center.
- Highlight Location: Sets the distance of the circular highlight from the center of the iris.
- View Iris: Enabling this option shows the iris shape in white, so you can see exactly how the adjustments above affect the shape that will be used to render the specular highlights.
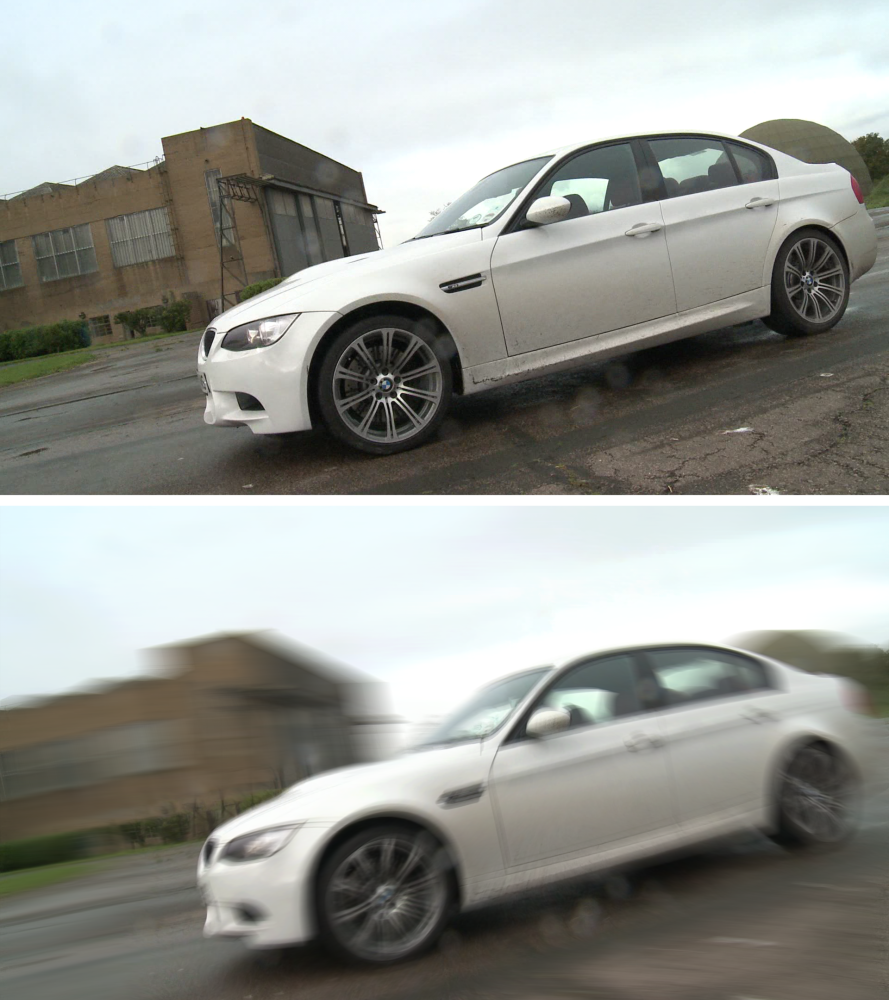
Motion Blur
This uses optical flow techniques to identify movement in a layer and apply artificial motion blur. This can be very useful for animation or for adding exaggerated motion blur to a live action shot.
- Mode: You can use the default settings used by the entire composite shot by selecting Comp Settings, or use Custom settings. If you select Custom, the following settings will become available.
- Custom
- Shutter Angle: A larger shutter angle will create more motion blur. The shutter angle simulates the amount of time a real camera shutter is open.
- Shutter Phase: Positions the blur in relation to the moving object. This can be used to offset the blur in front or behind the object. For realistic motion blur this is best kept to half the value of the shutter angle.
- Samples: Motion blur is constructed by sampling the position of the layer over multiple frames. A higher number of samples will result in a higher quality motion blur. Fewer samples will be faster to render but may introduce visible banding in the motion blur.
- Optical Flow
Motion blur is calculated by tracking the movement of every pixel in the image using optical flow techniques. The amount of blur applied to each pixel is based on the speed at which it is moving. These advanced settings let you adjust how the movement in the frame is tracked.- Window Size: The number of pixels surrounding the current pixel that is scanned to calculate the motion of the current pixel.
- Sigma: A value in the algorithm used for tracking, that alters the way it tracks. Changing the Sigma can affect the result. If the blur is calculated incorrectly, trial and error can be used to see if changing sigma improves results.
- Iterations: The number of times the tracking algorithm is performed. The results of all iterations are averaged, so more iterations will give a more accurate result, but will also take longer to calculate.
- Downsamples: Optical Flow can only track movement smaller than one pixel, so before the tracking algorithm runs, the image must be downsampled. You can create multiple levels of downsampling, and the algorithm will be calculated for each downsample level. More downsamples can improve the results, but will take longer to calculate.
- Start Downsample: By default the tracking algorithm starts with the first downsample, skipping the full resolution image, which makes it less susceptible to being misled by noise in the image. Increasing the Start Downsample can speed up the results, but reduces the resolution of the tracking results, which may negatively impact accuracy.
Radial Blur
Creates a circular shaped blur. The center of the blur can also be moved using the control point in the Viewer.
- Center Position: The center point from which the blur is calculated can be positioned anywhere you like. You can either manually type in a value, or select the Position property, then drag the Center Point shown in the Viewer to a new location.
- Use Layer: If you wish to link the center of the blur to the position of a different layer, you can use this property to select any layer on your timeline.
- Angle: Controls the amount of blur applied. Since radial blur has a greater effect on the image the farther you get from the center point, the amount of blur is defined in degrees, rather than pixels.
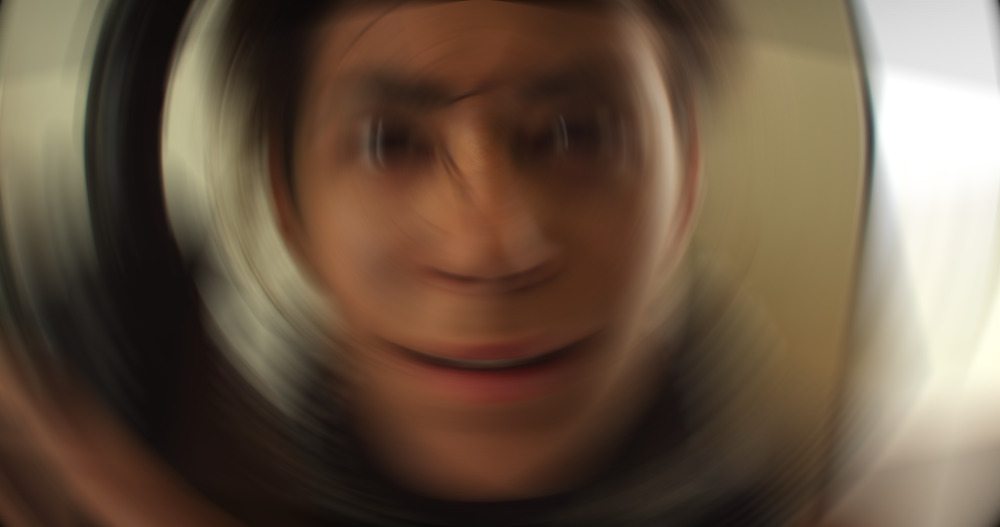
Zoom Blur
A blur emanating out from a central point. The center of the blur can also be moved using the control point in the Viewer.
- Quality: Affects the smoothness of the blurred results. Increasing the quality will smooth the results, but may take longer to calculate.
- Strength: The distance, in pixels, that each pixel will be blurred.
- Center Position: The center point from which the blur is calculated can be positioned anywhere you like. You can either manually type in a value, or select the Position property, then drag the Center Point shown in the Viewer to a new location.
- Use Layer: If you wish to link the center of the blur to the position of a different layer, you can use this property to select any layer on your timeline.