
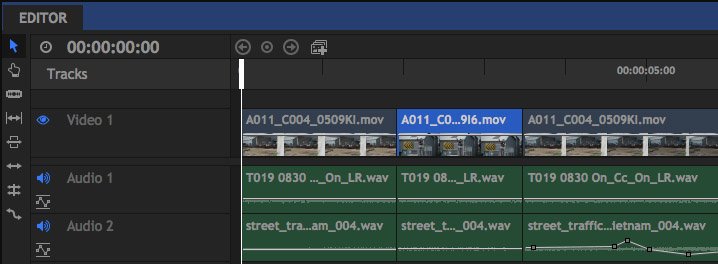
Once you have added clips to the timeline you will want to further refine your edit using the editing tools.
HitFilm’s editing tools are found on the left edge of the timeline.
Select ![]()
The Select tool is a multi-purpose tool that you can use for the majority of your basic trimming.
Selecting Clips
You can select single or multiple clips with the Select tool. Selected clips are highlighted in blue.
- Simply Click a clip to select it. Selecting a different clip will deselect the first one.
- Holding CTRL while selecting clips enables you to select multiple clips.
- You can also drag a selection box around multiple clips to select them all. By default the timeline will automatically scroll left and right while dragging a selection box. Holding ALT while dragging will also automatically scroll vertically through the video or audio tracks, depending where your mouse was positioned.
Moving Clips
You can move any clip to a new location on the timeline by dragging it with the mouse.
If you move a clip to a location which is already occupied by other clips, an Overlay Edit will be used by default. The existing clips are sliced according to the moved clip’s in and out points and the moved clip replaces that section on the timeline. This means that the positions of other clips on your timeline are not affected.
By holding the SHIFT key you can instead perform an Insert Edit. The moved clip slices the existing clips at the in point, then moves all the affected clips to the right to make room.
Holding ALT (OPT on Mac) while you drag a selected clip will duplicate the clip, and drop a new copy where you release the mouse button.
Trimming Clips
The Select tool is also used for simple Trim Edits, when you want to change a clip’s in or out point.
When you move your mouse over the start or end of a clip it will change to the trim pointer. You can then drag with the mouse to change the in or out point.
As you change a clip’s in or out point the surrounding clips will not be affected.
The Viewer will show a preview of the currently trimmed frame.
When working with a linked media asset which contains video and audio, both tracks will be trimmed in synchronization. You can trim only one track by holding ALT while performing the trim, a technique known as J and L cuts.
You can also double-click a video clip on the Editor to re-open it in the Trimmer, and adjust its in and out points there. As you do, the clip on the timeline will immediately be updated to reflect your changes.
Slice ![]()

The Slice tool is for cutting individual clips into multiple layers.
When using the slice tool, clicking anywhere on a clip will cut it at that point, splitting it into two clips. You can slice a clip as many times as you want.
After a clip has been sliced, both pieces exist separately on the timeline and can be adjusted individually.
Holding ALT when you click will slice all clips at that frame, regardless of what track they are on.
Slip ![]()

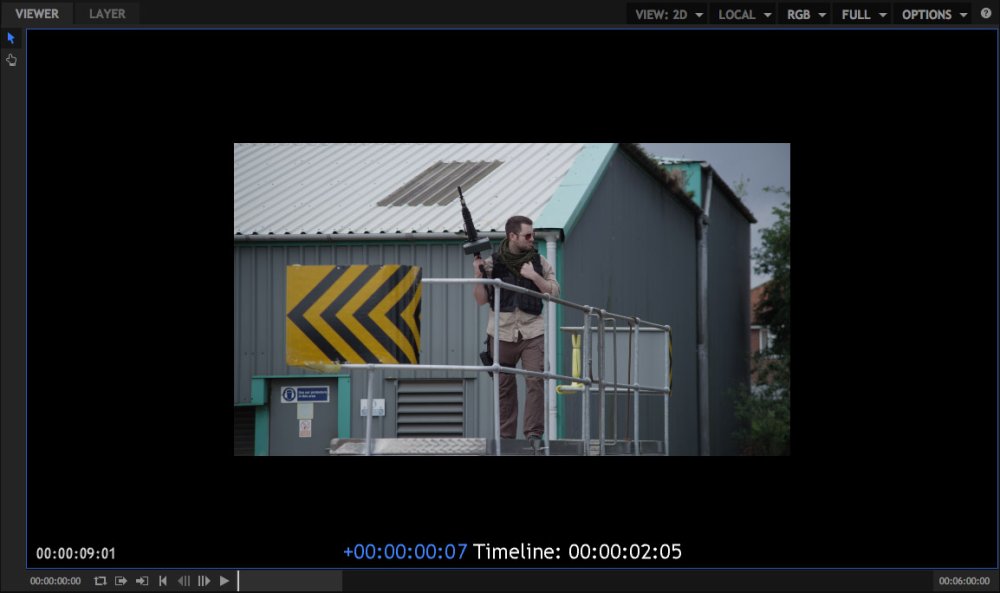
Slip Edits are useful for adjusting the in and out points of a clip without affecting its length or position on the timeline.
When the slip edit tool is selected on the editor timeline you can click and drag on any clip to perform a slip edit.
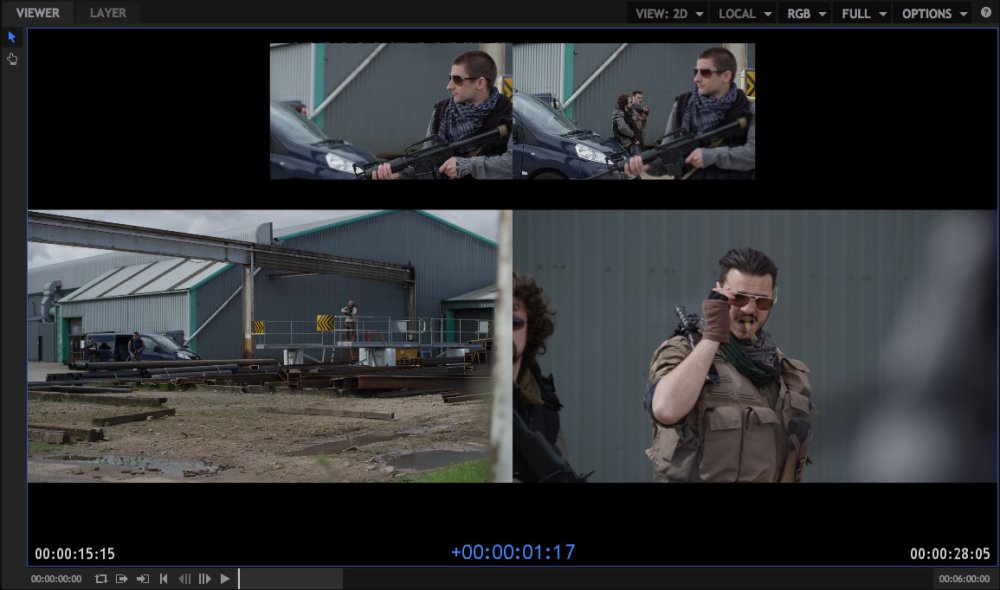
The Viewer changes to show useful information during the slip edit.
The top left and top right videos show the adjacent frames before and after the selected clip. These do not move during the slip edit, as the slip edit does not affect other clips.
The larger, lower videos show the in and out points for the selected clip. As you drag with the slip edit tool, the clip’s duration and position on the timeline remain unchanged but its in and out points are shifted.
The Viewer preview can be used to easily check continuity between shots.
Timecode information shows the relative slip edit change in the center and the new in and out points relative to the source media asset.
Slide ![]()

The Slide Edit tool is used for quickly moving the position of a clip on the timeline relative to those before and after it.
The selected clip’s duration and out point do not change. The previous clip’s out point and the next clip’s in point are adjusted automatically to accommodate the slid clip.
The timeline shows a preview of the slid clip’s new location.
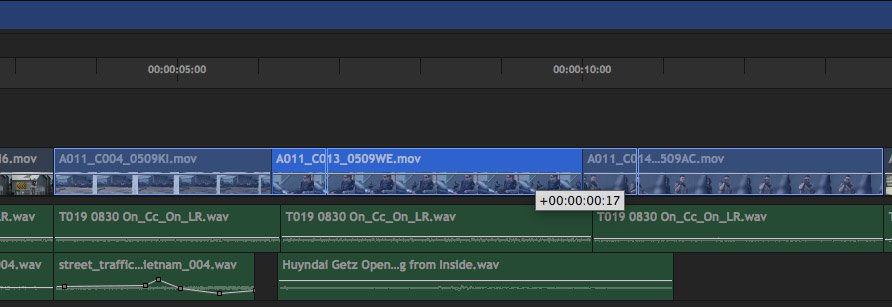
In the above image the bright blue clip is being slid. The light blue overlay indicates where the clip is being slid, which is three frames to the right.
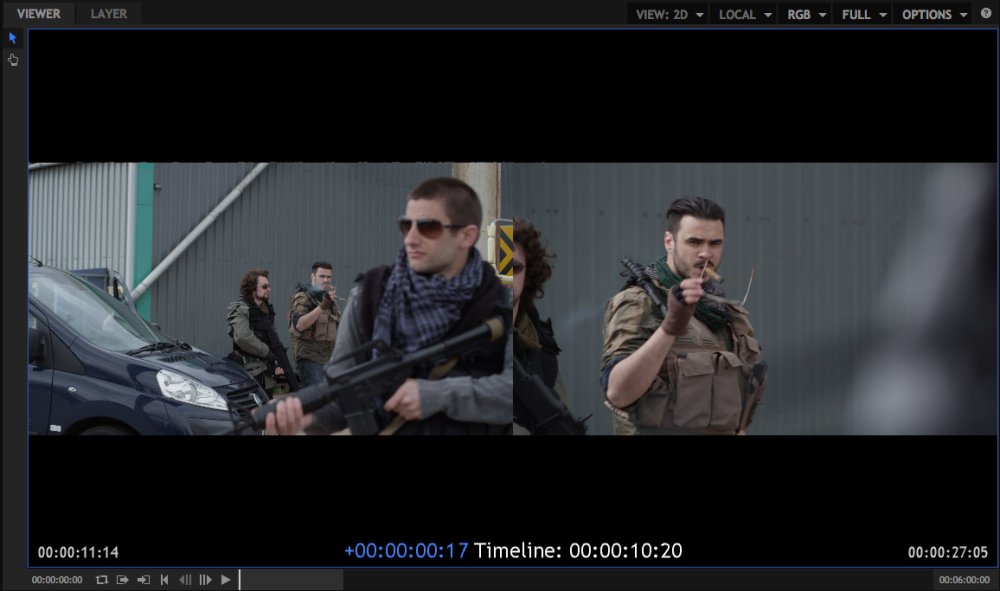
The Viewer updates with useful information during a slide edit.
The top two videos represent the start and end points of the selected clip. These do not change as the duration and in and out points of the selected clip do not change during a slide edit.
The bottom two videos represent the frames or the clips adjacent to the selected clip. As you slide the clip these update to show the new frames at the edit points.
Ripple ![]()
The Ripple Edit tool is used to trim the in or out point of a single clip, while adjusting the timeline to ensure no gaps or overlaps are created. Therefore the edit ‘ripples’ down through the timeline.
After a ripple edit, all clips (including the selected clip, in the case of ripple editing its in point) to the right are shifted in time automatically.
This is a good way to ensure that your timeline does not have any unwanted or accidental empty space between clips.
The Viewer updates with useful information during a ripple edit:

When adjusting the in point of a clip with the ripple edit tool, the selected clip will be shown on the right side of the Viewer. The preceding clip to the left is shown on the left side.
When adjusting the out point of a clip the videos in the Viewer are reversed, with the selected clip on the left and the subsequent clip on the right.
During a ripple edit the selected clip will update in the Viewer to show the current edit point.
Holding SHIFT while performing a Ripple edit will enable Ripple Insert mode, pushing all clips to the right of the selected clip down the timeline to make room for the edit to be inserted.
Ripple Delete
You can also ripple delete clips or gaps. When a clip or gap is ripple deleted, all affected objects to its right are moved to close the gap.
Any clip can be ripple deleted by right clicking it and selecting Ripple delete from its menu.
Empty spaces on the timeline between clips can also be ripple deleted.
Roll ![]()

The Roll Edit tool is used to trim two contiguous clips at the same time. The out point of the first clip and the in point of the second clip will be trimmed simultaneously, changing the duration of both clips without moving their positions on the timeline.
When you position the mouse on the connecting line between two clips it will change the roll edit icon. Clicking and dragging with the mouse will change the out point of the first clip and the in point of the second simultaneously.Surrounding clips are unaffected.
The Viewer updates with useful information during a roll edit:
The out point of the first clip is shown on the left and the in point of the second clip is shown on the right. As you perform the roll edit both previews will update to show the new edit points.
Rate Stretch ![]()

Retiming can be used to speed up or slow down playback for specific clips. Using the Rate Stretch tool to change a clip’s in or out point will retain the contents of the clip and change its playback speed to fit into the newly defined space on the timeline.
For example, dragging the out point of a clip so that the clip on the timeline is twice as long will cause the clip to playback at half speed.
You can also use the Speed/Duration option in any clip’s menu to perform a more accurate speed adjustment. This displays the Edit speed/duration window:
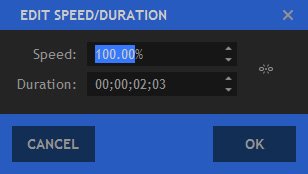
The two properties, speed and duration, can be linked or separated using the chain icon at the right. The behavior is subtly different depending on the link state.
When unlinked, as in the picture above, changing the speed will retain the clip’s in and out positions on the timeline while changing the playback speed of the clip’s content. Changing the duration will change the out point of the clip without affecting its playback speed.
When the two properties are linked together, changing the speed will also automatically update the duration, moving the out point of the clip to accommodate the same contents at the new speed. For example, a 2 second clip on the timeline when changed to 50% speed will have a new duration of 4 seconds. Alternatively, you can change the duration and the speed will be automatically changed to fit the clip’s contents perfectly into the new duration.
Snapping ![]()

The Snap button can be used to turn snapping on and off. Snapping ensures that clips connect directly with no blank frames in-between.
Clips snap to other clips and to the playhead.
You can also jump the playhead to the start or end of clips using the Page Up and Page Down keys.
J and L Cuts
When working with a linked media asset which contains video and audio, both tracks will be trimmed in synchronization. You can trim only one track by holding ALT while performing the trim, a technique known as J and L cuts.

A J cut is when the audio begins before the cut in the video, creating a J shape, as in the selected clip above.

An L cut is when the video begins before the cut in the audio, creating an L shape, as in the selected clip above.