
The Generate effects are used to create new visual elements. These can be applied to layers like any other effect.
3D Extrusion
Extruding creates the appearance of 3D depth in a flat 2D layer. This is often used to enhance titles but can be used on any layer.

3D extrusion can use the 3D lights in your scene. The material behavior of the extrusion can be adjusted in the Illumination property group.
Another layer can be used as an environment map for extruded text. This is effective for creating reflective text or for inheriting some of the lighting in a background plate.

Audio Spectrum & Audio Waveform
Generate spectrum or waveform patterns based on an audio layer.
The appearance of the spectrum and waveforms can be heavily customized, while behavior is determined via the audio input controls.
Auto Volumetrics
Generates volumetric lighting effects which can be positioned in 3D. The volumetric rays are based on a source layer.
Often the most effective way to apply auto volumetrics is to a simple plane layer. You can then specify a separate source layer in the Light source properties. Applying the effect to a separate plane provides greater flexibility when moving a 3D camera, as the rays can emanate away from the layer boundaries of the source itself.
The light position determines the angle of the rays. You can also link the light position to another layer, such as a light or point layer.
Caustics
Simulates the distortion caused by viewing through a body of water.
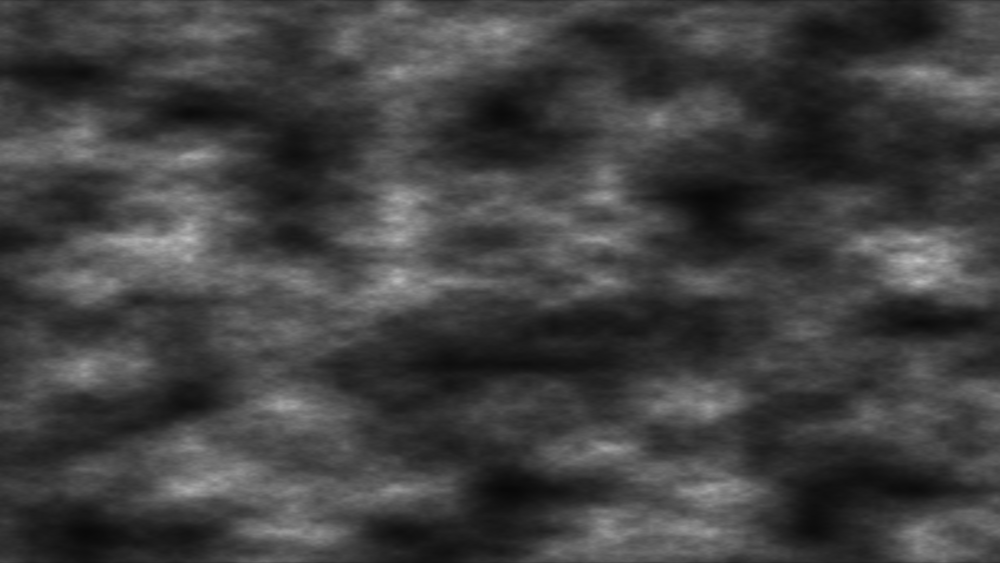
Clouds
Generates a moving, randomly generated cloud texture.
Drop Shadow
Adds a drop shadow to the layer. You can change the scale, distance and appearance of the shadow, or choose to render the shadow without the layer.

End Credits Crawl
Creates scrolling end credits with automatic formatting and animation, designed to mimic classic feature film credits.
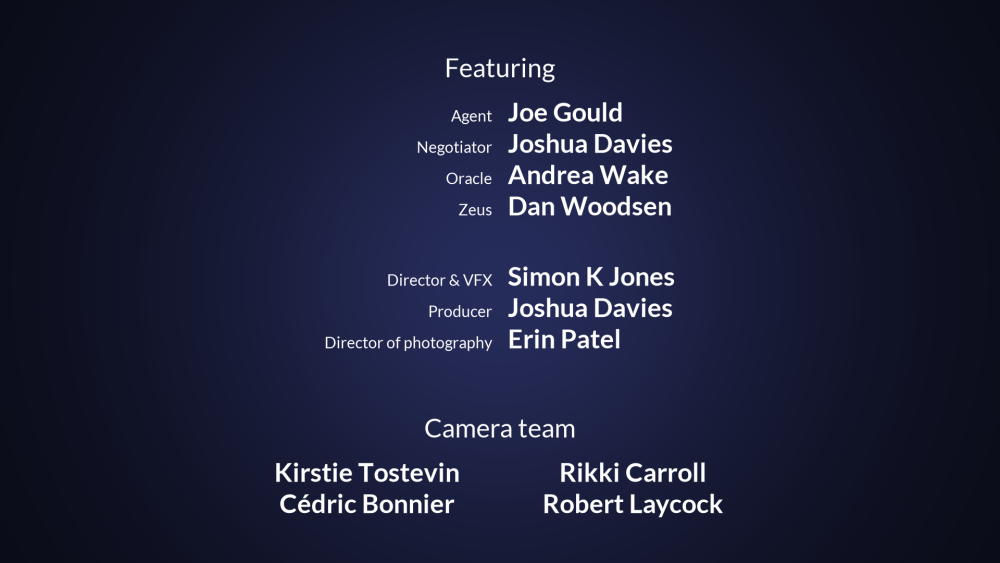
The effect is split into multiple design elements and automatically reflows text and adjusts the layout depending on the copy you provide. Formatting and layout for element titles, role descriptions and names can be adjusted independently, giving you a lot of flexibility within the core framework.
If you omit titles or roles, the layout will be automatically updated to still make sense. For example, removing roles will reflow the names into a multi-column layout by default, which is useful for crediting a large stunt or VFX team who all share the same role.
Fractal Noise
Generates a range of textures using procedural methods.
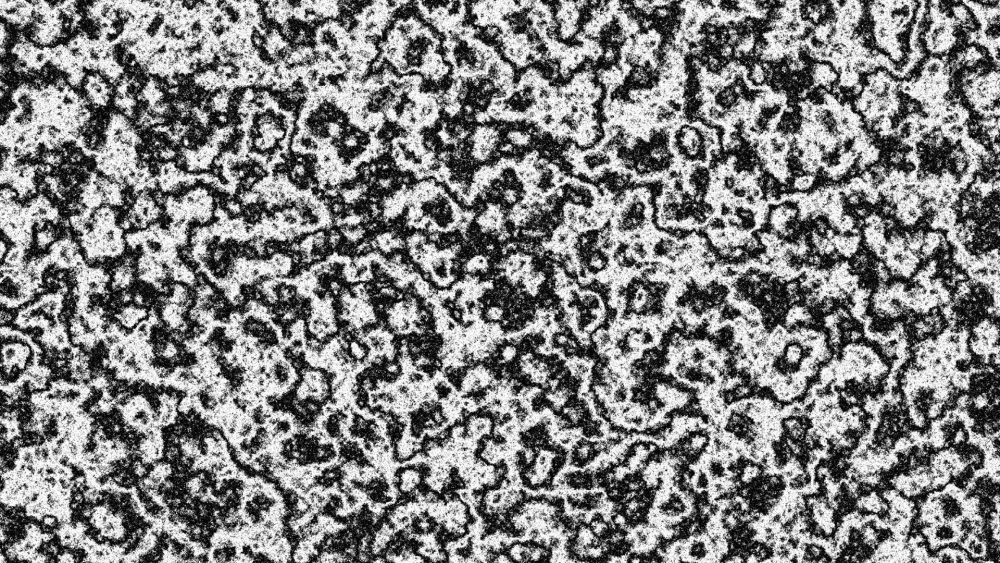
Each fractal method includes a range of properties for customizing the appearance of the effect.
Grid
Creates a grid pattern. You can adjust the spacing and size of the grid lines.

Letterbox
The fastest and easiest way to add letterboxing to your movie. Presets enable you to quickly pick from standard film aspect ratios.

Lightswords
See Lightswords.
Neon Path [Layer Only]
A useful tool for creating animated Neon Path effects. You can use a Text Layer or a Mask to define the shape of the effect, and then control the position and movement of the Neon line on the selected path.
Pond Ripple
Creates ripples which expand and distort the layer.
The size and behavior of the ripples can be adjusted.

Pulp Sci-fi Title Crawl
An instant way to get perfect Star Wars and Flash Gordon-style openings, complete with separate sections for the teaser, main title and the crawl itself.
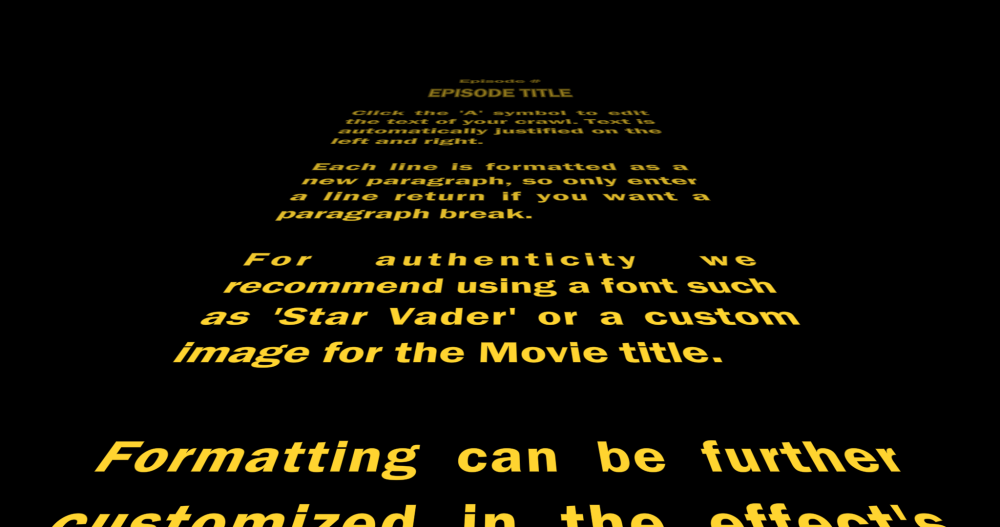
The text is entered into the Teaser, Movie Title, Episode Number, Episode Title and Text Crawl properties. Clicking the font ‘A’ symbol opens a new window for editing the Movie Title and Text Crawl text.
The formatting and animation of the teaser, movie title and text crawl can be adjusted in separate property groups, with the text reflowing automatically to suit the classic pulp look.
The Movie Title can also be switched to use an image instead of text. This can be useful for creating a more authentic appearance when recreating movie logos.
Radio Waves
Creates geometric shapes that can be warped and animated. Shapes can be heavily customized.

Reflection
A quick and easy way to create a reflection of the layer.

Sphere
Creates a sphere that reflects its surroundings.

The sphere can be heavily customized with separate layers for the optional surface texture and environment map.
The refractive index property can be used to accurately simulate refraction from real world materials. A list of common refractive indices can be found on Wikipedia.
Split Screen Masking
Provides a quick way to set up various split screen layouts. Numerous screen layout presets are included which can then be further customized.
Cuts determine how many slots are available for input.
Input layers/frames is used to link different layers into the effect.
Border changes the separation between cuts.
Text
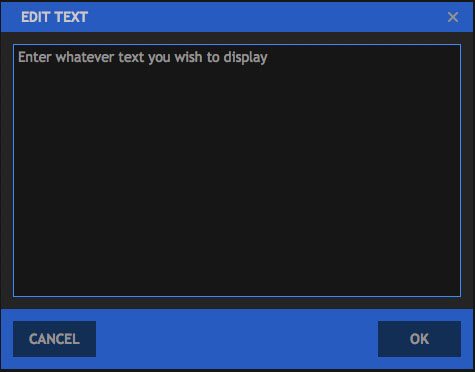
The Text effect lets you quickly generate text on any timeline, including the Editor. To add Text, drag the Text effect from the Effects panel onto a Plane, an image, or a video clip, to add text to that object. Open the controls for the effect in the Controls panel, and then click the A icon displayed to the right of the Text property. This will open the Edit Text dialog, where you can enter the text you wish to add to the layer. Once you are finished editing the text, click the OK button to close the Edit Text dialog and apply the changes. You can then edit the text and further customize the effect in the Controls panel, or directly on the timeline when working in a composite shot.
- Text: This is where you edit the contents of the Text effect. Click the “A” icon to open the Edit Text window. You can then enter whatever text you wish the effect to display.
![]()
- Cancel: discards any changes you have entered and closes the Edit Text window.
- OK: Confirms the text you have entered and closes the Edit Text window. Once the window closes, the text will be updated on the viewer.
Transform
You can control the alignment and positioning of the Text effect through these controls.
- Offset From: Select the position from which the layer movement will be measured. By default the text is Centered, but you can also place it in the Bottom Left, Bottom, Bottom Right, Left, Right, Top Left, Top, or Top Right.
- Position Offset: Sets the distance, in pixels, which the layer is moved from the default position selected in the Offset From menu.
- Rotation: Sets the rotation of the layer, in degrees.
Format
The Format controls allow you to set the details of the text style for the effect.
- Font: Select the font to be used, from a list of all fonts installed on your computer.
- Style: If your selected font includes different styles (Bold, Light, Italic, etc.), you can select your desired style here.
- Alignment: The text alignment can be adjusted here. You can align the text to Left, Center, or Right, or Justify the text to keep both sides aligned
- Color: Allows you to select a font color.
- Opacity: Sets the transparency of the Text, from completely invisible at 0.00 to completely opaque at 1.00.
- Font Size: Sets the size of your text. In general, if you want to enlarge your text, it is better to increase the font size rather than increase the layer Scale above 100%.
- Line Spacing: Defines the vertical spacing between each line of text.
- Enable Word Wrap: Toggles word wrap on and off. Enabling word wrap means that as soon as the text gets too long to fit in a single line, a line break will be created automatically, and a new line is started automatically.
- Word Wrap Width: Defines the width at which word wrap will be implemented. You can create margins in your text layer by setting the Word Wrap Width to a smaller value than the width of the layer the text effect is applied to. For example, if your text is applied to a Full HD layer that is 1920 pixels wide, and you set the Word Wrap Width to 1800, the 120 pixels that remain will be split to create a 60 pixel wide margin on each side of the layer.
- Blend: Determines how the Text is blended with the layer it is applied to. None will prevent the layer from being displayed at all, so only the text is visible. Normal displays the text over the top of the layer, so both are visible. Details on all the other Blend Mode options can be found on the page about Compositing With Blend Modes.
- Motion Blur: Sets the amount of motion blur applied to the layer when its position is animated.
Tile
A quick and easy way to tile the layer without needing to create duplicates.
Timecode
Generates a counter showing the current position in time of the layer or timeline.
Wireframe
Renders a line-based representation of a layer. This is particularly effective when applied to 3D models, to create wireframe views that can be highly customized.
Type
There are two main types of wireframe:
- Mesh: renders the lines around the triangles that make up the 3D model.
- Grid: renders a 3D grid of lines, on the surface of the 3D model. The grid can be further customized to adjust the pattern.
Render Mode
- All Triangles: renders the lines for all triangles within the model.
- Front Facing: renders lines only for surfaces that are facing towards the camera.
- Nearest Triangles: renders lines only for the parts of the model that are visible to camera.
Material
- Solid Color: creates solid lines of the chosen color.
- Model Material: uses the color from the model’s material.
- Model Material: * Color multiplies the color of the model’s material by the chosen color.
Illumination
Wireframe can use 3D lights for illumination. You can choose to use all lights in the composite shot or specific lights.