
Once you have installed the ESI file(s) in your TwinCAT IDE and created your project solution; the next step is to add an instance of the ESI for each individual MotionLinx device you need to control. In our example, we called our solution “Test project”.
| From the Insert EtherCAT Device window, you select the device type you want to insert and then enter the name you want to give the device. In this example we selected the MotionLinx-Ai type device and entered “Box1” as the device name. We also want to create multiple modules at the same time, so we entered “5”. |  |
| When you have inserted the desired quantity of individual MotionLinx-Ai modules, you can expand your project tree to see the individual devices. In our example we inserted 5 MotionLinx-Ai modules. When the modules are entered, note that TwinCAT automatically increments a numerical suffix so each device has a unique name. |  |
| You follow the same procedure for inserting MotionLinx-IO modules into your TwinCAT project. In this example, in a different project, we want to insert 3 MotionLinx-IO modules. | 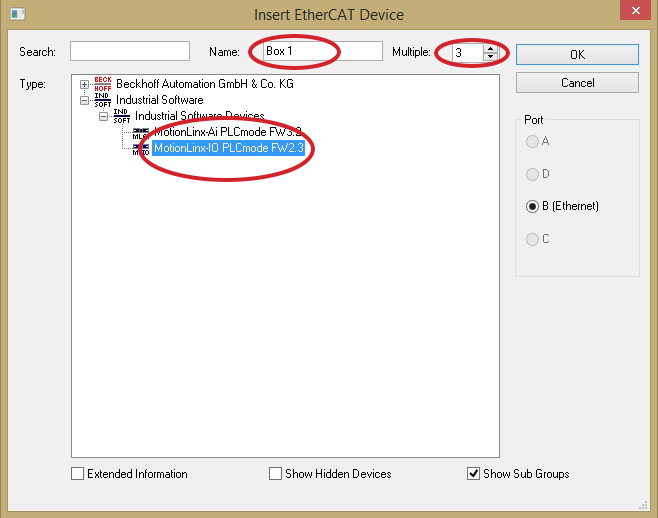 |
| When you expand your project tree, you can see the 3 MotionLinx-IO modules. Note that TwinCAT automatically increments a numerical suffix so each device has a unique name. | 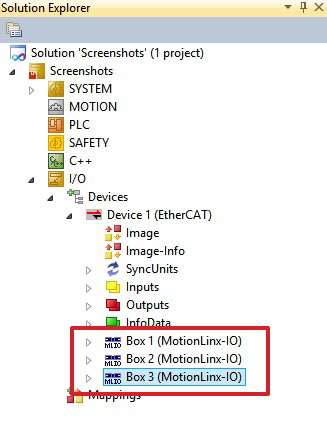 |
On-Line Method
You can also connect your TwinCAT PC to a physical network or devices and scan the physical network for devices and they will be automatically added to your project solution in the order they are connected in the network topology. Please refer to your TwinCAT documentation on the details of scanning your network for devices.