
| |
This is the Map icon. |
| |
This is the Show Camera Bag icon |
| |
This is the Hide Camera Bag icon |
Adding a Map File
- To create a new map, start by reviewing your camera groups and sub-groups. When you find a group that needs a map, click on it to expand it.
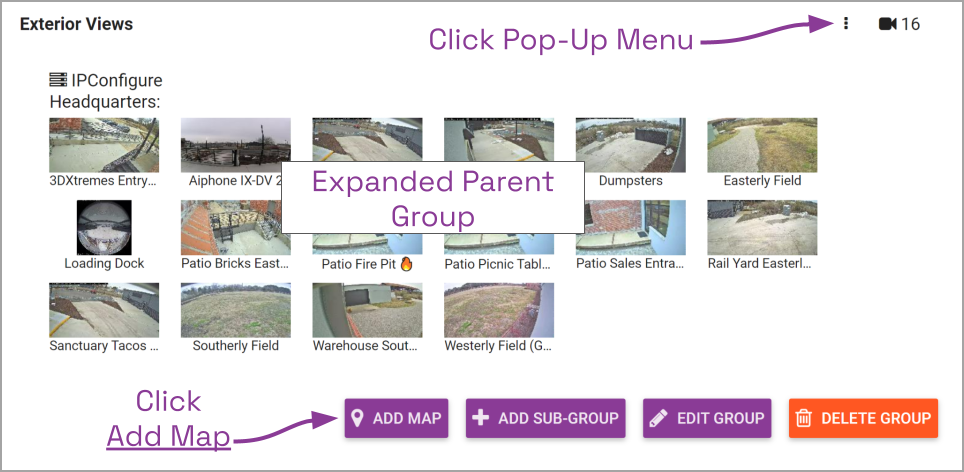
- To add a map to a top-level group, do either of the following:
- Click the Add Map button at the bottom of the group screen, or
- Click on the pop-up menu and select Add Map.
- To add a map to a sub-group:
- Click on the pop-up menu and select Add Map.
The Edit Map screen will appear. You’ll notice that all of the cameras associated with the selected group will appear in a Camera Bag along the left edge of the screen. This is very similar to the Camera Bag you see on the Stage, except this one represents this camera group exclusively, and only shows cameras that have not been added to the Map yet. You may open and close the Camera Bag using the + and – icons.
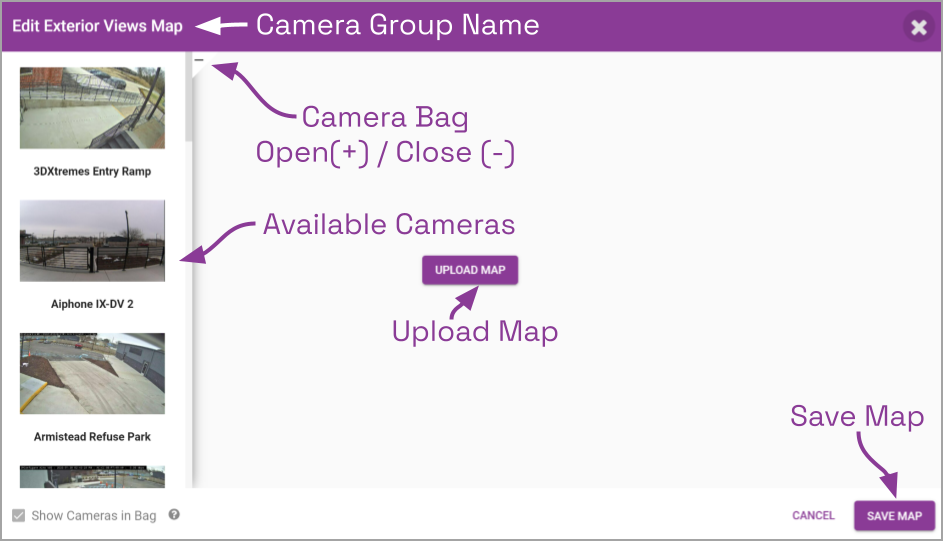
- To add the Map graphic, click the Upload Map button. The Select screen will appear.
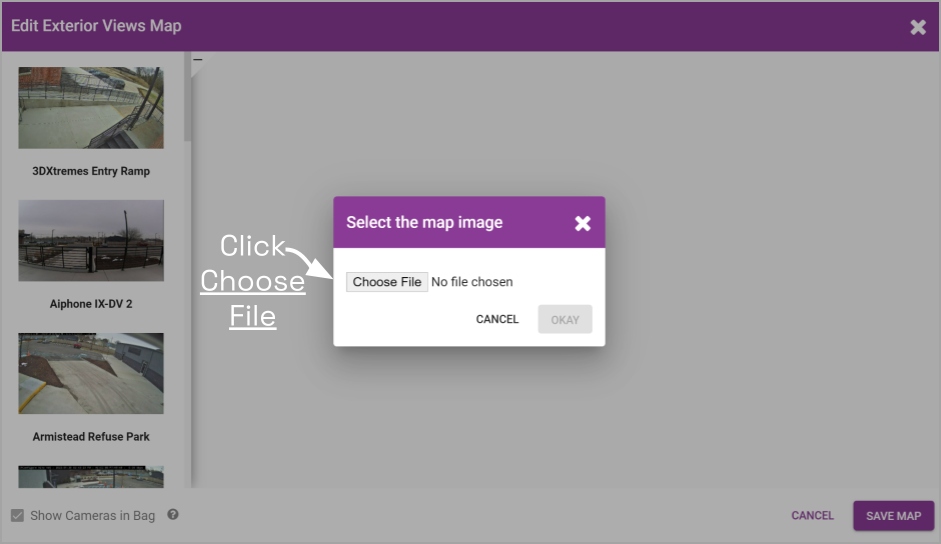
- Click the Choose File button. Navigate to the folder that contains the image file you want to use as the Map. (You must select either a PNG file or a JPG file.)
- When you find the file, click on it, then click the Open button.
- On the Select screen, click OK.
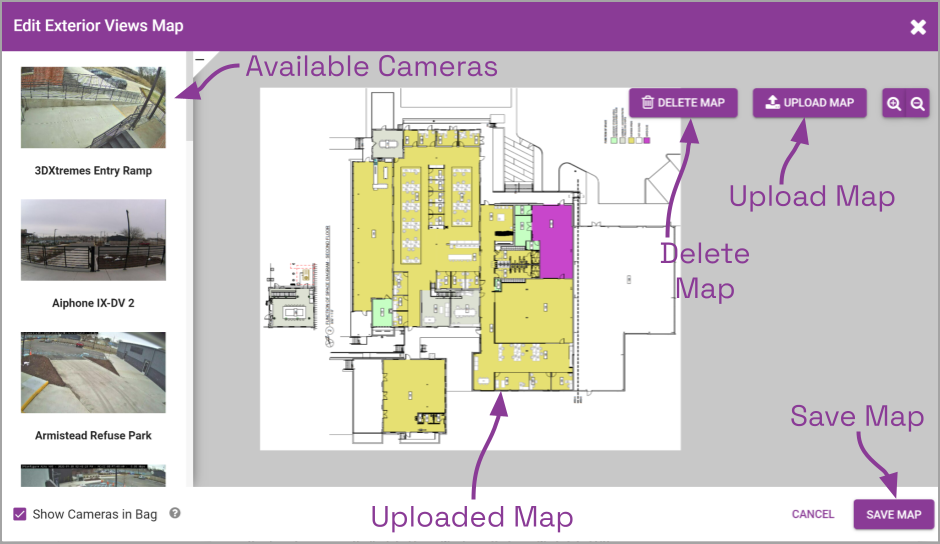
The selected Map will now be displayed on the screen.
Configuring the Map
| |
This is the standard Camera icon. | |
This is the Rotate icon. |
| |
This is the Dewarp Camera icon. | |
This is the Zoom In icon. |
| |
This is the PTZ Camera icon. | |
This is the Zoom Out icon. |
| |
This is the Expand icon. | |
This is the Delete icon. |
| |
This is the Condense icon. |
Now that you have added the Map, you may start adding and positioning cameras.
- To add a camera to the Map, do either of the following:
- Double-click one of the thumbnails in the Camera Bag, or
- Click and drag one of the thumbnails from the Camera Bag to the Map.
The camera will be removed from the Camera Bag and will be placed on the Map. The camera toolbar will appear at the bottom of the Map. Now you can work with the camera until it is positioned perfectly.
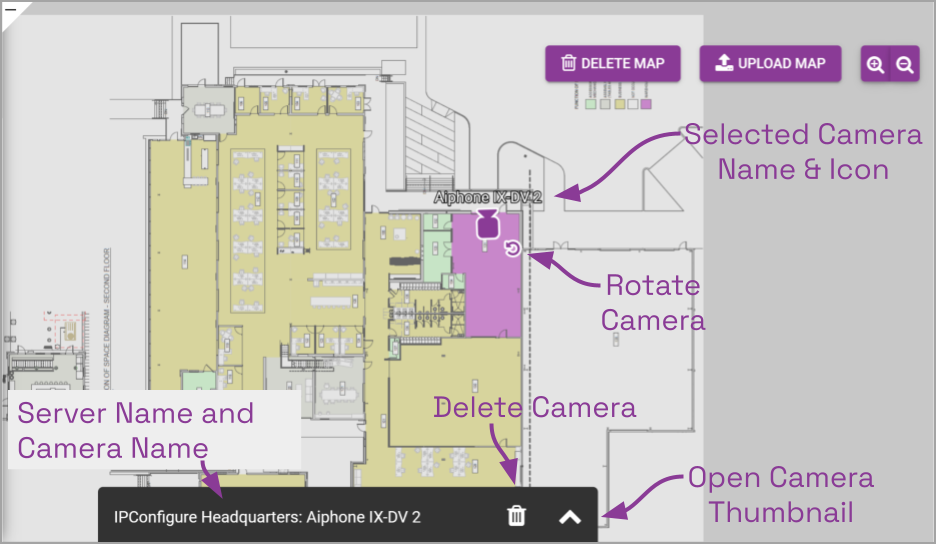
- To get the camera’s position just right, you may want to view a thumbnail of the camera. To do this, just click the Expand icon on the camera toolbar.
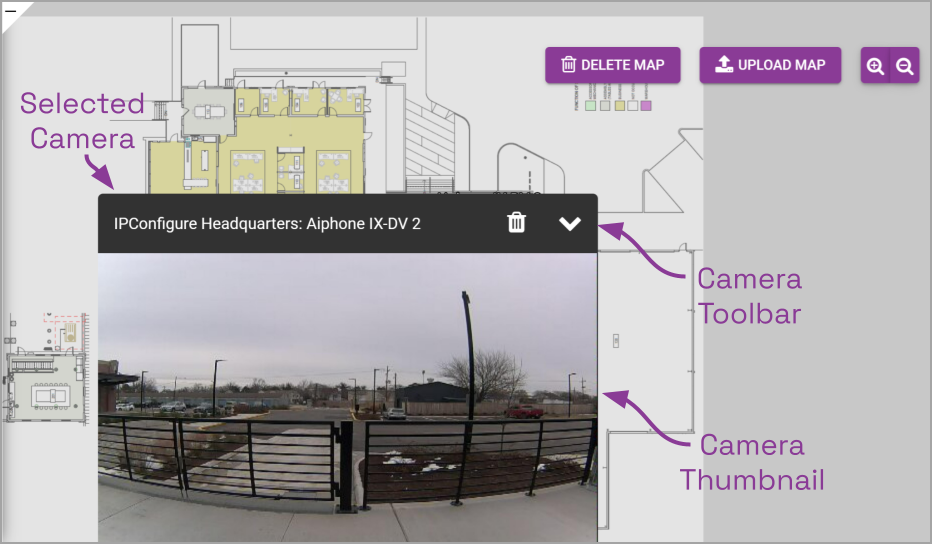
Now you can see exactly what the camera sees. (This should help you place the camera in the right spot on the Map.)
- If you need to minimize the thumbnail so you can see the entire map, click the Condense icon.
- Use the Zoom In and Zoom Out icons to zoom in and out of the Map. (You can also click and drag the Map to reposition it.)
- To move the camera, just click and drag the Camera icon to another position on the Map.
- You can also use the Rotate icon to spin the camera until it is pointed in the right direction.
- To work with a different camera, click on it first, then you can move it, rotate it, or delete it.
- To remove a camera from the Map, first click on the camera you want to remove. Then click the Delete icon on the camera toolbar. You will be asked to confirm the delete.
- Repeat steps 1 through 6 to add more cameras to the Map.
- When you have completed the Map, click the Save Map button.
The Map will now be associated with this Camera Group, and will be available for use on the Stage.
Setting Camera Visibility
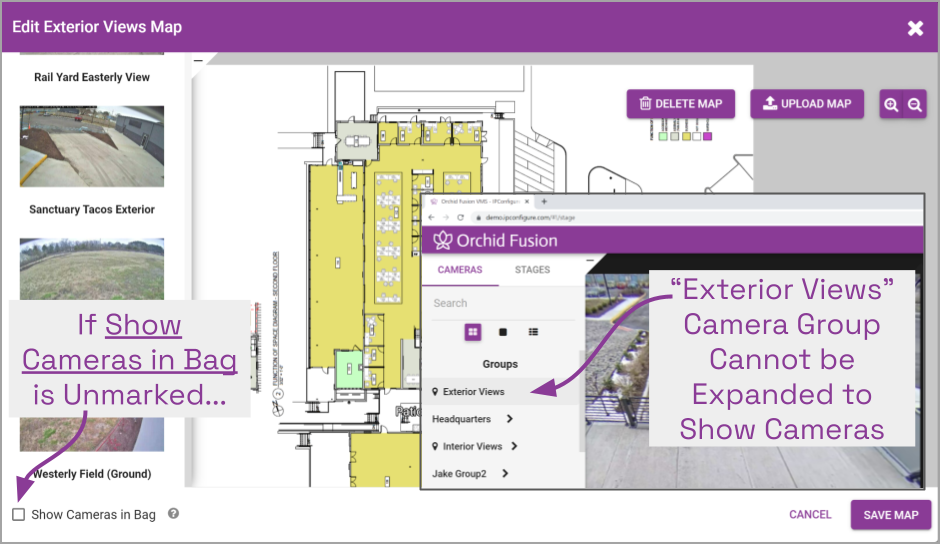
The Map screen includes one more setting that you will want to consider. This will determine if the cameras in this Camera Group will be visible in the Camera Bag on the Stage.
- Mark the Show Cameras in Bag checkbox if you want these cameras to be visible in the main Camera Bag. When marked, users will be able to select these cameras directly from the Camera Bag (for the Stage), or from the Map (when it is on the Stage).
- Leave the Show Cameras in Bag checkbox unmarked if you don’t want these cameras to be visible in the main Camera Bag. When unmarked, users must add the Map to the Stage first, and then select cameras from the Map.
Post your comment on this topic.