
Once the Apply button has been selected, the document request will be sent. The assigned user will receive a notification in their Pending Tasks informing them that they need to attach documents.

They will also receive an email informing them of the assigned task.
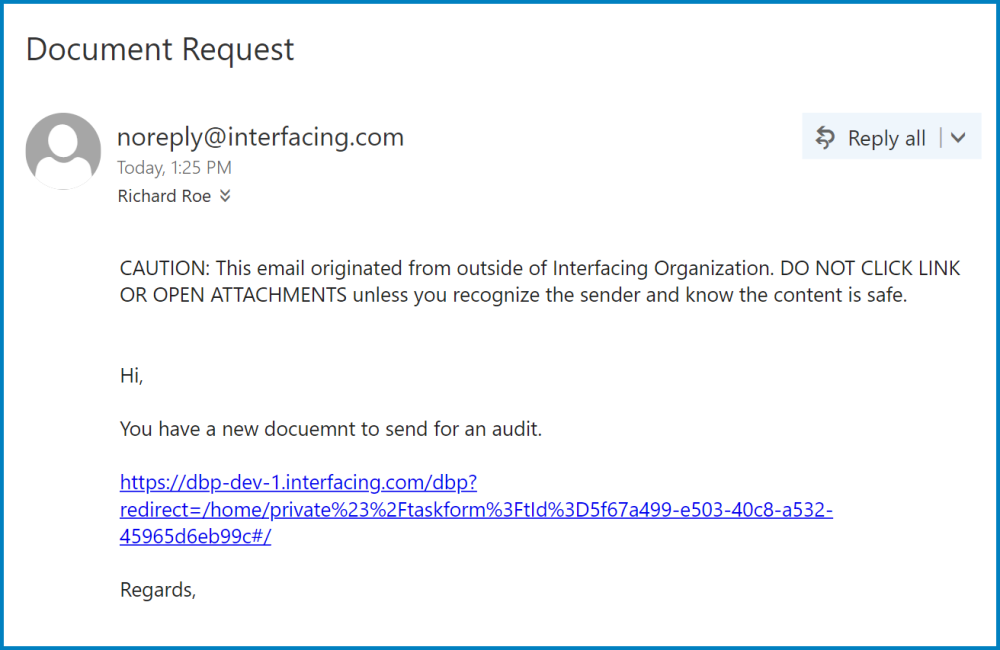
Clicking on either the subject in Pending Tasks or the link in the email will direct the user to the Attach Documents form.
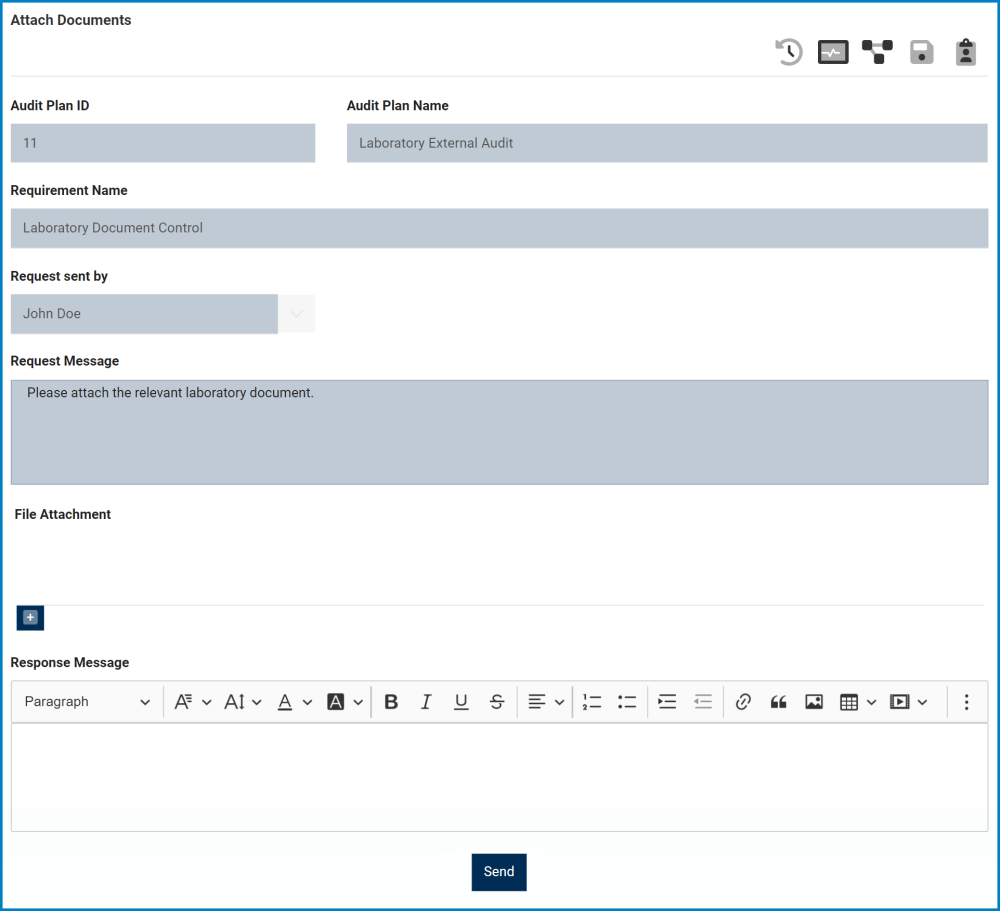
- Audit Plan ID/Audit Plan Name/Requirement Name/Request Sent By/Request Message: These fields are all automatically populated with information from the Issue Document Request form.
- File Attachment: This is an attachment field that allows users to attach the requested document(s).
- For more details on this field, click here.
- Response Message: This is a rich text field that allows users to input their response to the document request.
- For more details on this field, click here.
- Send: This button allows users to send the requested document(s).
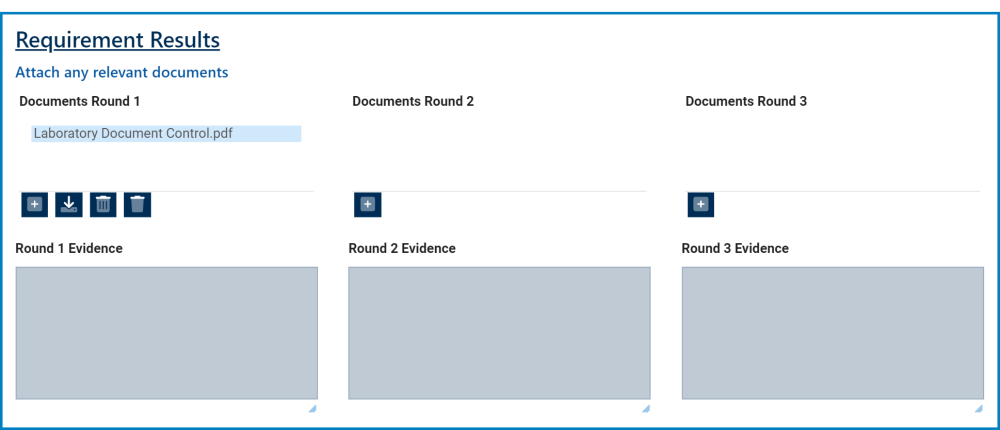
- Once sent, the document(s) will populate the Documents Round 1 field in the Conduct Requirement Result form.
![]()
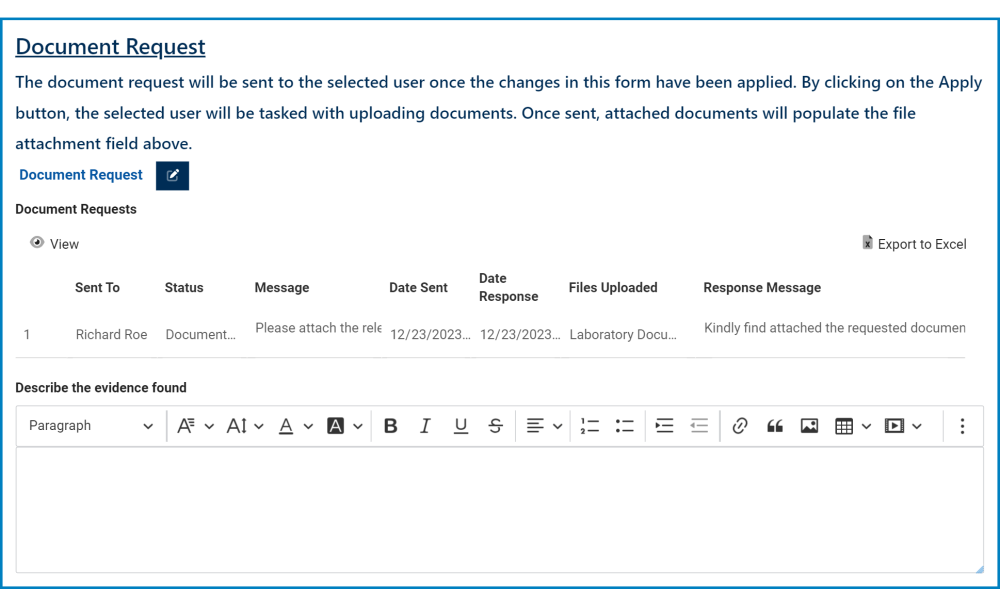
- A copy of this form will also be displayed under the Document Request section of the Conduct Requirement Result form.
![]()
- View: This button allows users to view the document request.
- To view, select the document request that you want to view from the grid and click on the View button. In viewing mode, users will be able to access the details of the document exchange (the request message, the attached file(s), the response message, etc.). Users cannot make any modifications. They can, however, download any attached files.
- View: This button allows users to view the document request.
- Once sent, the document(s) will populate the Documents Round 1 field in the Conduct Requirement Result form.
- Export to Excel: This button allows users to export the Document Requests grid to Excel.
Laissez votre avis sur ce sujet.